At a recent visit to an antique store, something caught my eye. It was a lamp – a very different looking lamp. In fact I wanted to buy it, but at $150.00 it was out of my price range.
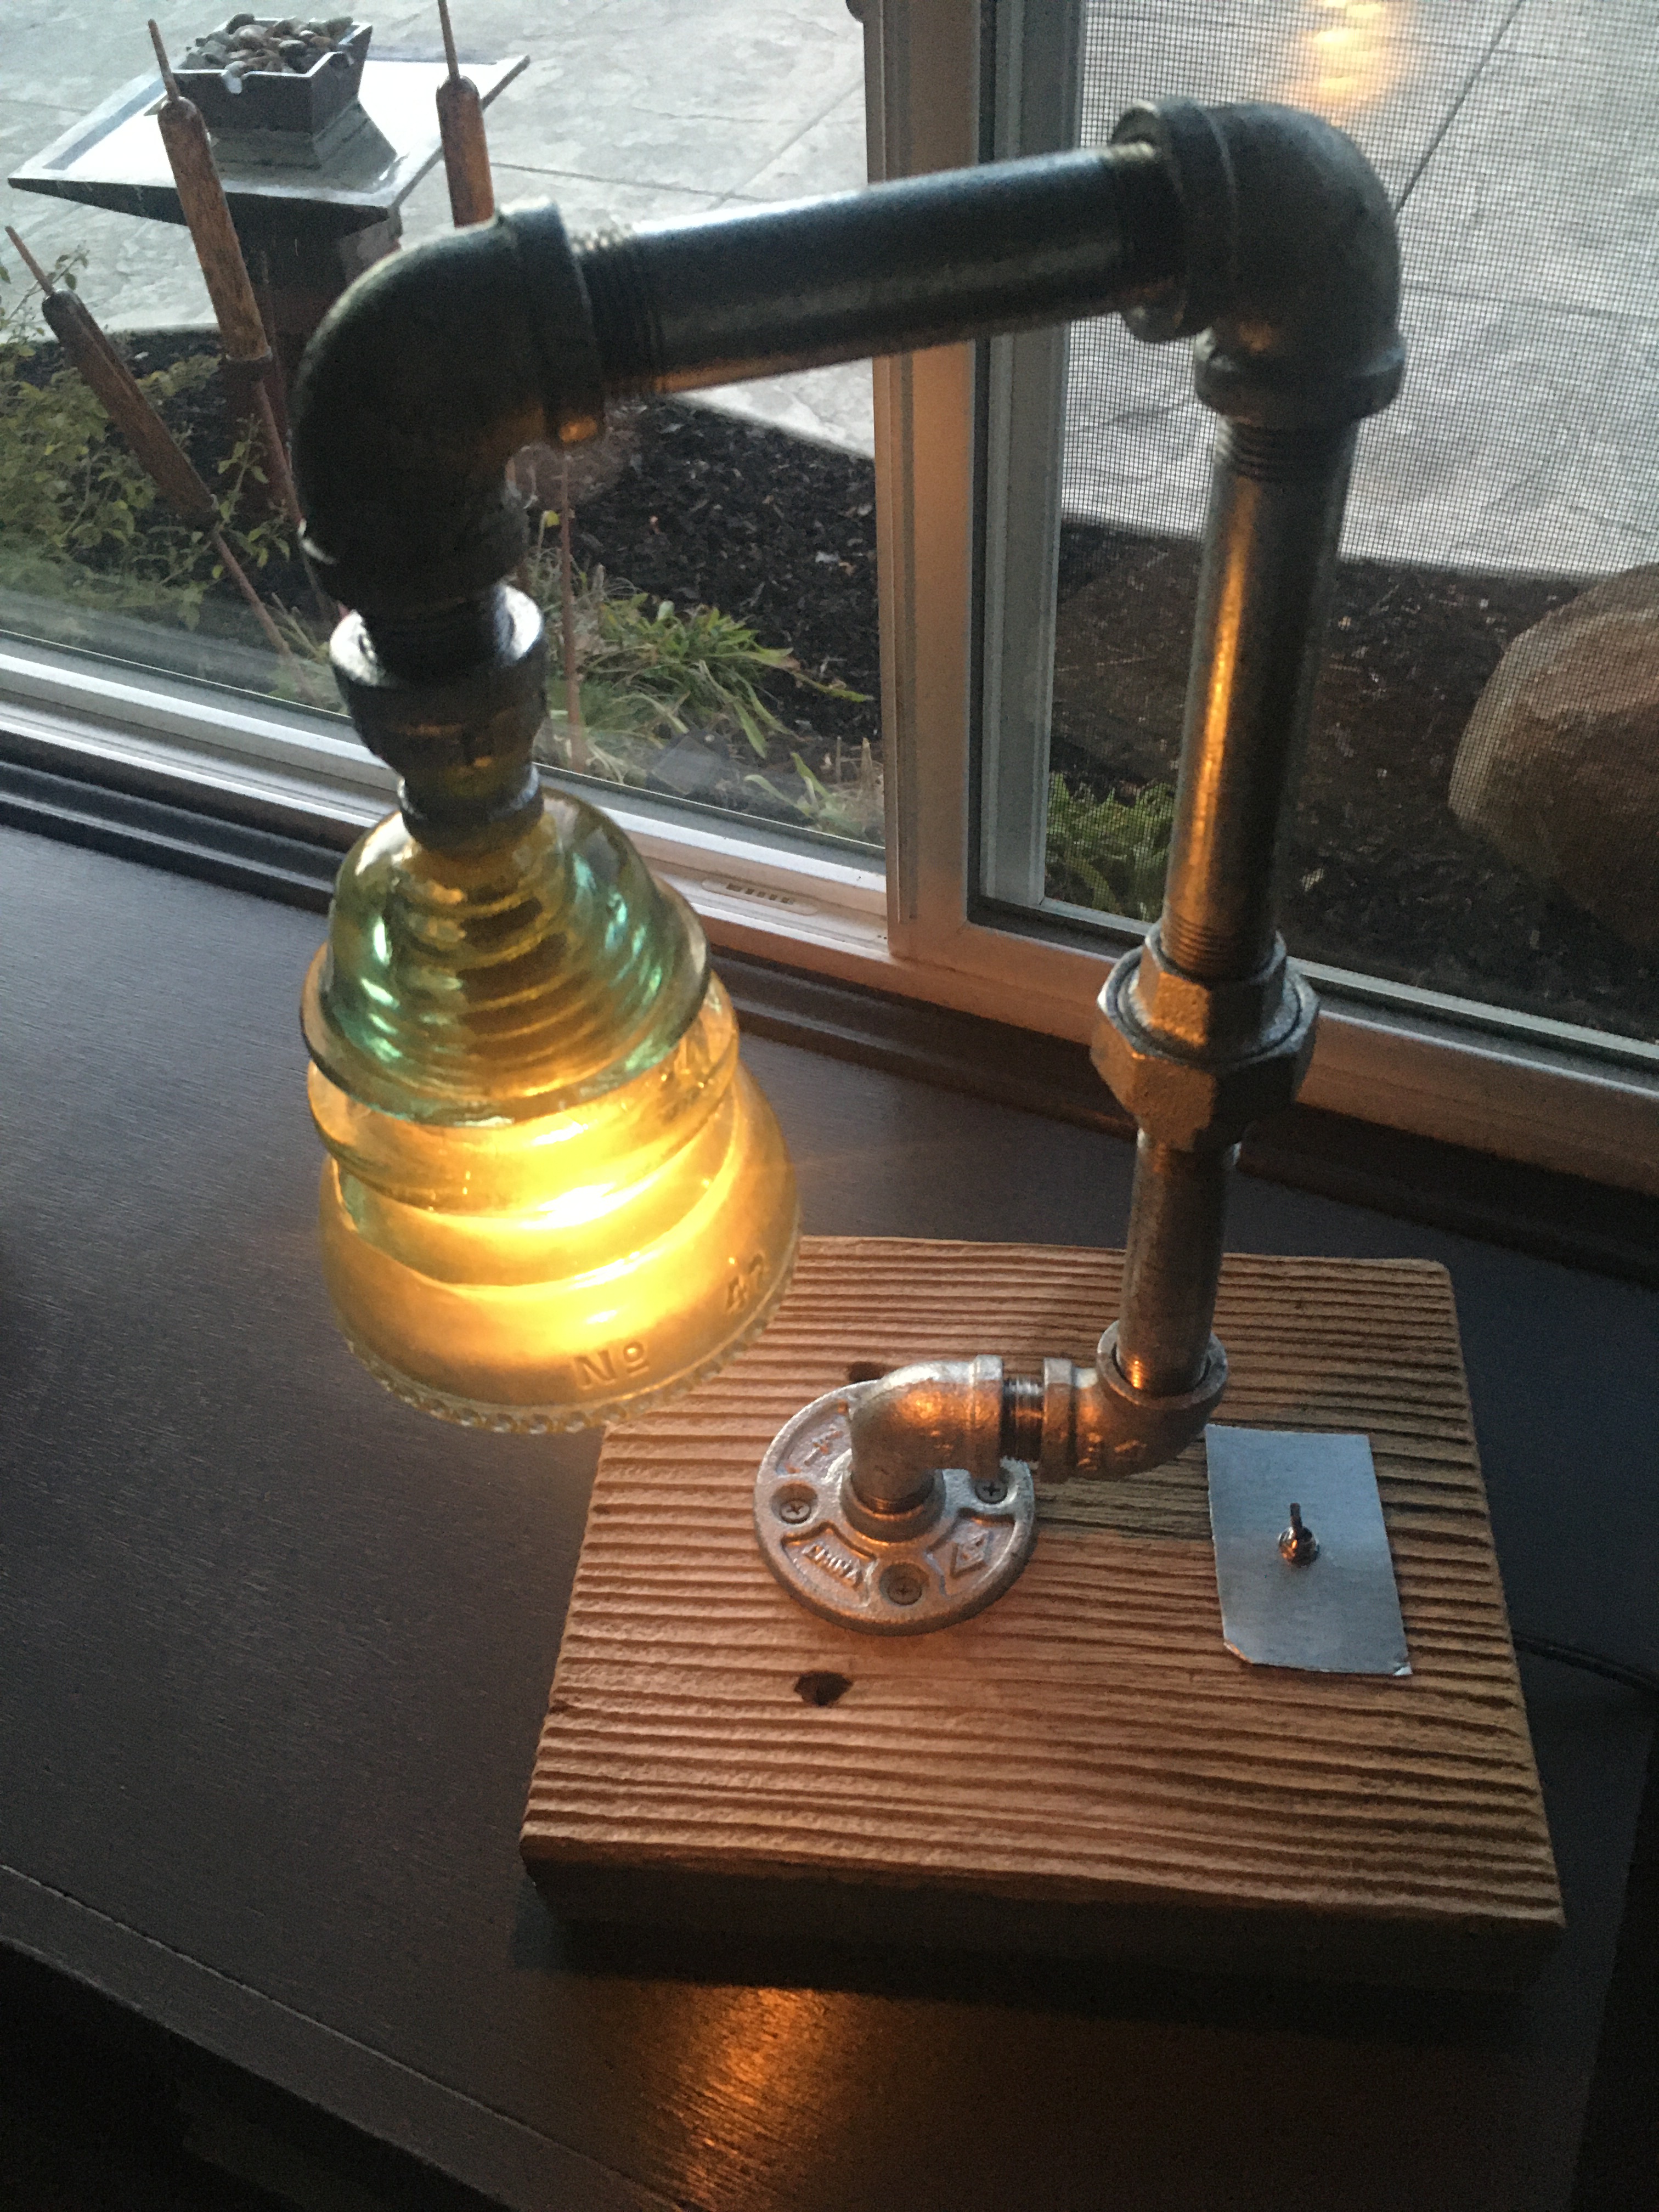
The lamp was made from galvanized pipe and an old telephone pole glass insulator. I decided to make one, and now I am on my third build. Here are the finished lamps.

Note: Believe it or not, the most expensive material was the galvanized (galvo) pipe. It was about $40.00 at a local hardware store. See if you can obtain it from a salvage yard. You may have to clean it up a bit, but your build will be much less expensive and you are recycling.
Special Tools:
- Diamond Drill Bit – 1/2″ DIA
- Soldering iron – 40W
- Long Drill Bit – 3/8″ DIA x 10″
- Plumber’s putty
Materials:
- Old weathered wood – recycled
- Glass telephone pole insulator – about $7.00 – $10.00 at an antique store
- Galvo pipe – about $40.00 new
- Dimmer switch – $5.00
- Lamp wire – $3.00
- Toggle switch – $6.00
- Metal – recycled
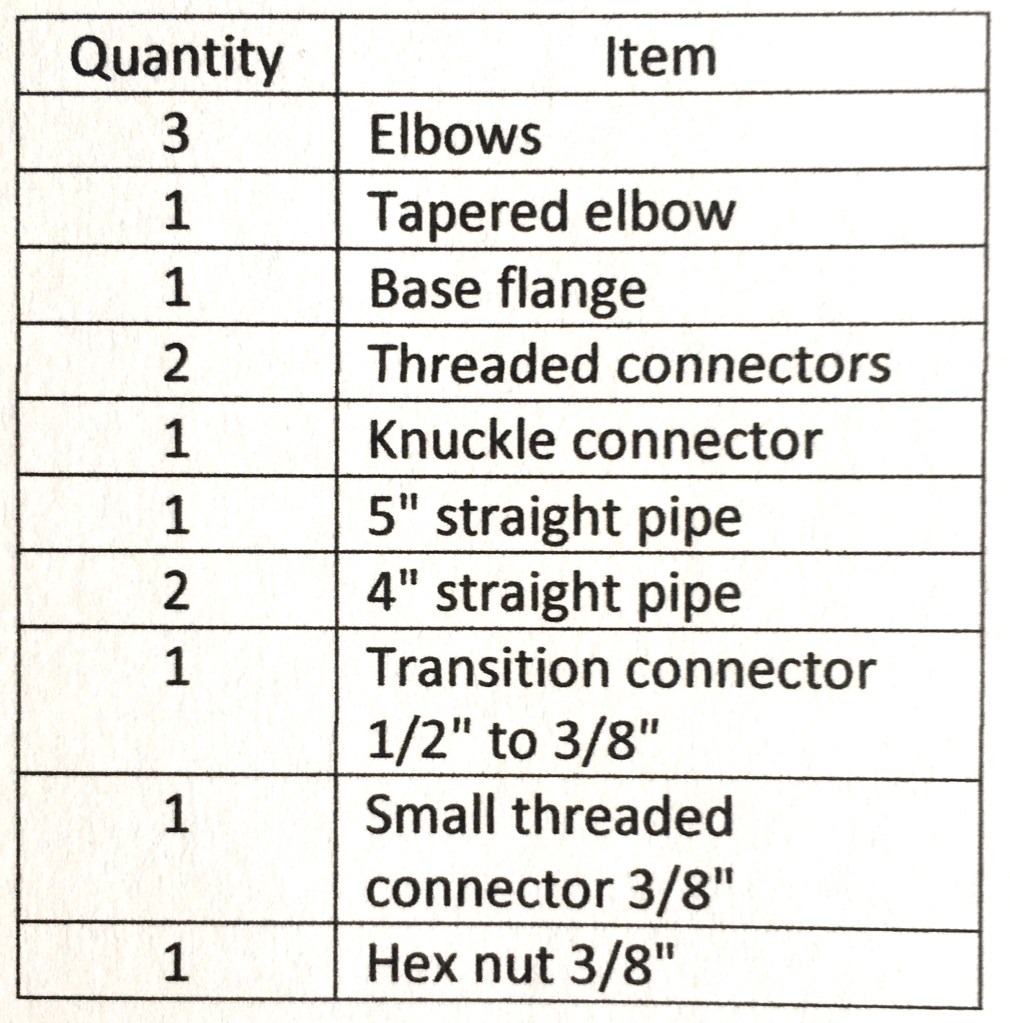
Galvo Pipe List:
Note: All pipe is 1/2″ except where noted.
Tips on Building the Lamp
1) Drilling The Top Of The Insulator
I must admit, I was a bit of a skeptic, but what the guy told me at the hardware store worked perfectly.
Set up a test fixture as below.
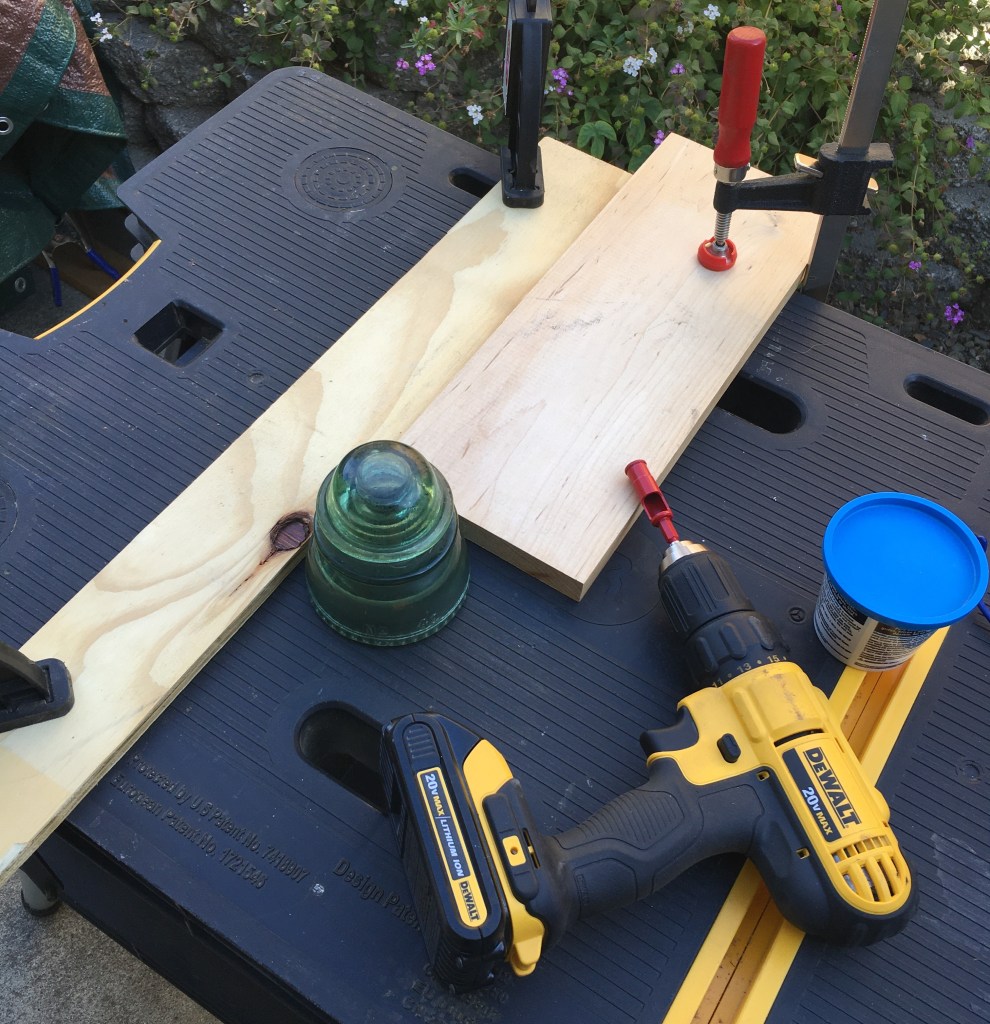
Put some plumber’s putty around the hole on the insulator.

Fill the area surrounded by plumber’s putty with water. Then insert your drill with diamond bit attached, at roughly a 45 degree angle and begin drilling.
Slowly position the drill until it is completely upright. Then drill all the way through the insulator. It takes about 15 seconds or so to cut through. This way, using water, the diamond bit will not be damaged. It’s a bit messy though, but awesome.
2) Toggle Switch or Dimmer Cable
In my build, I show a toggle switch. It is just for show. After my first build, I used a dimmer switch – much simpler. Either way, some wiring mods will be needed to pass the wire through the pipe.

Those are the essential tips. I did assemble the glass insulator pipe first. With insulator attached, I inserted the wire with lamp socket into the insulator. As I fed the wire through, I kept adding the pipe pieces, and then attached all to the base flange.
These lamps make a really unique gift. So go ahead and add some “light” into someone’s life!