Tribal Fence Frog

A couple of years ago, I built a tribal Orca fence sculpture (Killer Whale Fence Sculpture), based upon a design that I saw while traveling in the Pacific Northwest.

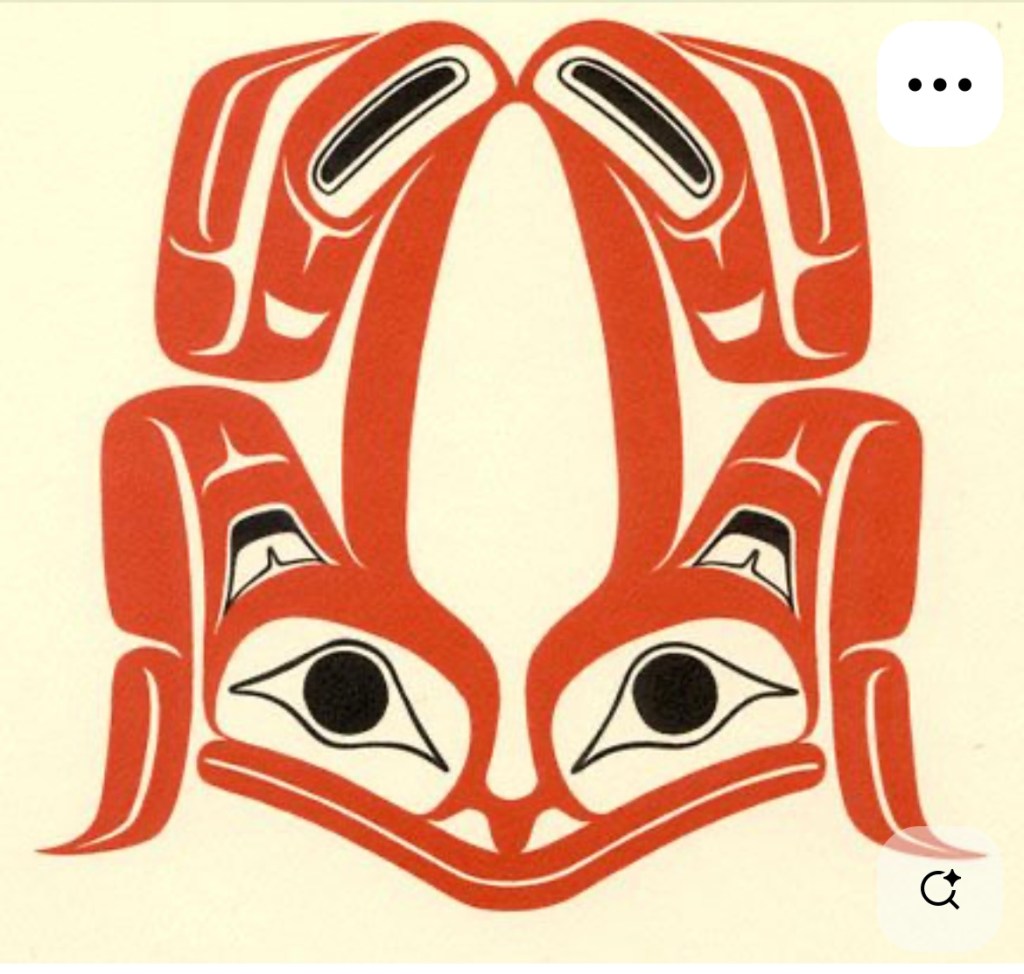
The build went over so well, that I was asked to build a Tlingit native tribal Frog fence sculpture. I was given a couple of preferred images from the web, and went to work. Here is the chosen design.

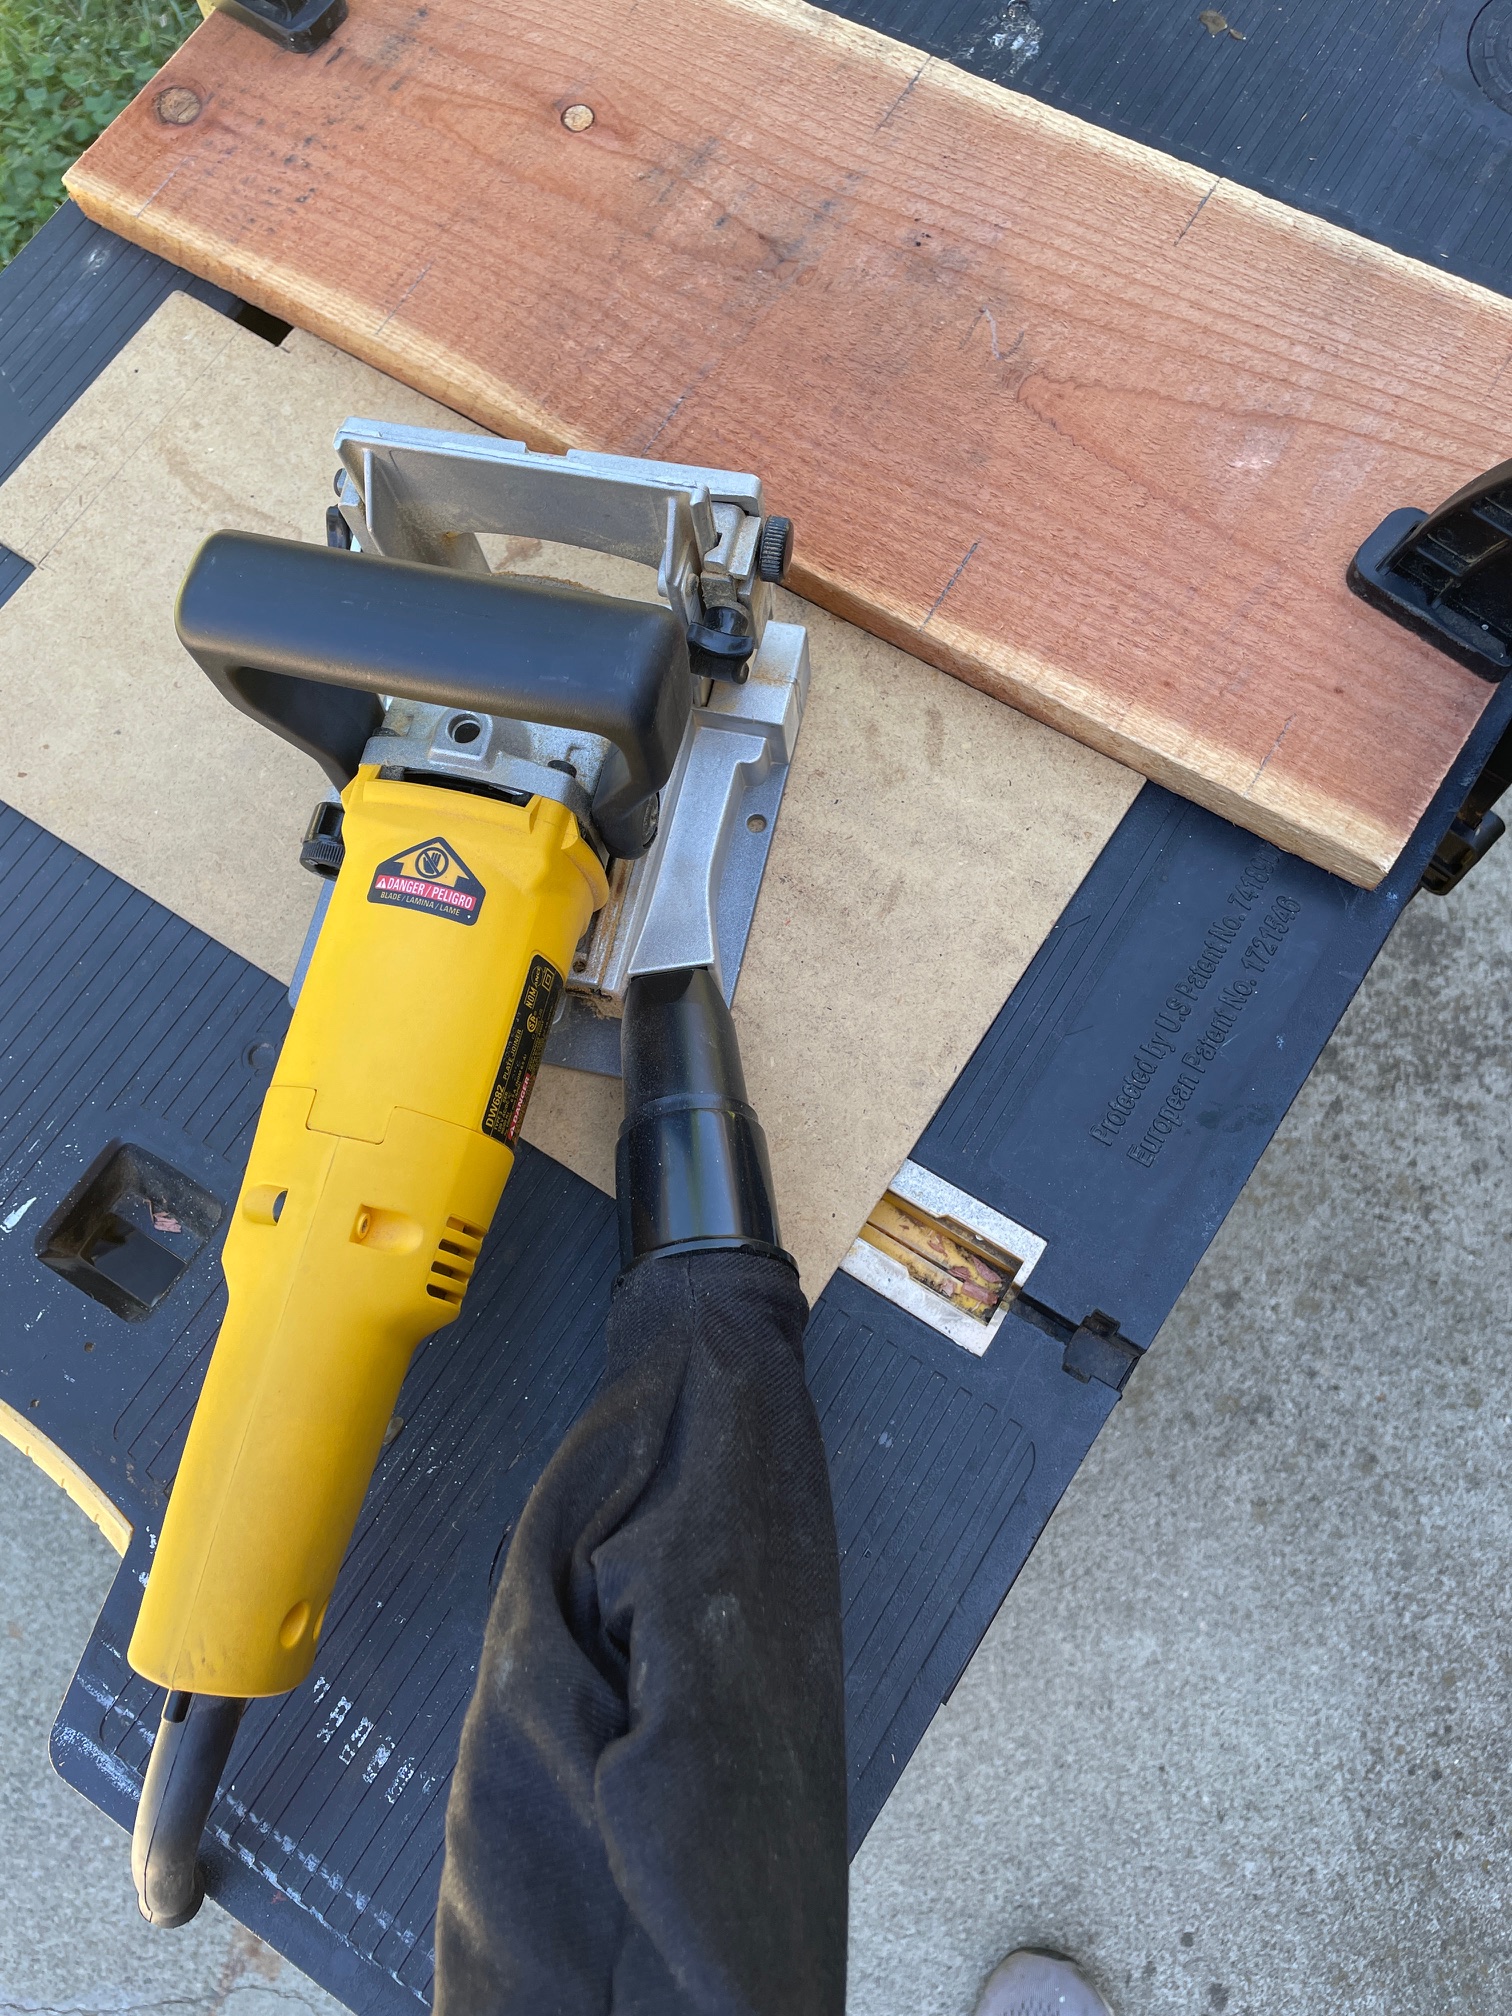
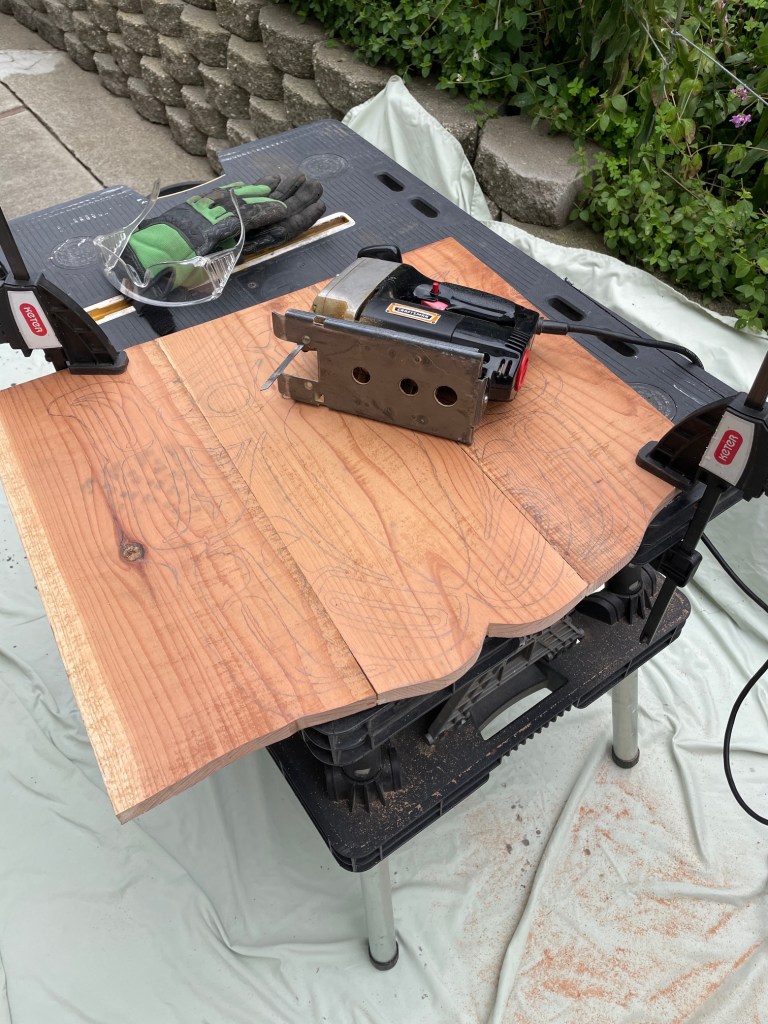
I needed a canvas to paint the frog on, and as I like to use scrap lumber whenever I can, I decided to piece together some redwood fence boards. As usual, I used my biscuit joiner to do so, then glued and clamped the boards. The wooden canvas measured approximately 19″ H x 18″ W.

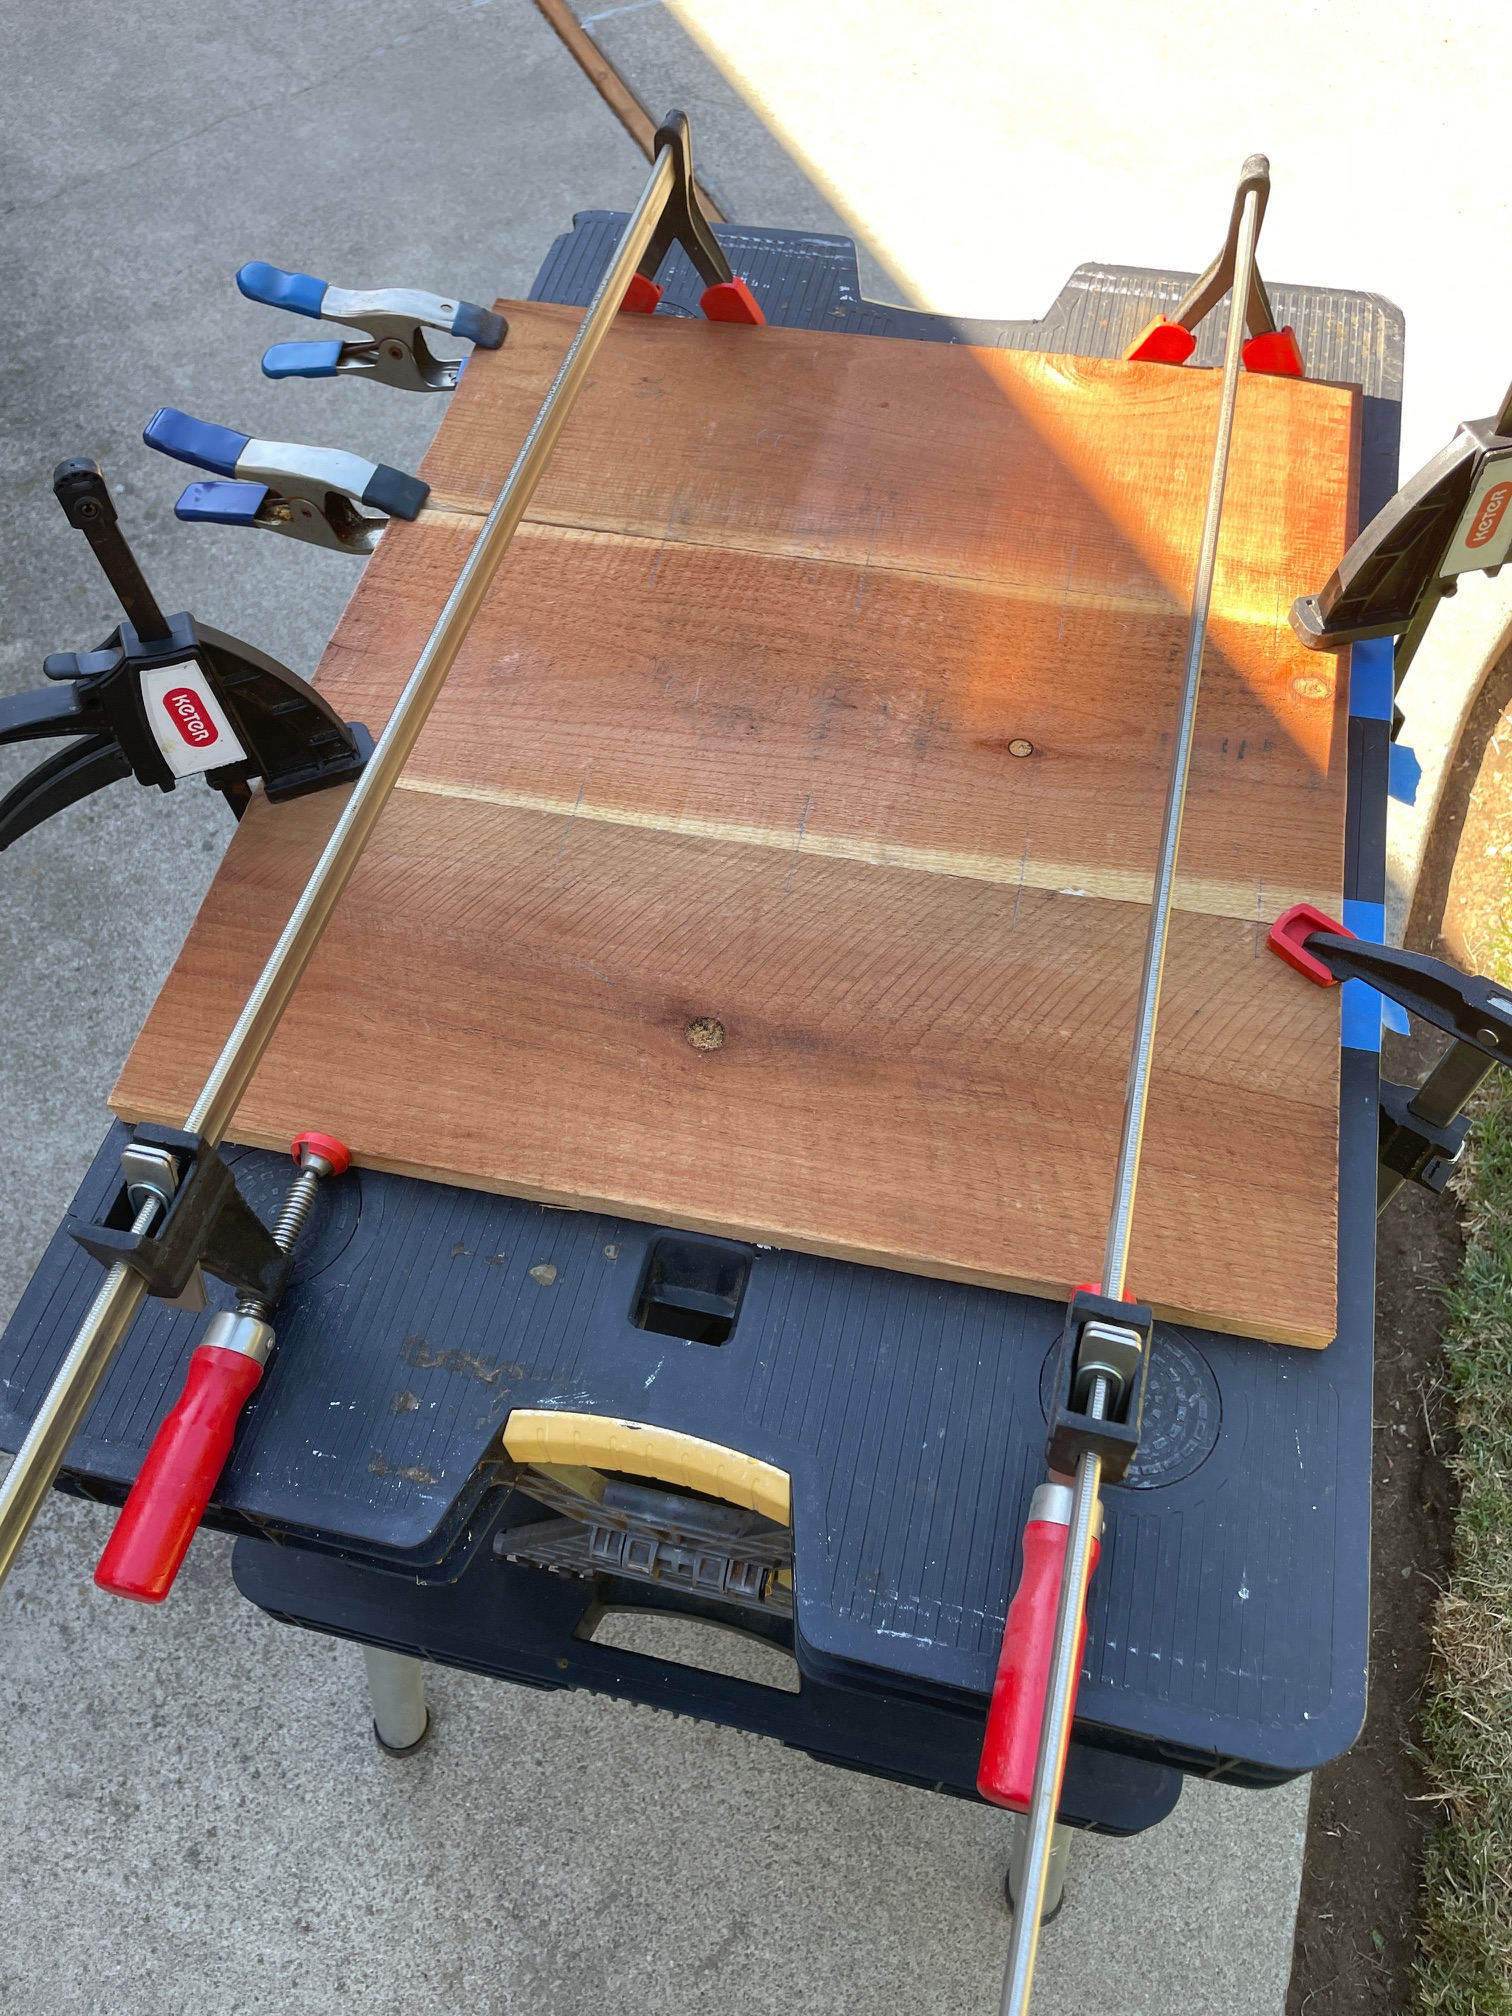
Once the glue was set, I sanded the top, creating a smooth wooden canvas on which to draw and paint.

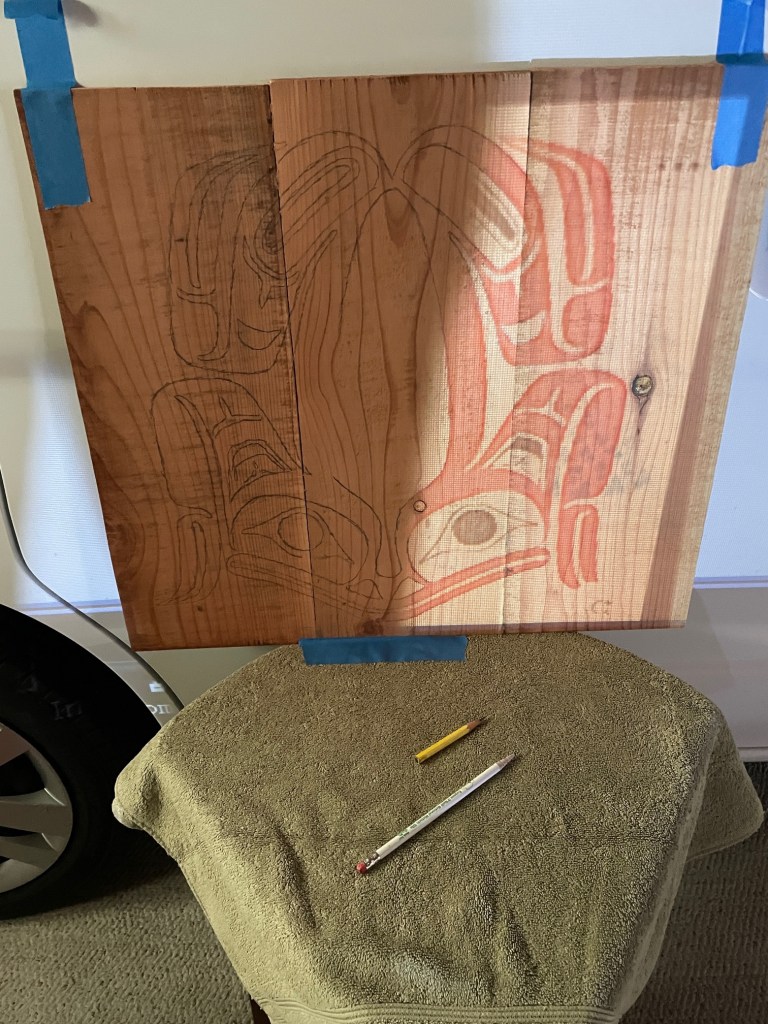
Now, to get the image drawn. I decided the best way was to use a projector. While I do not own one, I was able to check one out from the local library. I set up the projector in the garage, adjusted the image to fit the board, and began tracing. You can see below, that I have the left side of the image traced out.

Once the tracing was complete, I used a jigsaw to cut around the basic shape of the frog.

A few days later, I began painting. A rather tedious job that was done over several days. Lastly, I put a clear coat on top, preserving the paint from the weather.

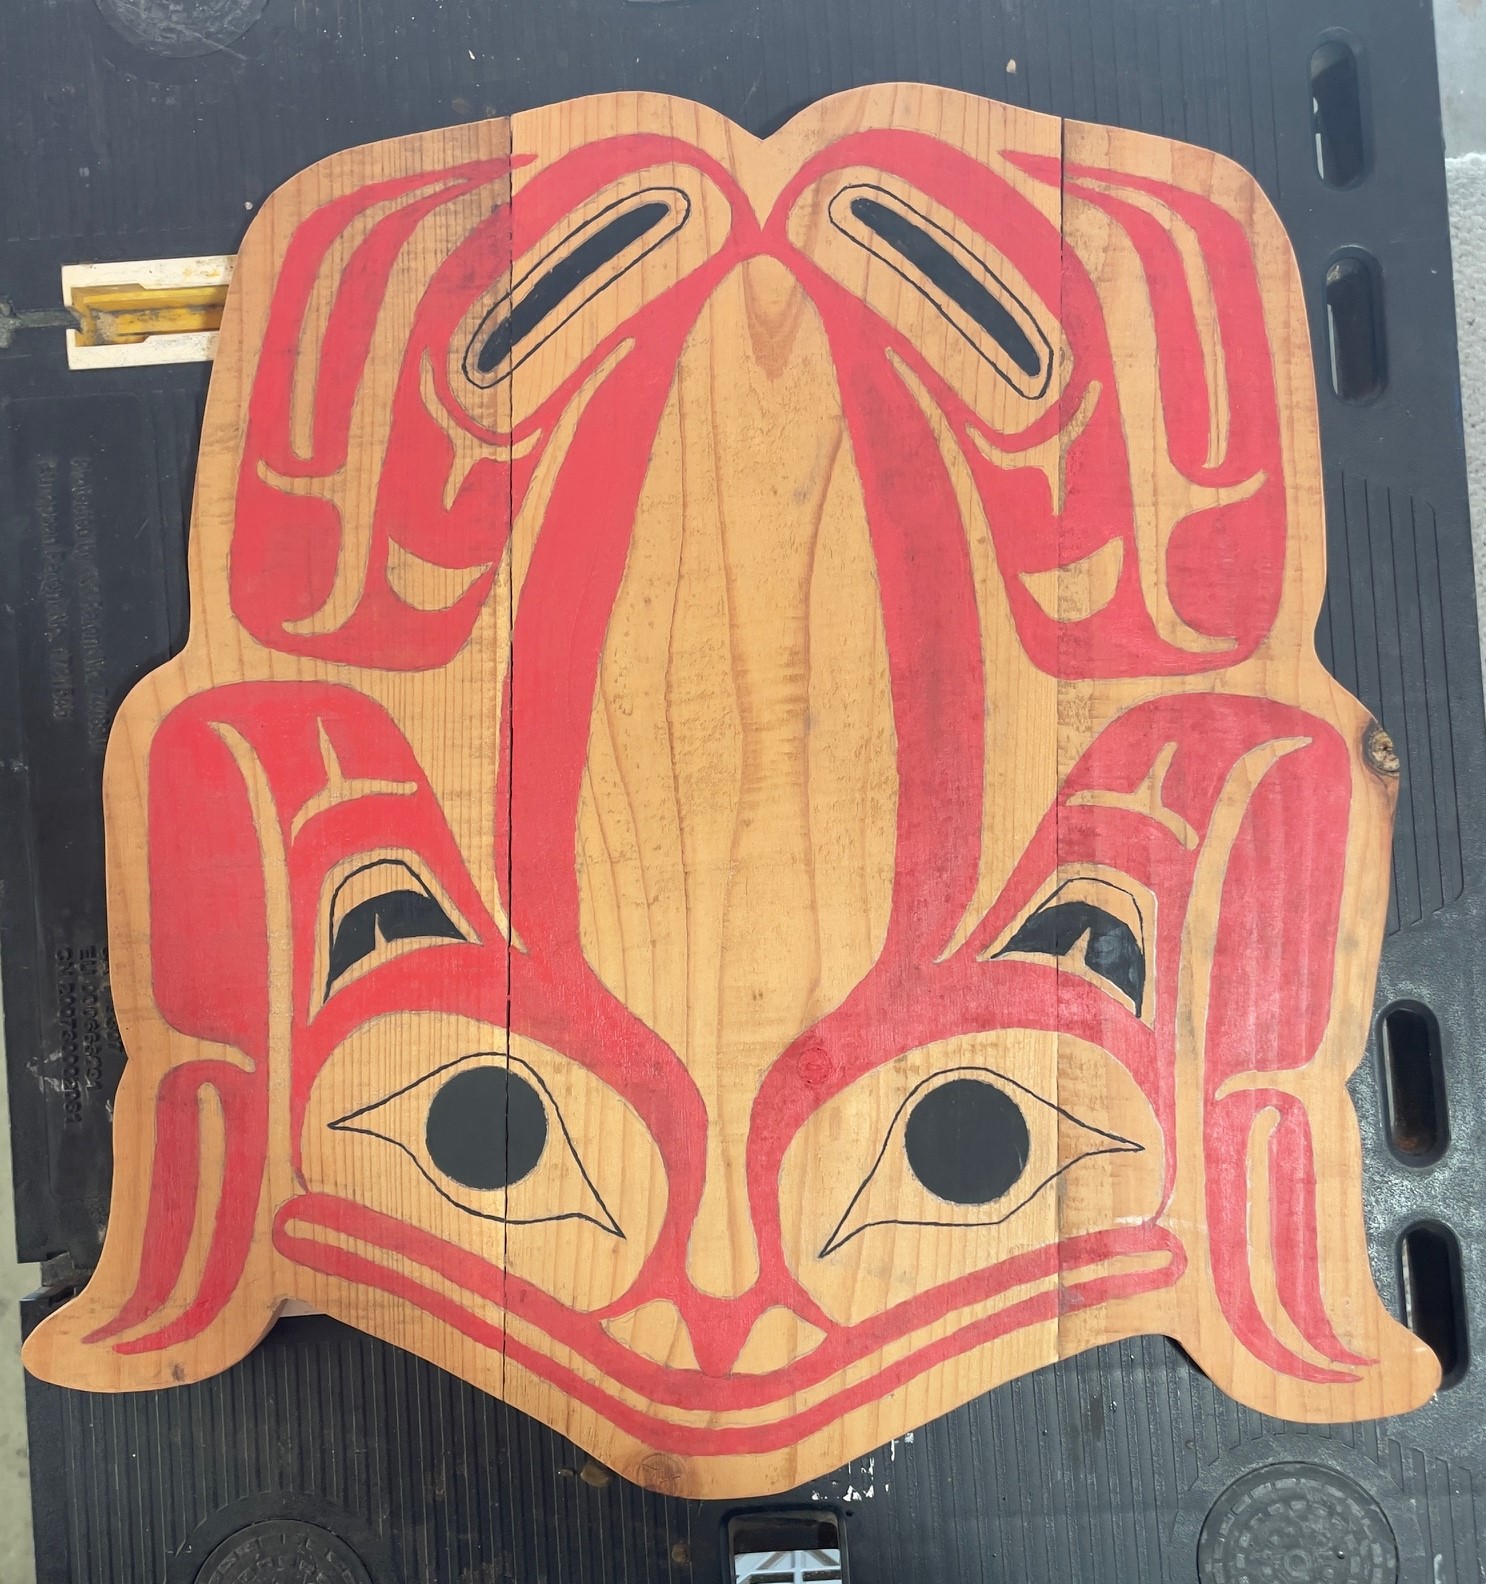
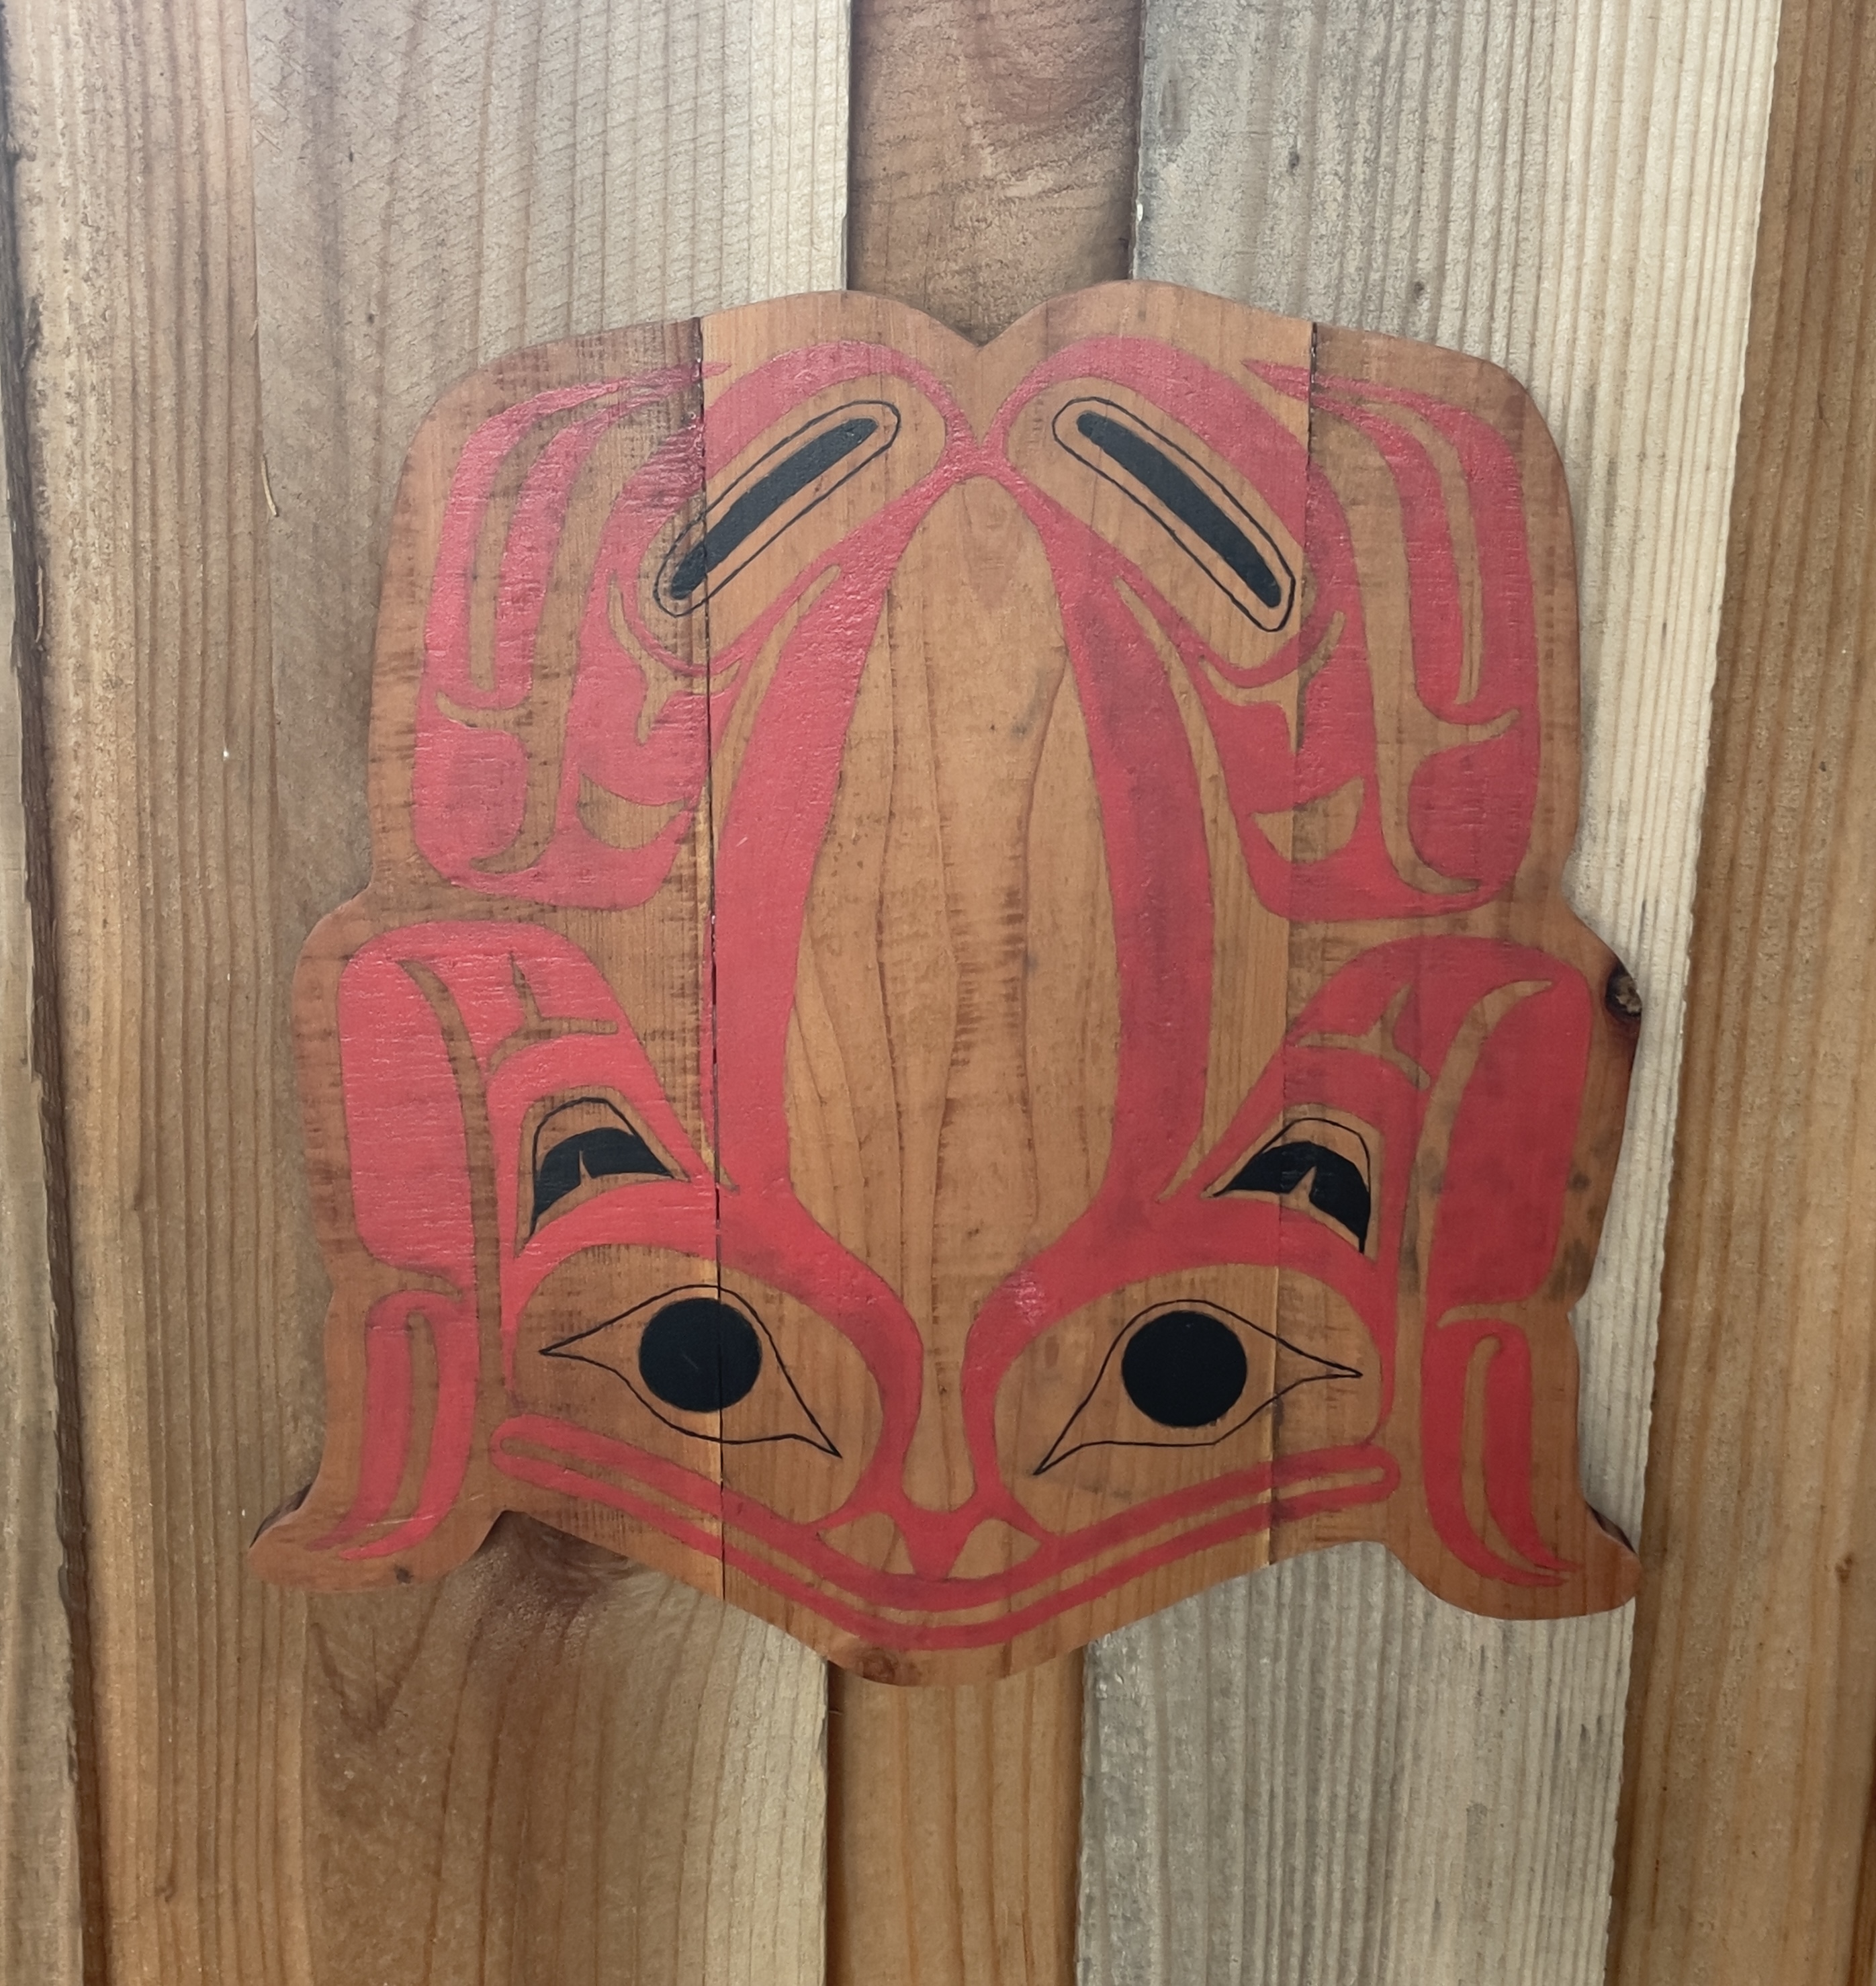
Here is the tribal Frog hanging on the fence. It turned out much better than expected.

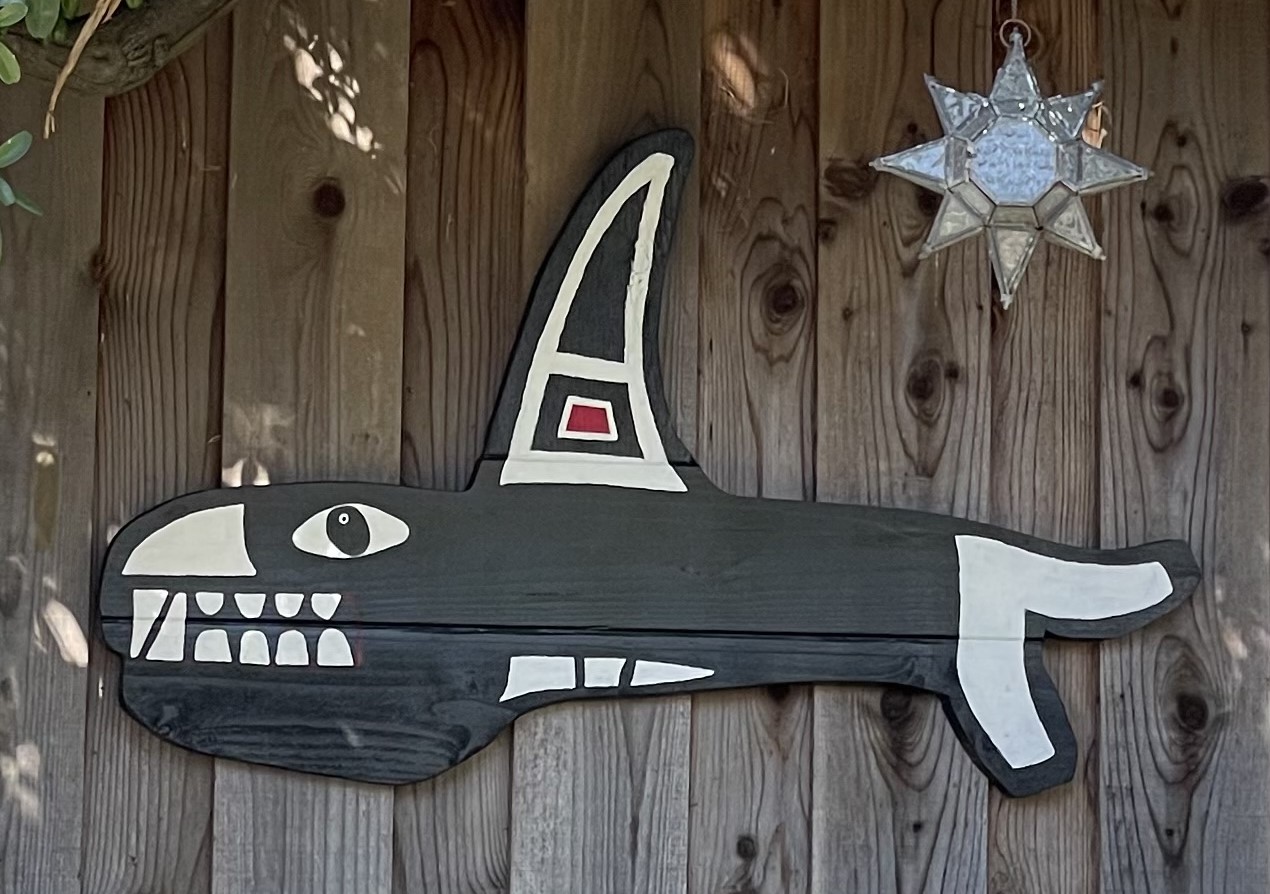
These two were meant to be together!

Decorative Solar Fence Lights

I wanted to put some solar lights on three of my garden fence posts. Most of what I found to purchase was plastic, not very visually appealing, and would not hold up well in the summer sun.

While shopping in a large hardware store, I found some electrical outdoor lights that I really liked. They were on sale for $5.00 dollars each. Plus, they were made of brass and copper, ideal for the weather.

However, they were not solar, but I could not resist the price. So I bought three of them.

I had also purchased three solar lights (that you stick in the ground) from a local discount store. My plan was to insert these into the top of each light, and then attach them to the fence posts.

I modified each outdoor light by first removing the electrical light socket and accompanying wiring. Pretty quick and easy.

I measured the diameter of the solar light using a circle template. However, you could also tie some wire or string around it to determine the circumference, and then measure across it to determine the hole diameter.

I needed a hole in the top of each outdoor light, to drop the solar light into. I drilled a 1/4″ hole in the center of each, and then used my circle template to outline the 1 and 7/8″ hole to cut. I used a nibbler to ‘bite’ off the metal, until I had the correct sized hole. A nibbler is not expensive, and easy to use when cutting thin metals. It is a slow process however.

Once the holes were cut, I simply dropped in the solar lights.

I hung each light on the fence posts. Here is one of the lights at night.

Bring some light into your garden at night!