Decorative Solar Fence Lights

I wanted to put some solar lights on three of my garden fence posts. Most of what I found to purchase was plastic, not very visually appealing, and would not hold up well in the summer sun.

While shopping in a large hardware store, I found some electrical outdoor lights that I really liked. They were on sale for $5.00 dollars each. Plus, they were made of brass and copper, ideal for the weather.

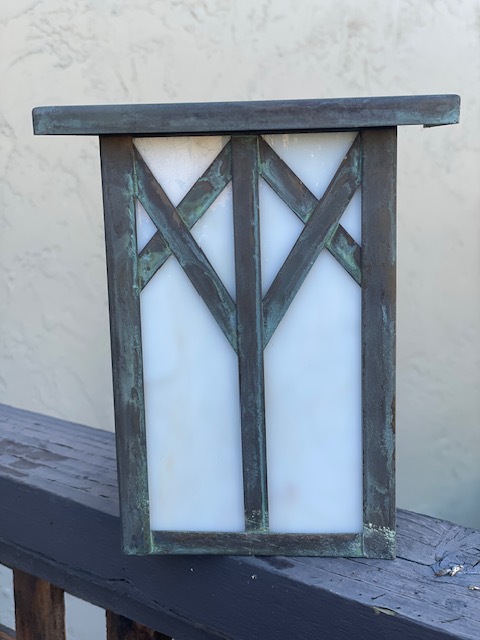
However, they were not solar, but I could not resist the price. So I bought three of them.

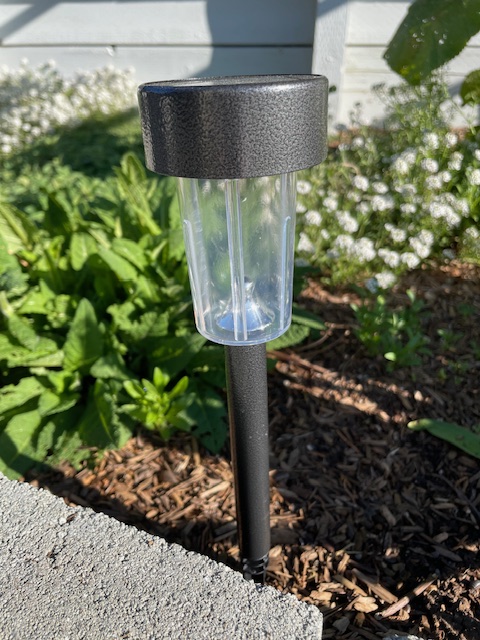
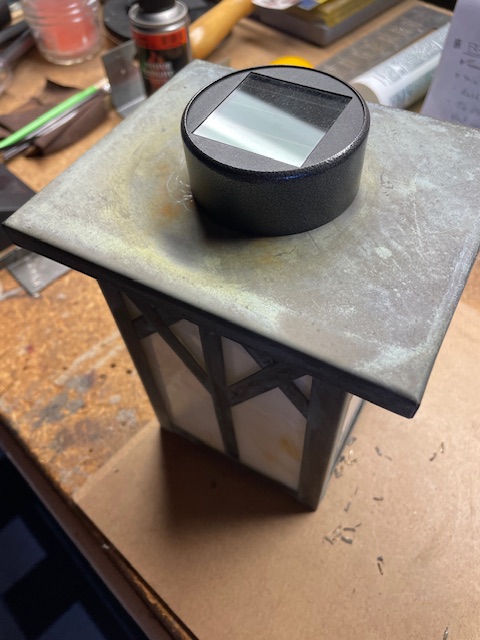
I had also purchased three solar lights (that you stick in the ground) from a local discount store. My plan was to insert these into the top of each light, and then attach them to the fence posts.

I modified each outdoor light by first removing the electrical light socket and accompanying wiring. Pretty quick and easy.

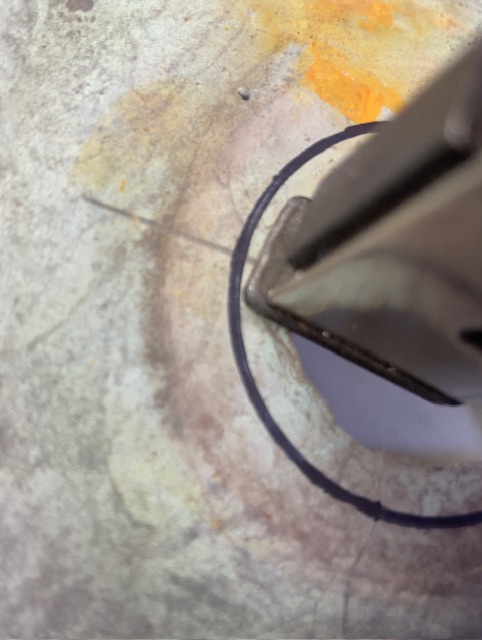
I measured the diameter of the solar light using a circle template. However, you could also tie some wire or string around it to determine the circumference, and then measure across it to determine the hole diameter.

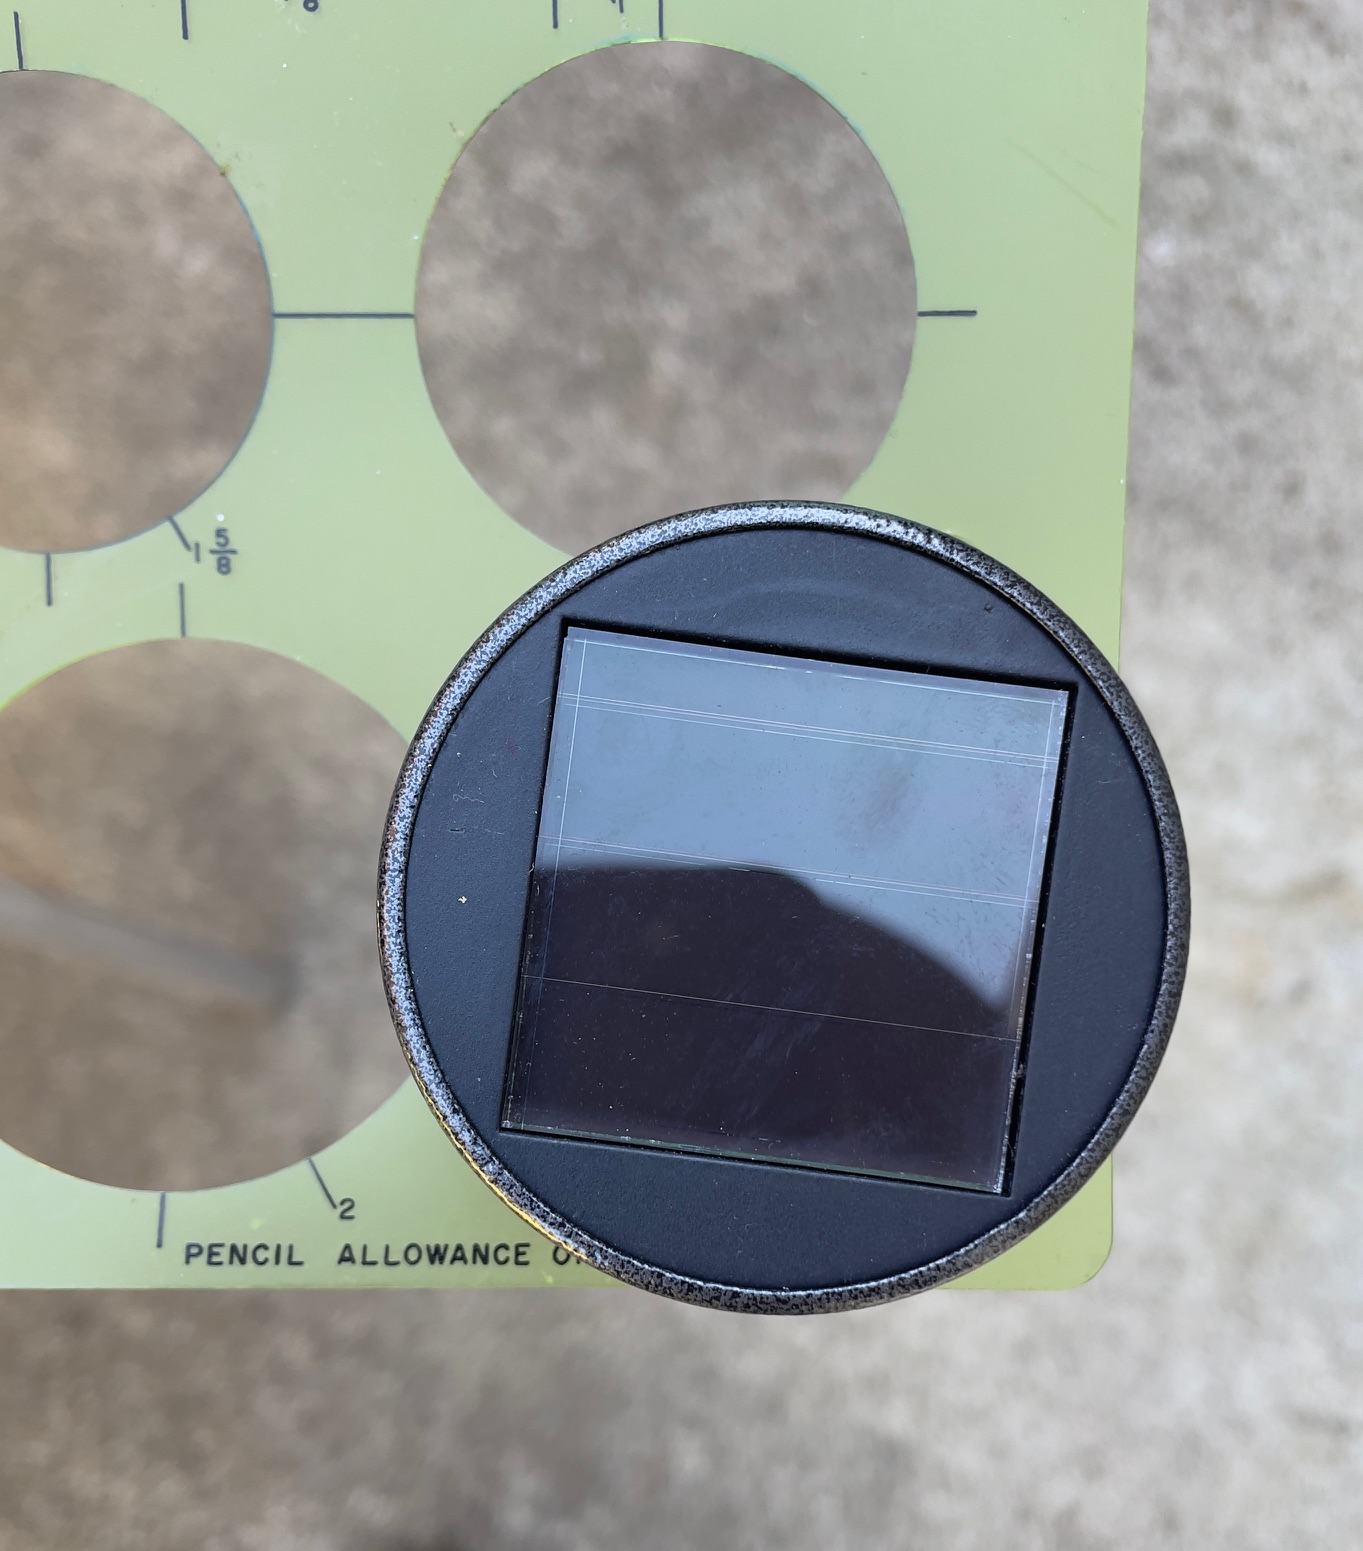
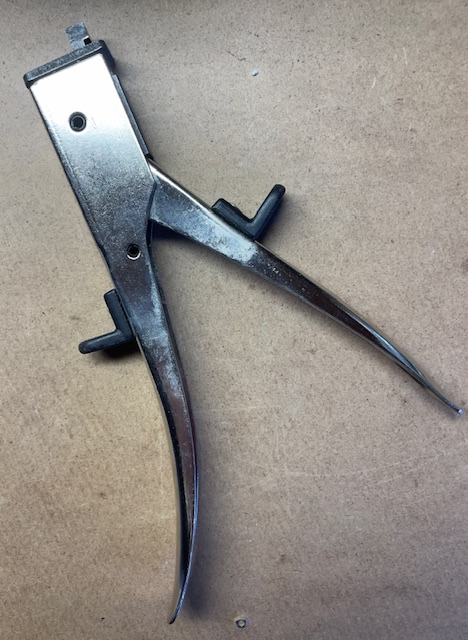
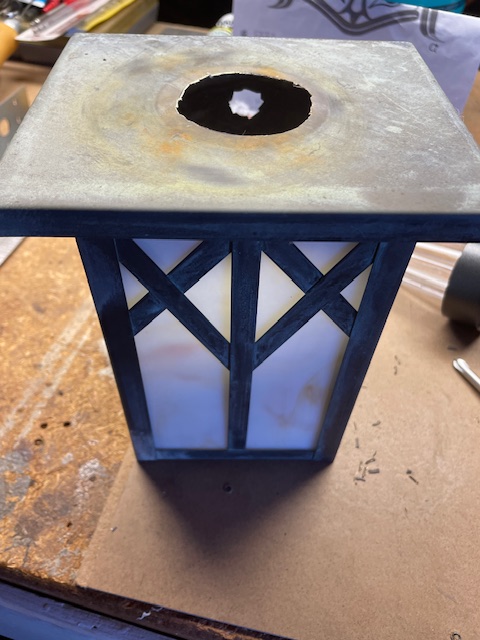
I needed a hole in the top of each outdoor light, to drop the solar light into. I drilled a 1/4″ hole in the center of each, and then used my circle template to outline the 1 and 7/8″ hole to cut. I used a nibbler to ‘bite’ off the metal, until I had the correct sized hole. A nibbler is not expensive, and easy to use when cutting thin metals. It is a slow process however.

Once the holes were cut, I simply dropped in the solar lights.

I hung each light on the fence posts. Here is one of the lights at night.

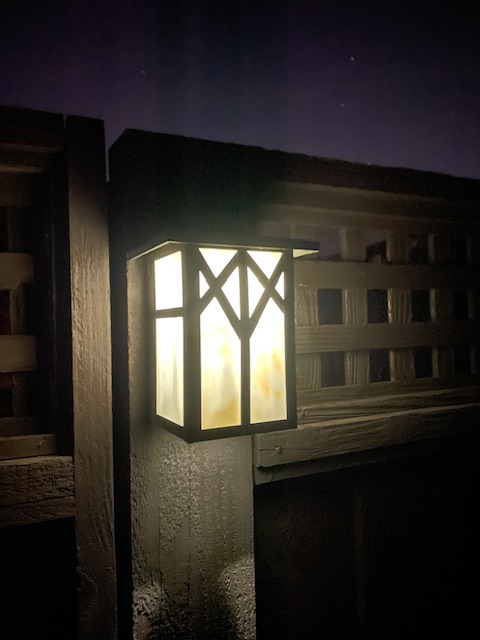
Bring some light into your garden at night!

Cabana Kit Build

Several years ago, I was at a local nursery and saw a very cool garden shed kit. It was actually called “The Cabana” by Cedarshed, a manufacturer of dozens of prefab cedar kits.

It was decided that I had to have this kit (thank you), and it would become my “backyard fort.” Today it’s called a Man Cave, but when I was little ‘fort’ was the popular term.

One Saturday morning, a half-ton flat pack was delivered to my front yard. I thought, “What have I gotten myself into?”

The only way to get it into the backyard, was to unpack it. I soon learned it was a bunch of panelized pieces with four shingled roof sections. Actually, it looked like I could really build this kit.

The most difficult issue, was where to place it. There was really only one location, and it was on a slope. After much discussion, I hired a guy to remove what turned out to be 20 yards of dirt! Of course, then I needed a retaining wall. There was no way I could have done this job myself. Not cheap, but well worth the cost.

Alright, looks great! The next step was to layout the flooring. I used some retaining wall blocks as my foundation piers.

Once the floor was installed and level, I began putting up the panels. These actually went up very quickly. It was really fun to see it “coming together.”

The challenging part for me was lifting the shingled roof pieces in place. This is really a two person job, but after nearly falling off the ladder and crushing my rib cage, well… it turned out great!

Over the years, I have modified the fort with interior shelves, a foldable desk, side window, a skylight Cabana Skylight Project and a bubble window project Bubble Window.

These kits are nicely layed out for the weekend warrior. If you are thinking about building a Man Cave or a fort, this is a good way to go!