After I built my hammerhead shark board – Hammerhead Balance Board, I had several pieces of oak wood leftover.
Now that I was ‘morphing’ from hodad to surfer, I decided that I needed a rack in the garage to store my board.
I framed up a simple rectangle, with a couple of center struts, and assembled with glue, screws and clamps.
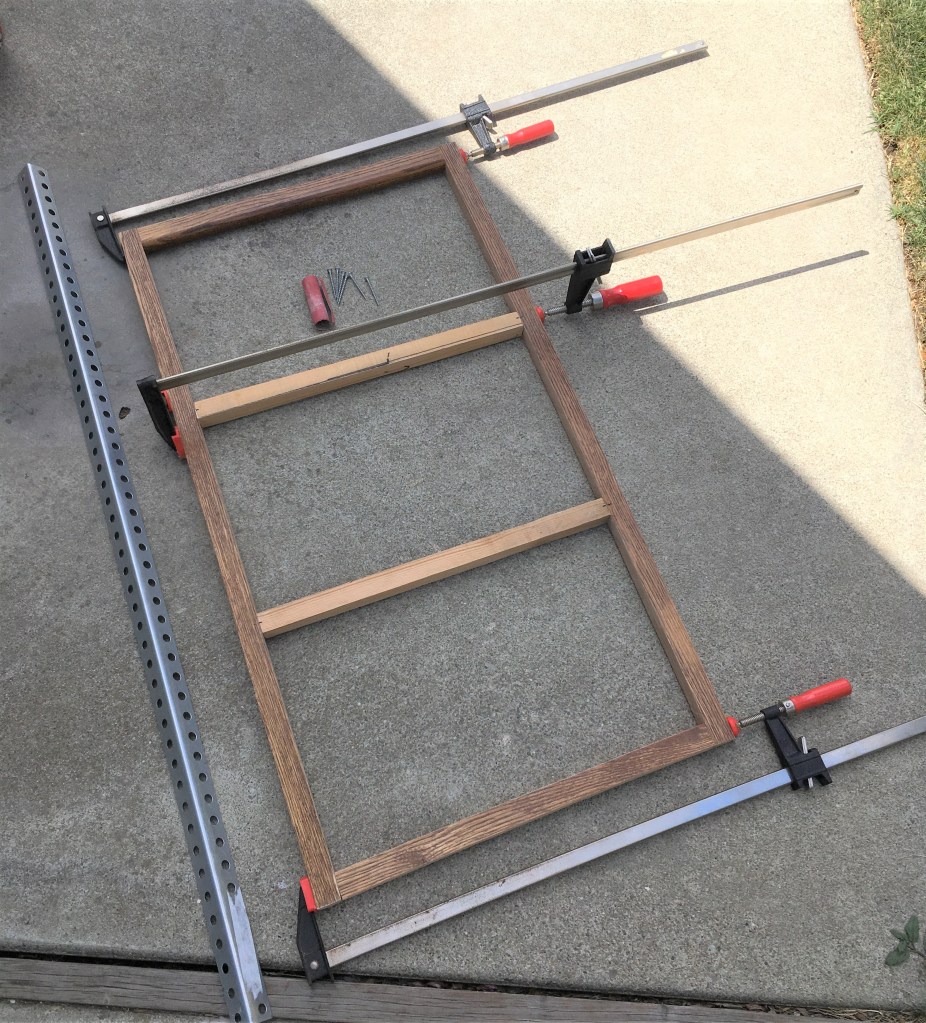
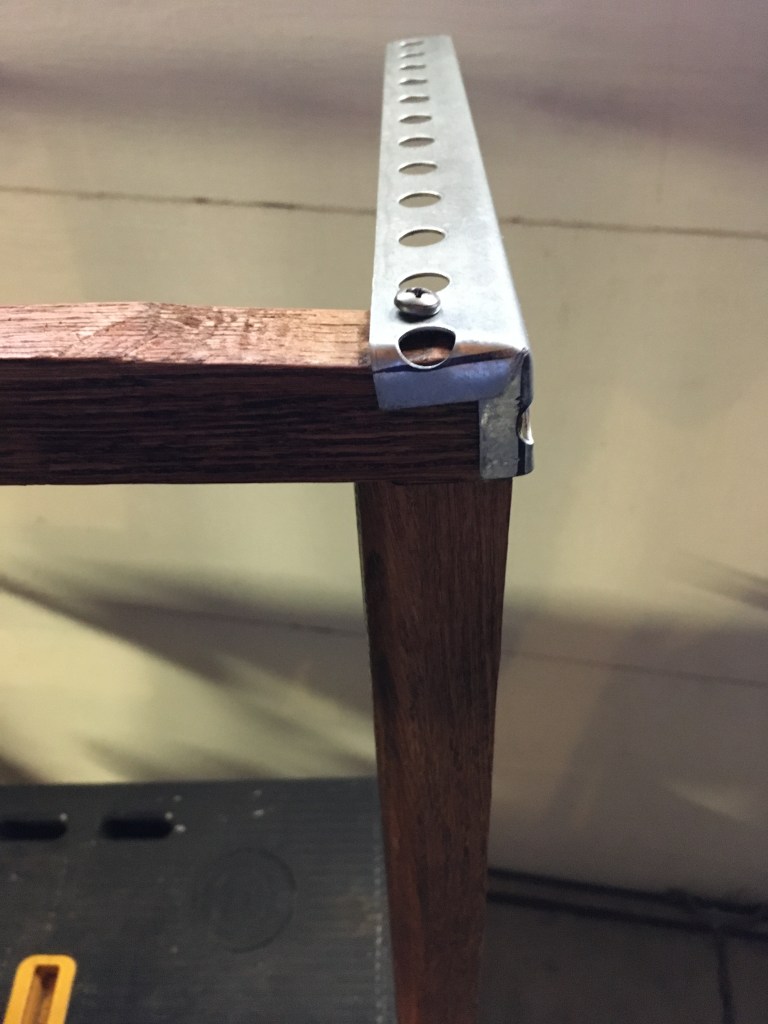
I also had several pieces of punched angle iron leftover, from my solar on the go kart project – Solar on the Go Kart.
I cut 4 legs to size and bent over the end to form a corner, and screwed each leg to the rack frame.
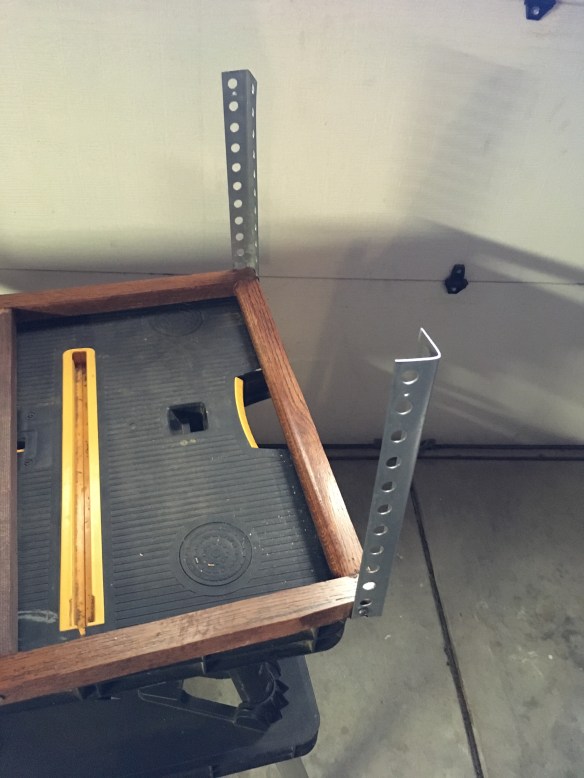
Here’s a good view of how the legs looked prior to attaching to the garage rafters.
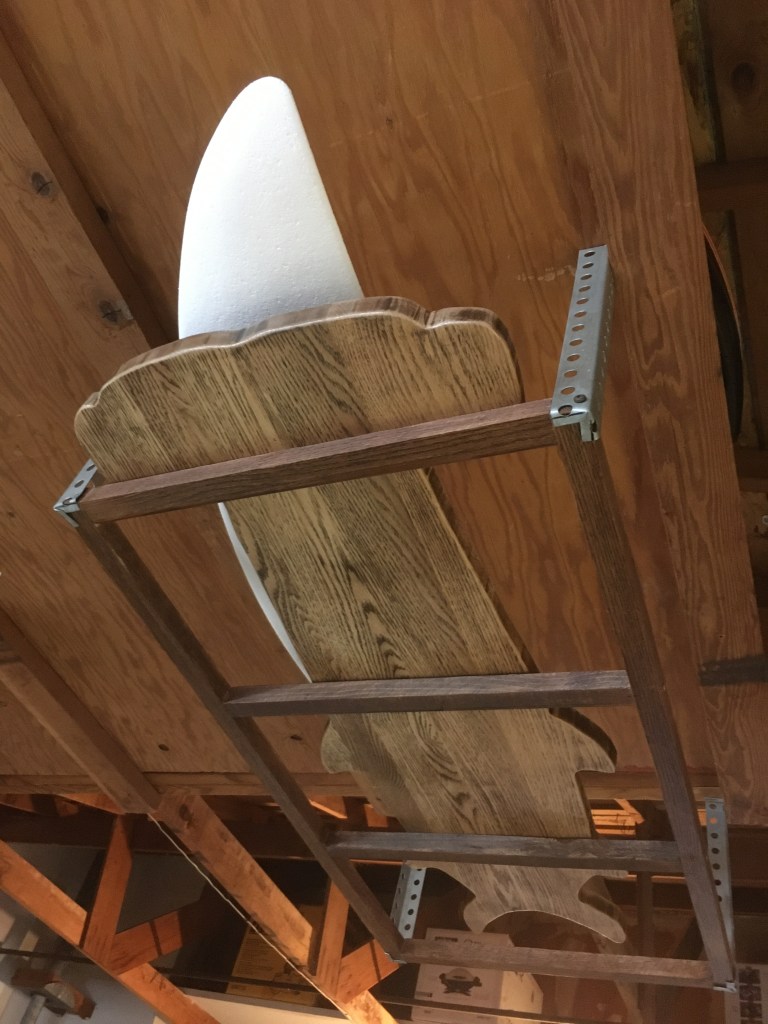
I screwed the top of the legs directly to the rafters. The rack is now installed, securely holding my custom board.
You can see the unglassed hydrofoil wing just peeking out, resting on top of the board. Or… is it a giant petrified shark’s tooth? I’ll let you decide.
Gotta get going on the hydrofoil wing or I’ll never hit the waves. The surf is always up somewhere!