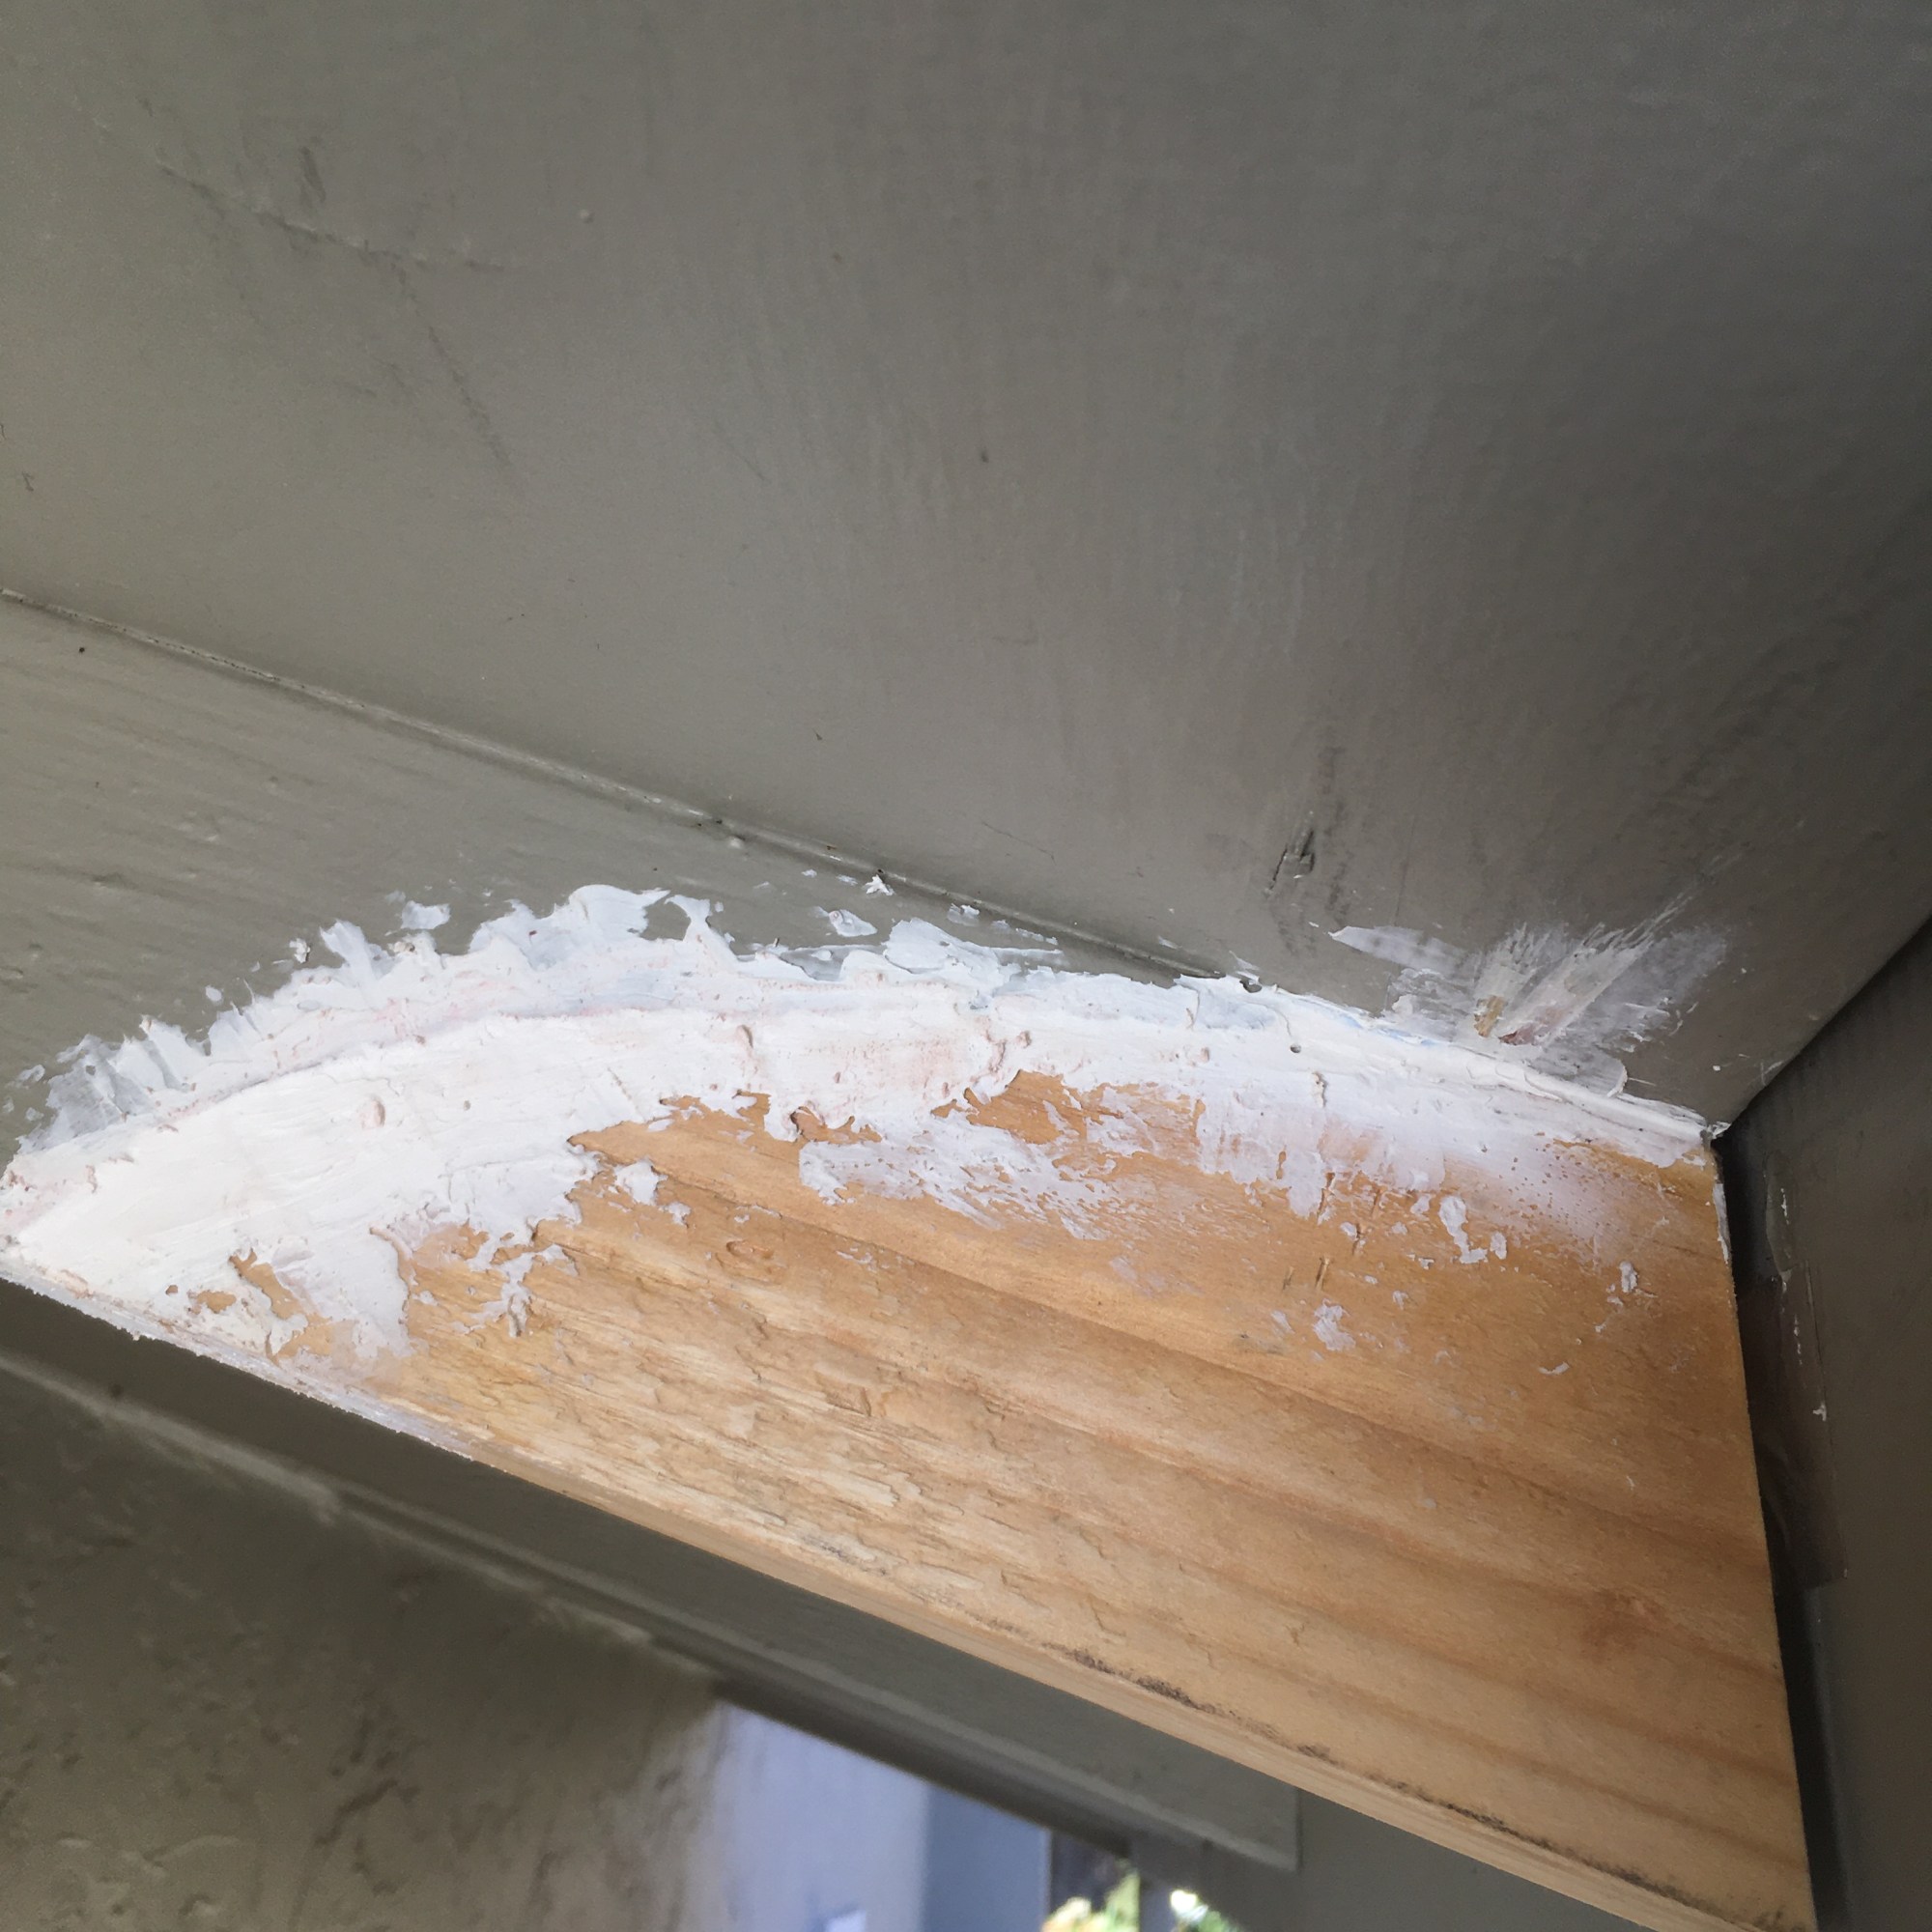
While doing some touch up house painting, I noticed that one of the rafter tails on the roof had some dry rot. After a bit of inspection, I realized that whoever installed the gutters put a nail in the wrong place. This allowed water to seep in and damage the wood on the rafter over time.
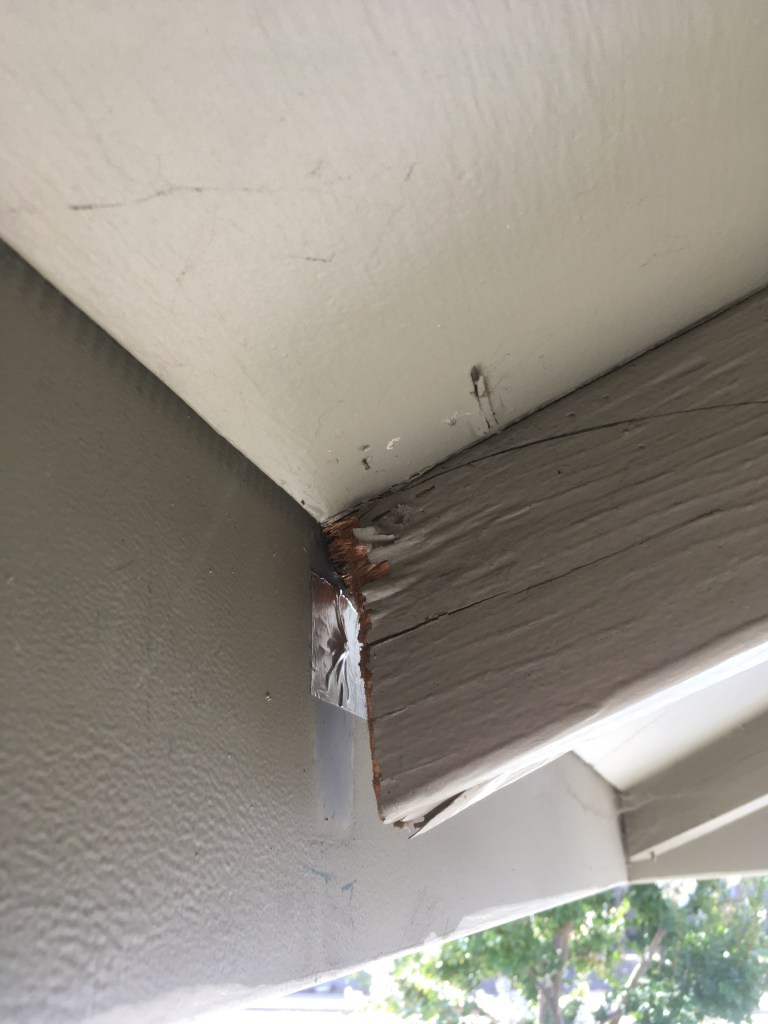
I got a bid to have it repaired and was a little shocked at the cost to do the job. I figured I’d give it a try on my own. I used a screw driver to poke into the damaged wood to determine how much rot was present. It seemed that only about 5″ was damaged.
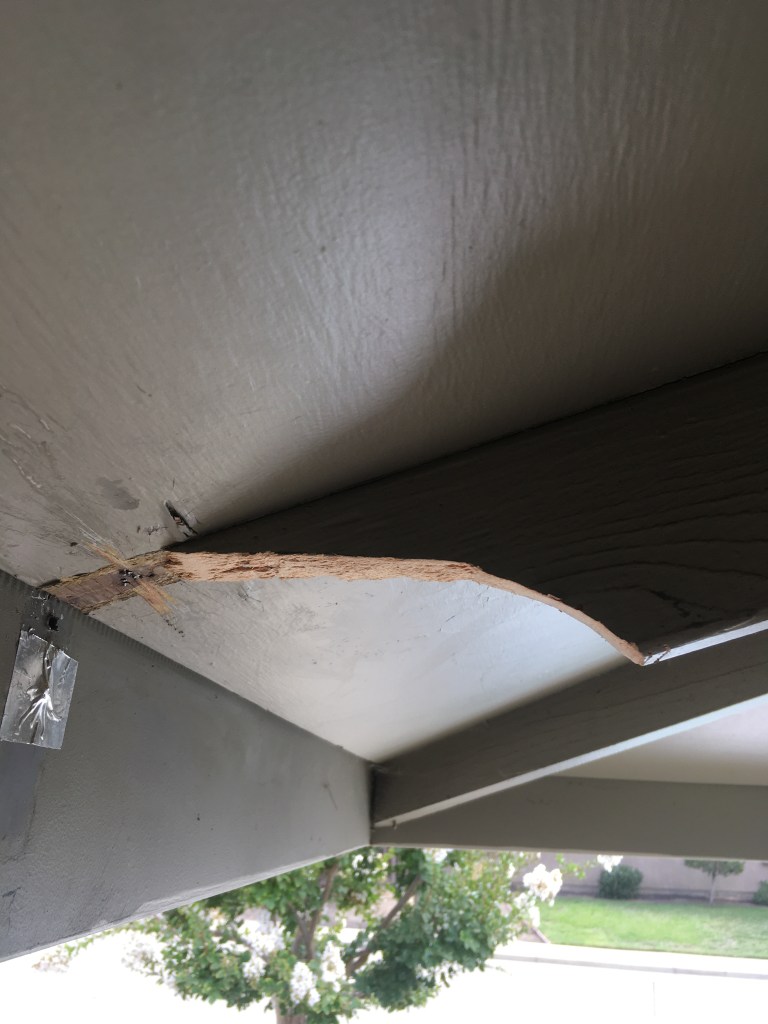
I got out my tools and cut and chipped away the damaged wood. What was left was all solid wood, and there was no damage to the plywood sheathing.
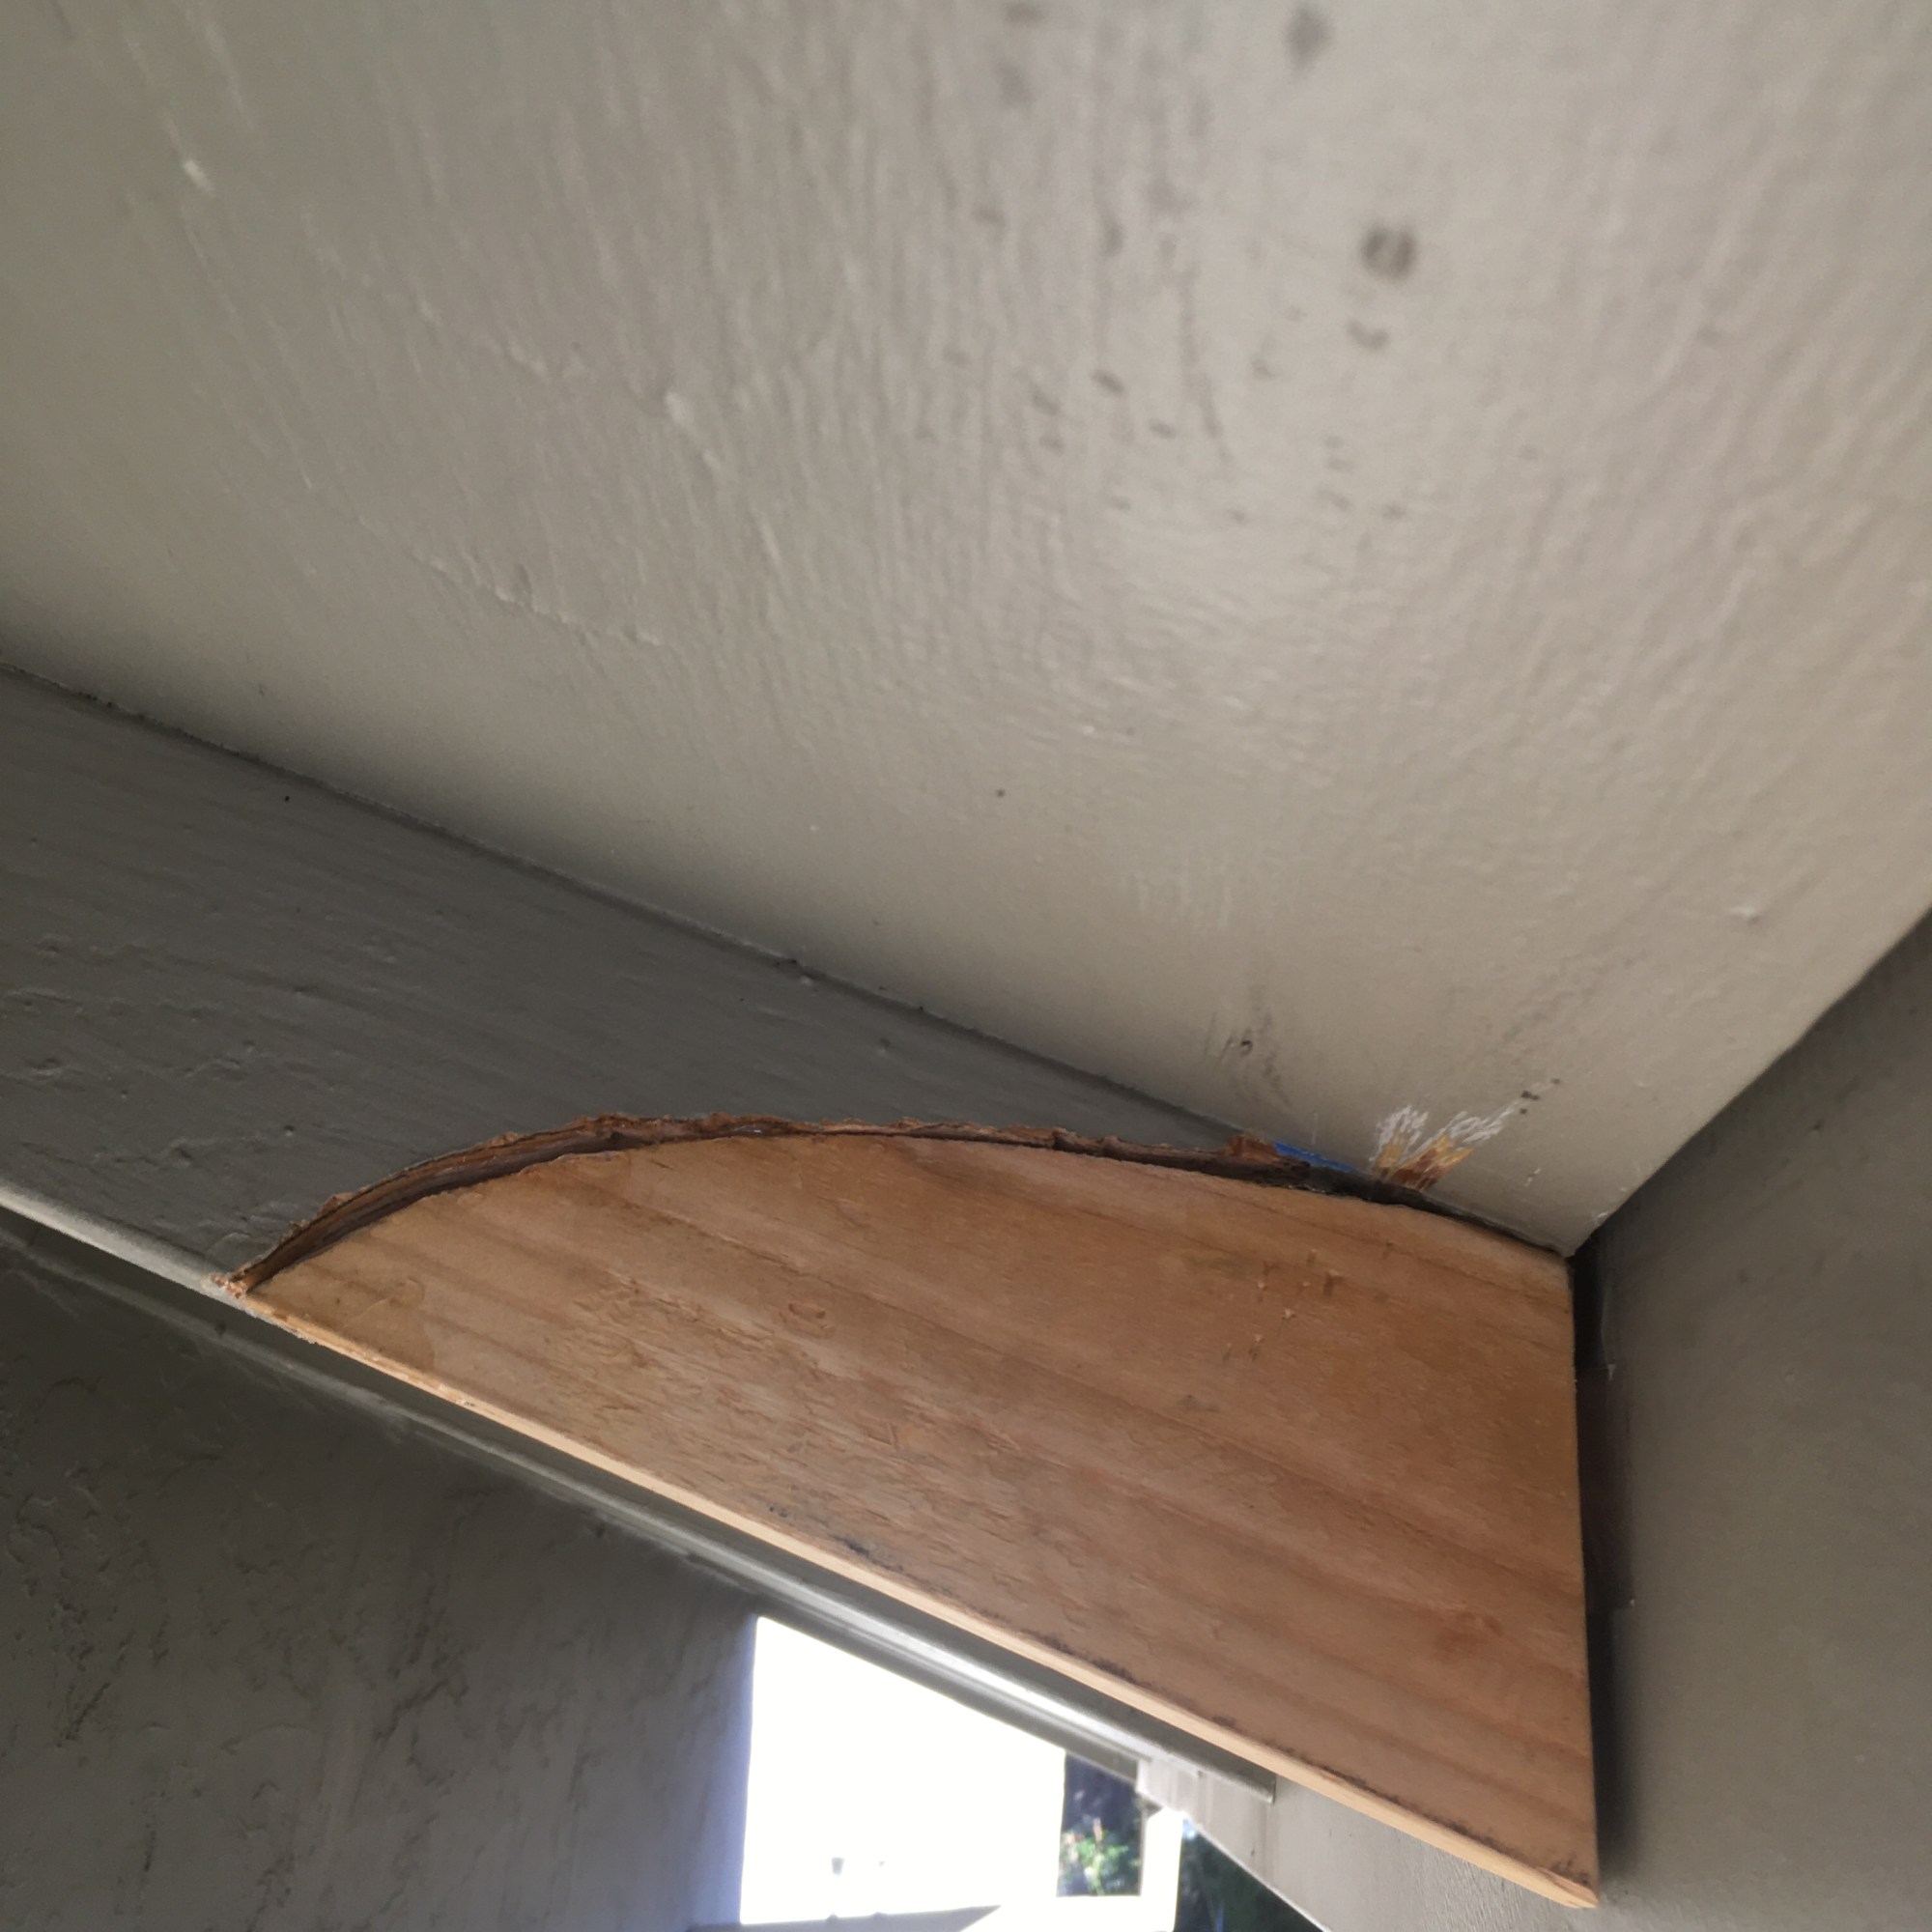
I cut a 2×4 to match the arc pattern that I had cut in the rafter. I glued and screwed it in place. The following day I caulked the cracks.
Once the caulk hardened, I primed and painted the rafter.
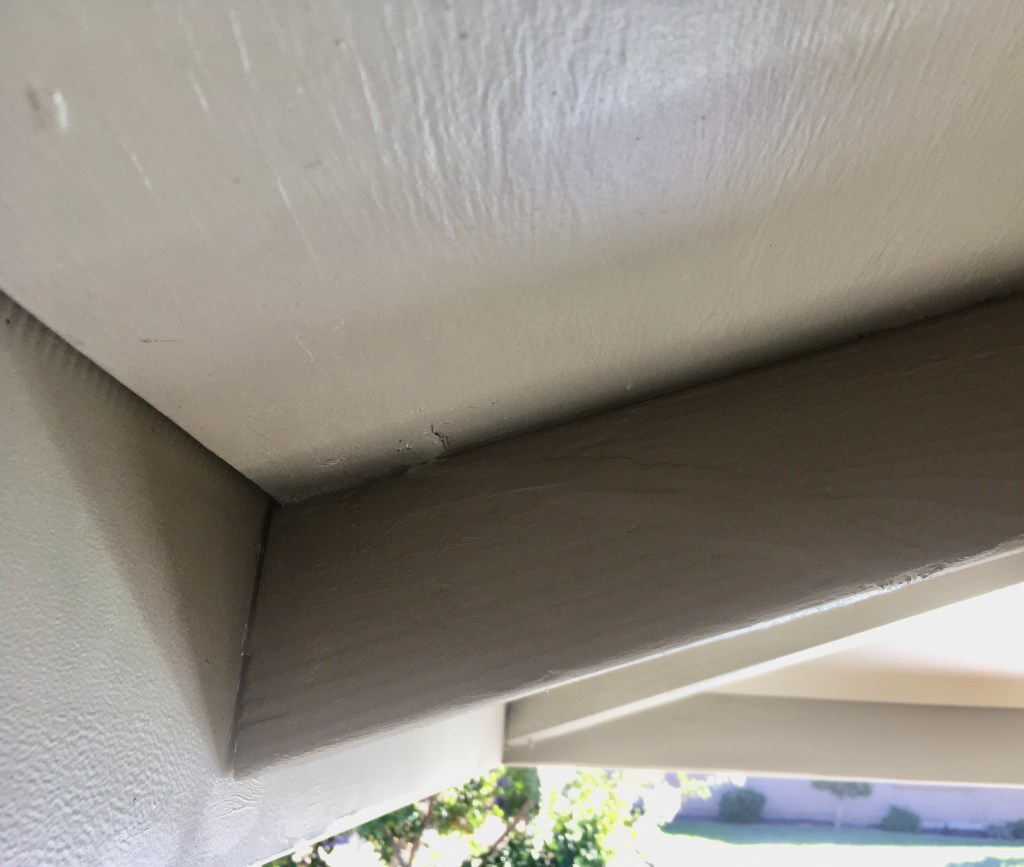
If you look close, you can see that it has been repaired but overall looks great! Well worth my time, and I saved quite a bit of money too. Time for a brew!