When you think or read about survival in the wilderness or anywhere for that matter, your vision is rarely mentioned. Sure, you need food, water and shelter, but what if you could not see well enough to locate those critical items?
What if you lost your glasses, how would you see? Especially if you do not have very good distance vision, it would be difficult to navigate a trail, or look ahead to determine what obstacles you might encounter.
What about bright sunlight or reflective snow? Your eyes can quickly become damaged without some basic protection.
Knowing a little about your eyes and a few simple vision improvement and protection techniques just might enable you to say, “Eye Survived.”
The Eye
A brief understanding of the structure of the eye, and how the eye works, will help in understanding how to preserve and protect it.
The basic structure, or anatomy of the eye, consists of the following (Figure1):
Cornea –The clear front covering, that also focuses light into the eye.
Iris – The colored part of the eye that opens and closes to let in light.
Lens – Transparent inner part of the eye that continues to focus light onto the retina.
Vitreous – The clear jelly of the inner eye, that provides shape and light transmission.
Retina – The nerve layer whose cells (Rods & Cones) sense light and convert it to electrical signals.
Macula – Area of the retina with highly concentrated light receptor cells used for detailed vision.
Optic Nerve – Nerve fiber bundle that carry the electrical signals to the brain.
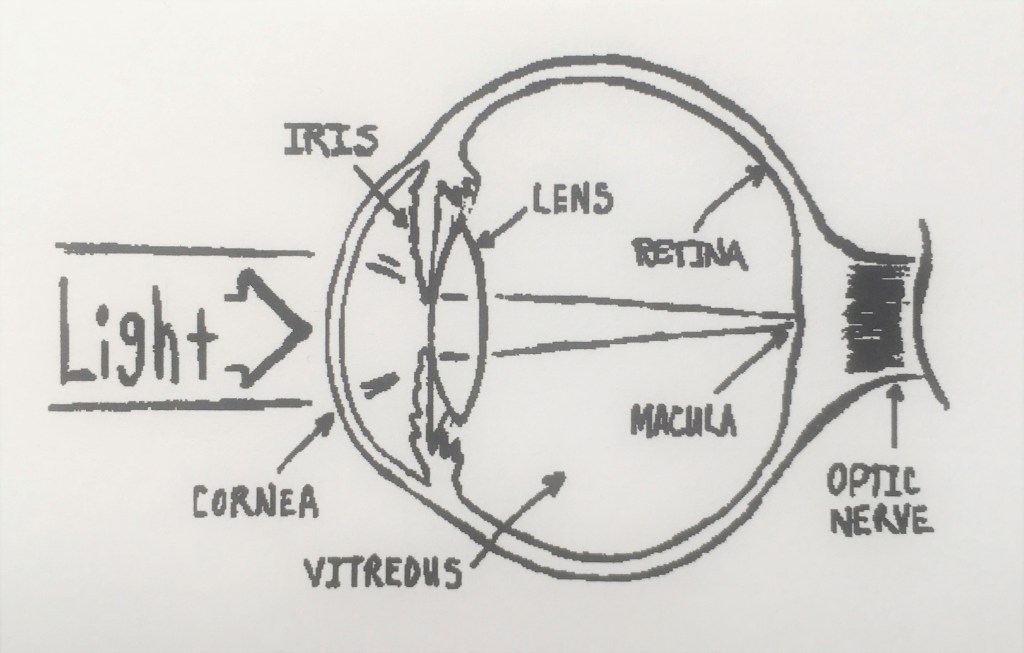
Figure 1: The Anatomy of the Human Eye
How the Eye Works
How does the structure of the eye enable us to actually see?
In a normal eye, (refer to Figure 1) light rays enter the Cornea where they are bent or refracted, and partially focused. The light rays, pass through the Iris, and are then further focused, as they pass through the Lens.
As the light rays exit the Lens, they pass through the Vitreous Humor, and are sharply focused on the Macula of the Retina.
The Retina’s Rods and Cones, stimulated by the light rays, convert the light into electrical signals. The electrical signals are sent through the Optic Nerve Bundle to the brain, where they are converted into a picture.
Types of Vision
What if you do not have a normal eye, and need eyeglasses to see? For survival purposes, I will mention only Near-Sighted and Far-Sighted vision conditions.
If you are like me, you are Near-Sighted (Figure 2). I can clearly see things close up, but not far away. Without my glasses, the rays of light focus or converge prior to my retina, and my vision is very blurry. My glasses enable the rays of light to focus on my Retina.
Depending on the degree of your near-sightedness, you may or may not be able to clearly see beyond a few feet. For me, I’d be lost without some vision aide to help me survive.
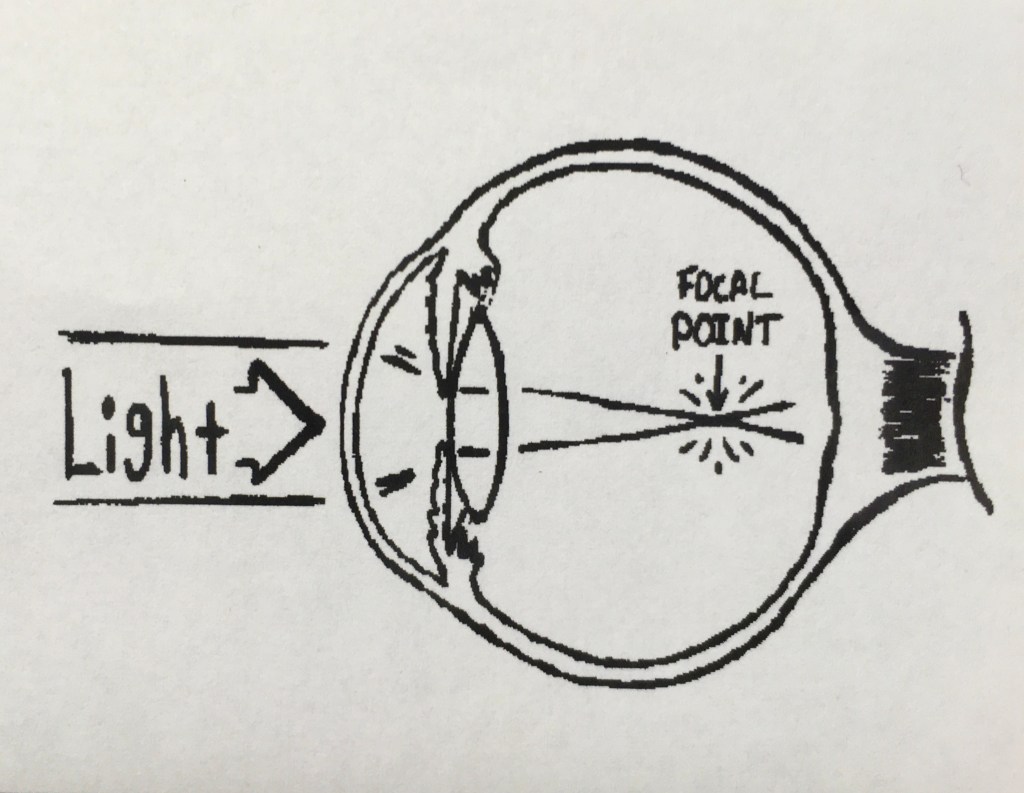
Figure 2: Near-Sighted
if you are Far-Sighted (Figure 3) you can clearly see things far away, but will have different degrees of close-up vision. In far-sightedness, the rays of light would converge (if they could), behind your retina, making your close-up vision fuzzy, but who needs to read when you are lost (unless you have a map)? From my perspective, being far-sighted and trying to survive is an advantage – you can see what’s coming – all around you.
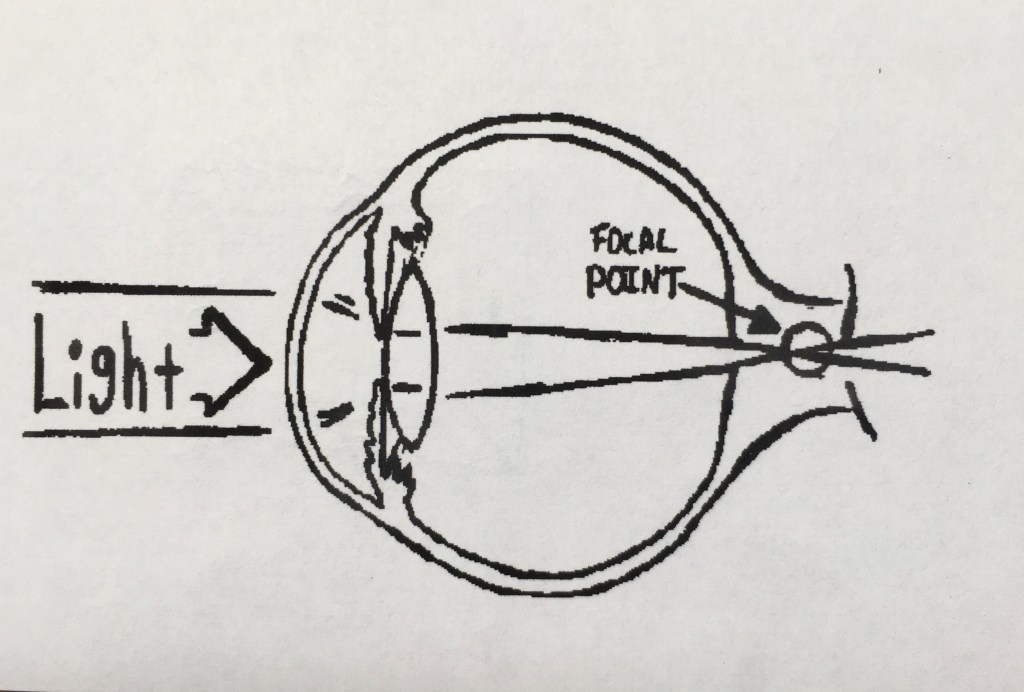
Figure 3: Far-Sighted
Vision Improvement and Protection
Alright, you are lost and near-sighted. You’ve got to focus the rays of light on your retina to see far away. Now let’s learn how to quickly use your hand or make a geeky-looking pair of glasses that will let you see far away or provide sunlight or snow exposure protection.
If you are far-sighted, protect your eyes from sun and snow exposure, as described below, and go find some food, water, and shelter.
Thumb and Forefinger Aperture
To quickly improve your distance vision, use your thumb and forefinger to create an aperture. It works just like the iris of your eye to focus the rays of light onto your retina.
Hold your thumb and forefinger close to one of your eyes, sight your vision through your forefinger, and slowly adjust your finger to make the hole smaller or bigger.
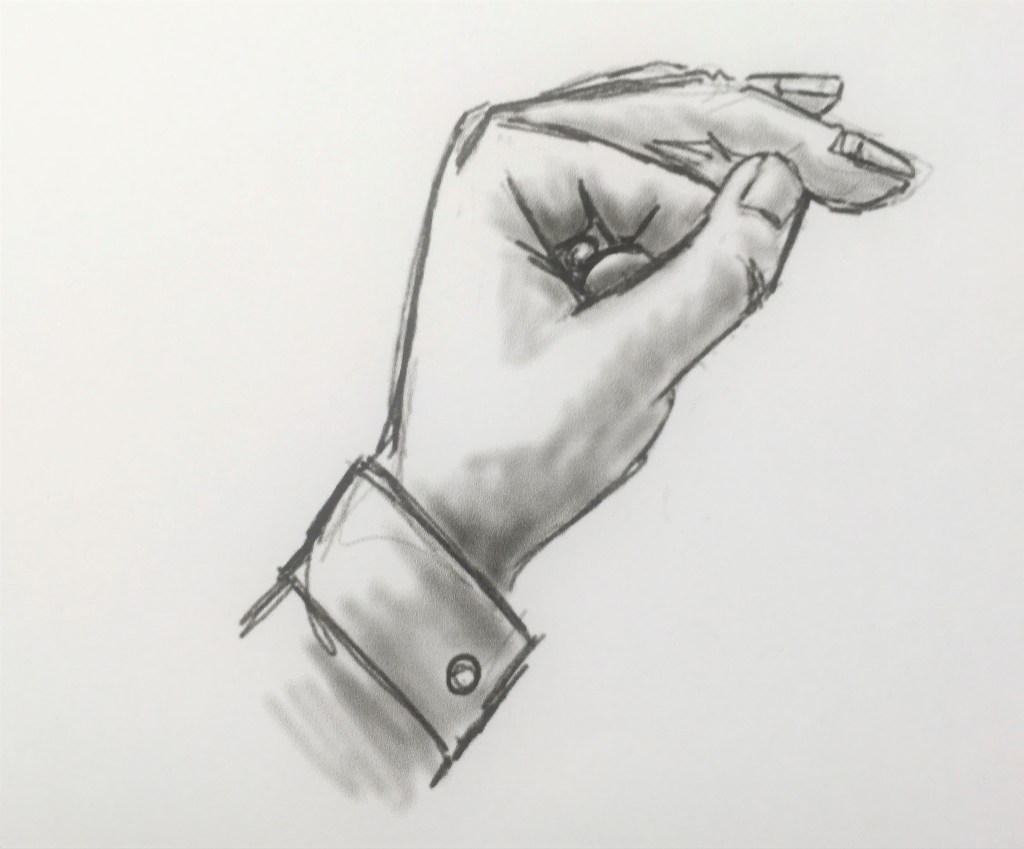
Figure 4: Thumb and Forefinger Pin-Hole Aperture
Pin Hole Geeky Survival Glasses
Okay, they will not work as well as your normal glasses and they are geeky, but we are talking survival.
Use thin bark (or leaves) and twigs (not poison oak, sumac, etc.) and fasten with twig fibers. Use a thorn to make a small hole in the center of leaf. Adjust as needed.
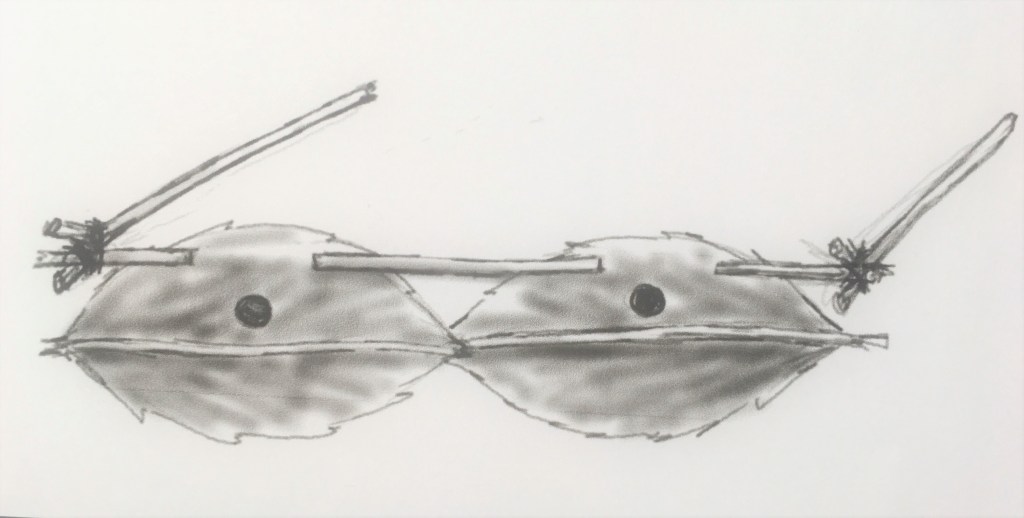
Figure 5: Pin-Hole Geeky Survival Glasses
Protection from Sun and Snow Over-Exposure
Use the same geeky glasses, but cut slits into the bark or leaves.
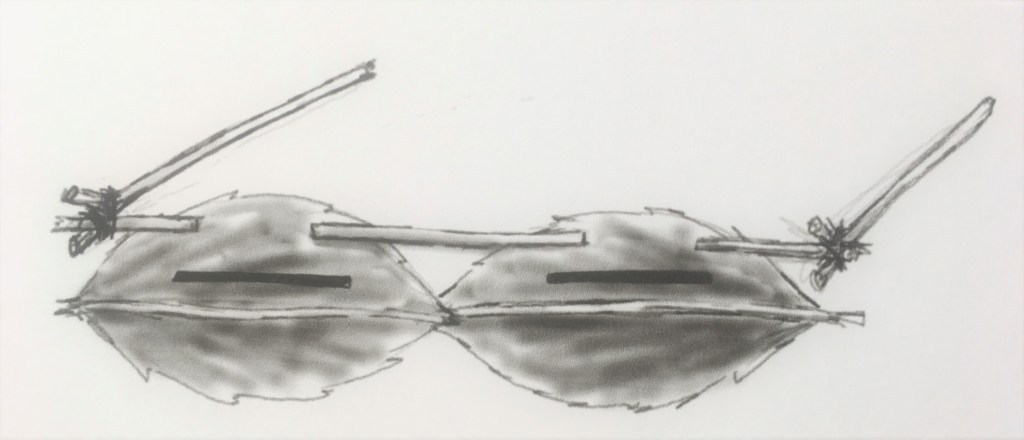
Figure 6: Protection from Sunlight and Snow Reflection
Conclusion
If you are near-sighted, you’d be surprised how useful the Thumb and Forefinger Aperture technique is in the wilderness, or when trying to see if the Sunday newspaper is on your driveway and your glasses are still on the night stand.
– Illustrations by D. Renfrow