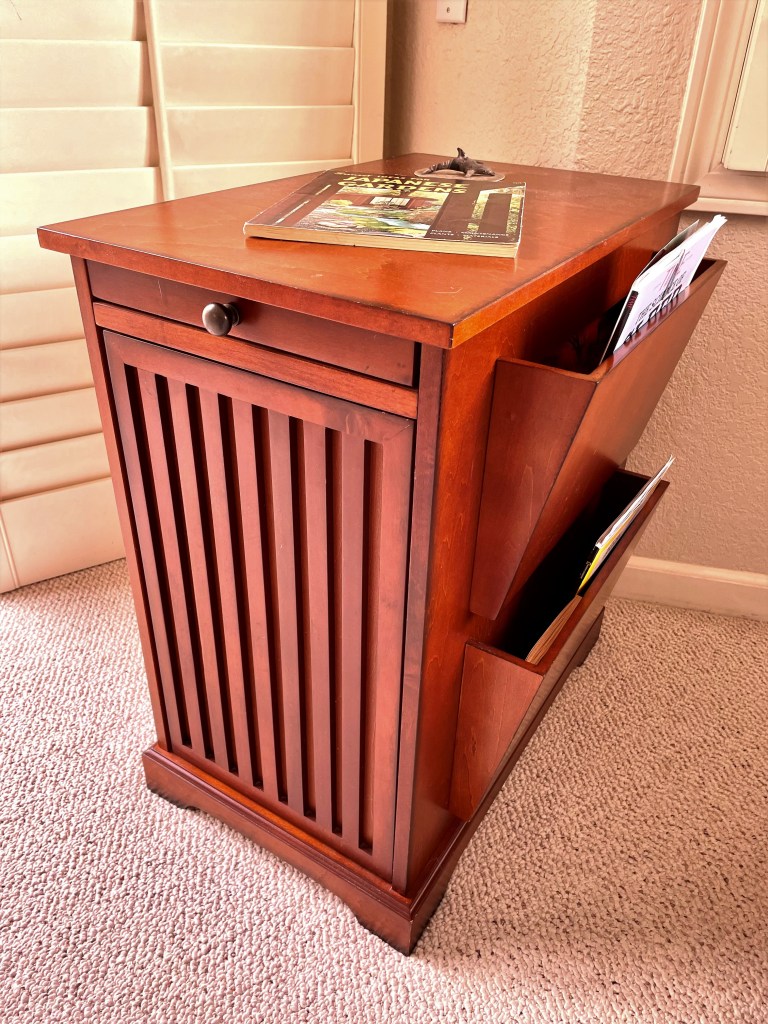
One nice thing about having a piece of inexpensive furniture, is that you don’t mind ‘hacking’ it for a secondary use.
As an example, I have a magazine side table next to my bed.
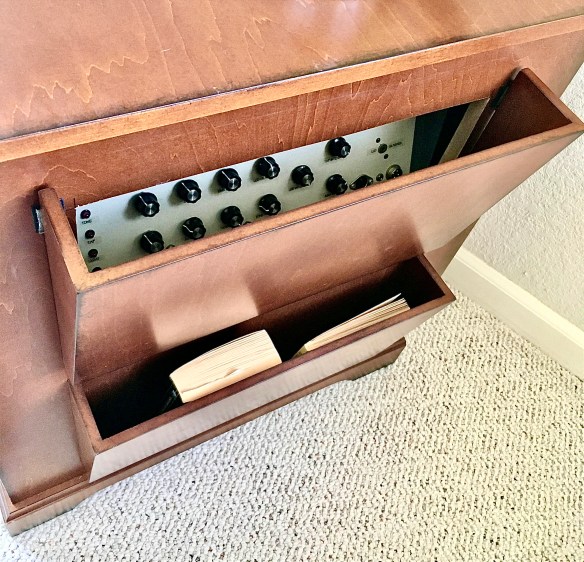
I needed to place my dreaming device The Dream Trainer directly next to the bed, for ease of use at night. However, I did not want it to be visible during the day.
I decided to see if I could cut an opening behind the top magazine rack and hinge it, so that it could be opened and closed.
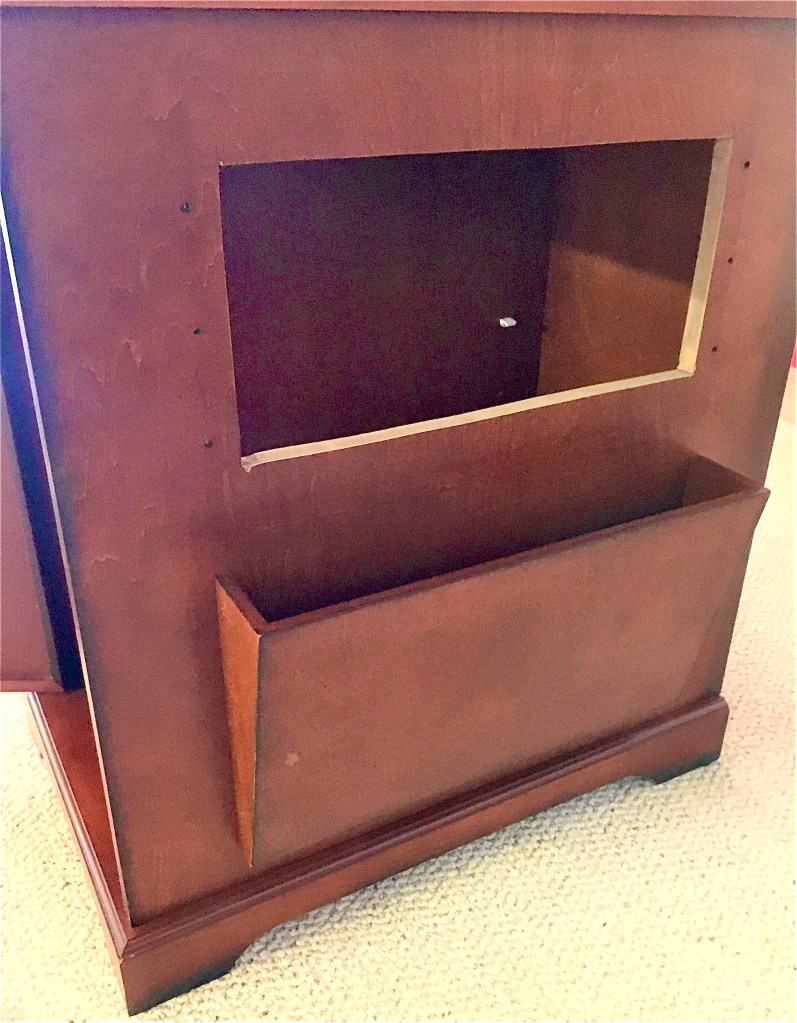
First, I removed the top rack and cut the opening out.
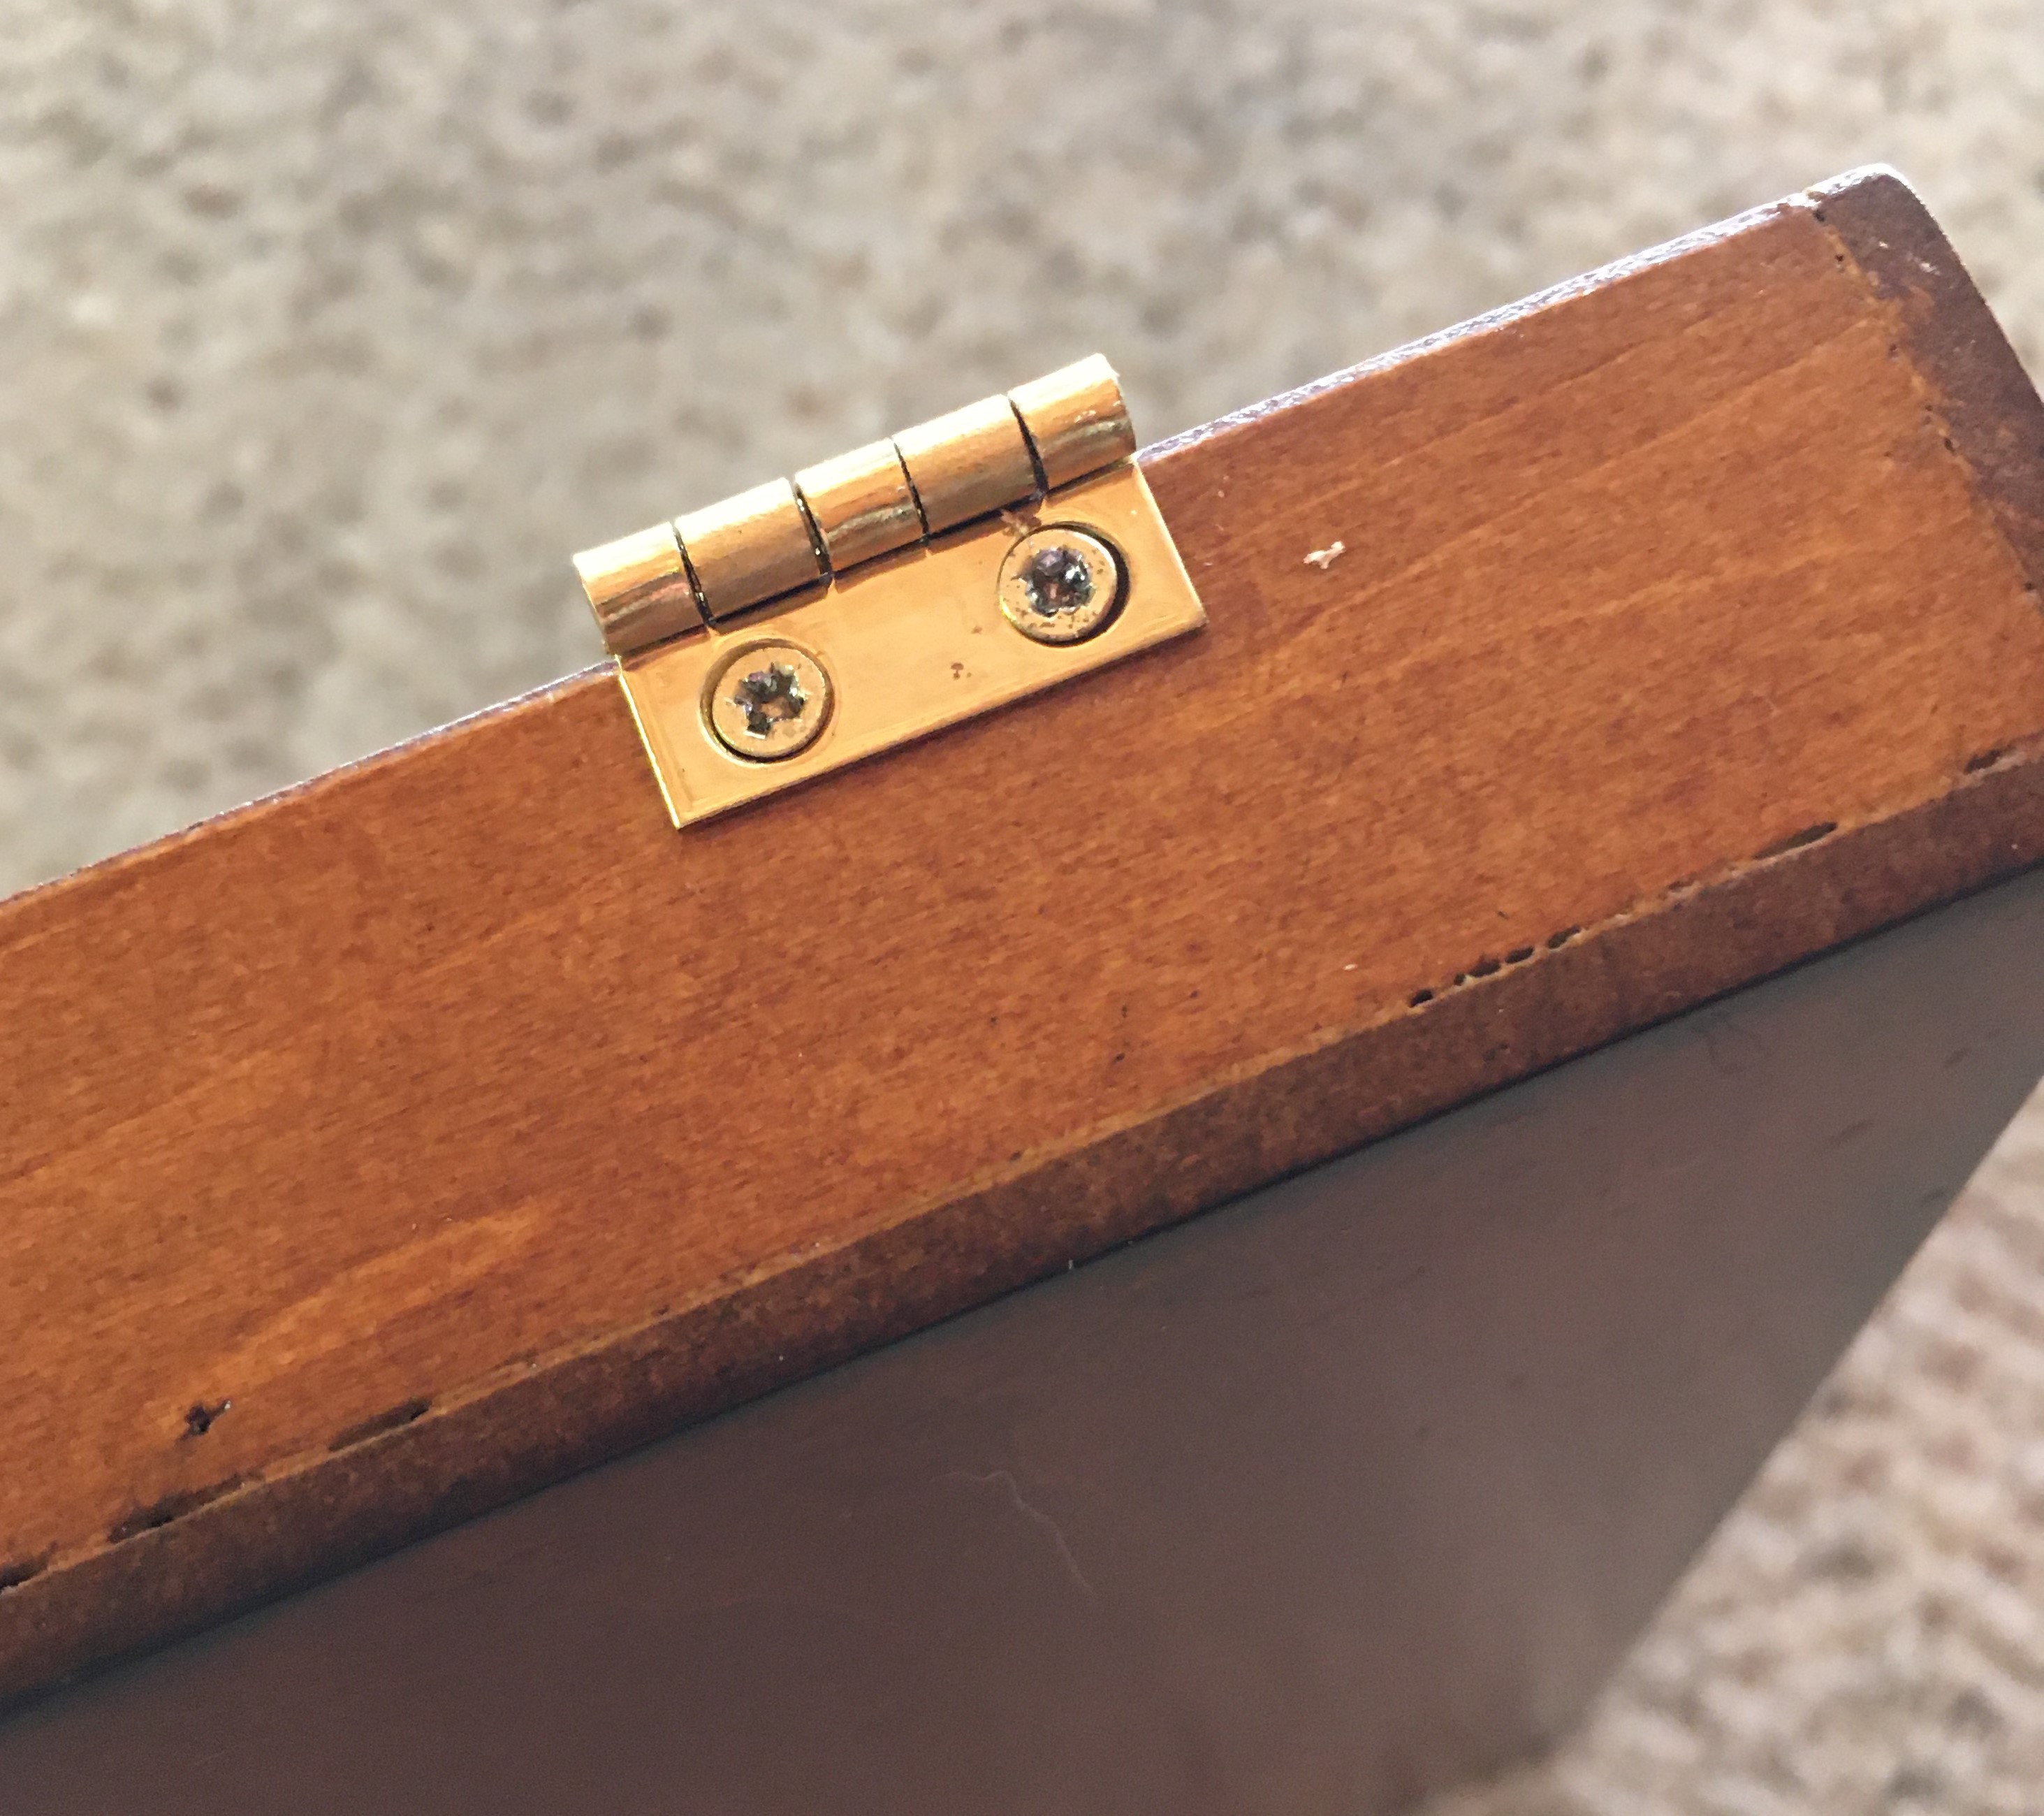
I attached hinges to the rack, and a latch mechanism. You can see The Dream Trainer positioned inside.
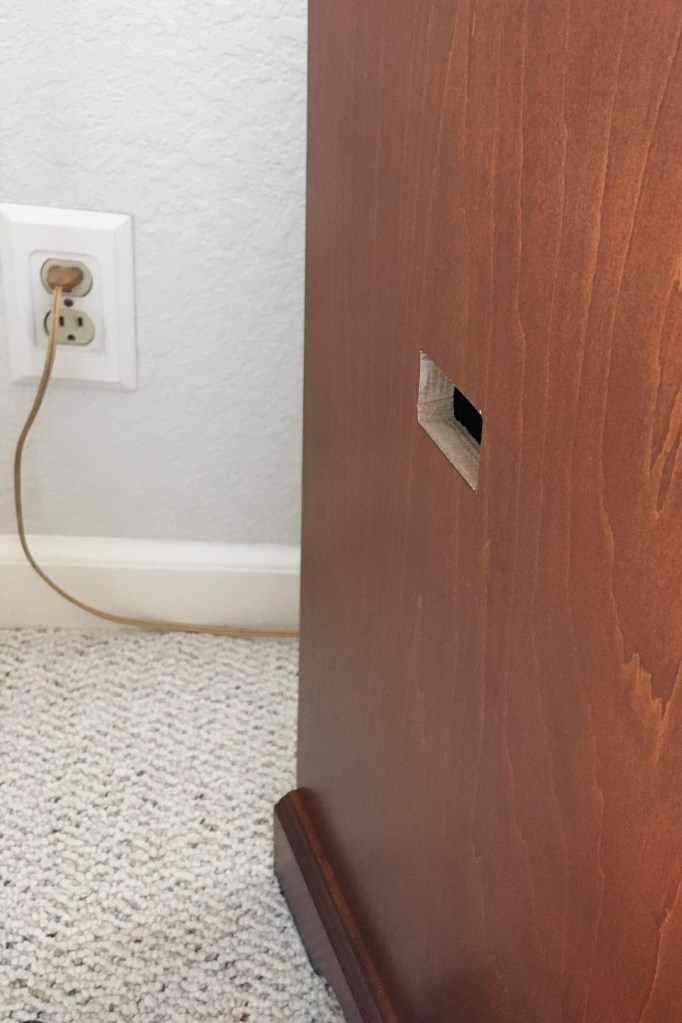
I cut a hole in the side for power switch access and to route the power cord.
With the rack up, it still looks the same and can be used to hold magazines.
With the rack down, I have access to The Dream Trainer controls and attachments.