Tear Drop Trailer Bird Feeder

I’ve always wanted to build a Tear Drop Trailer for camping. So when I saw a mini tear drop seed feeder on the web, I decided to make a similar seed feeder for the yard.

The one on the web was more of a thistle seed feeder and I wanted to use larger seed to attract White Crowns, Dark-eyed Juncos and Finches. I think that the Finches and Juncos will go inside to get the seed, but the White Crowns are too large.

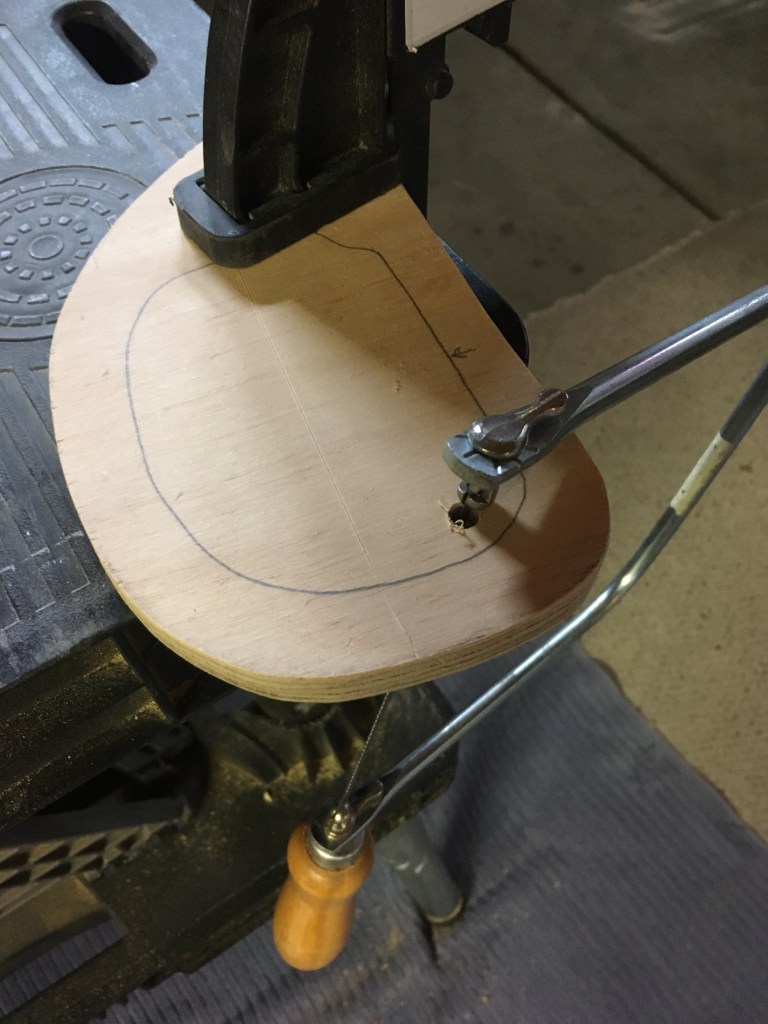
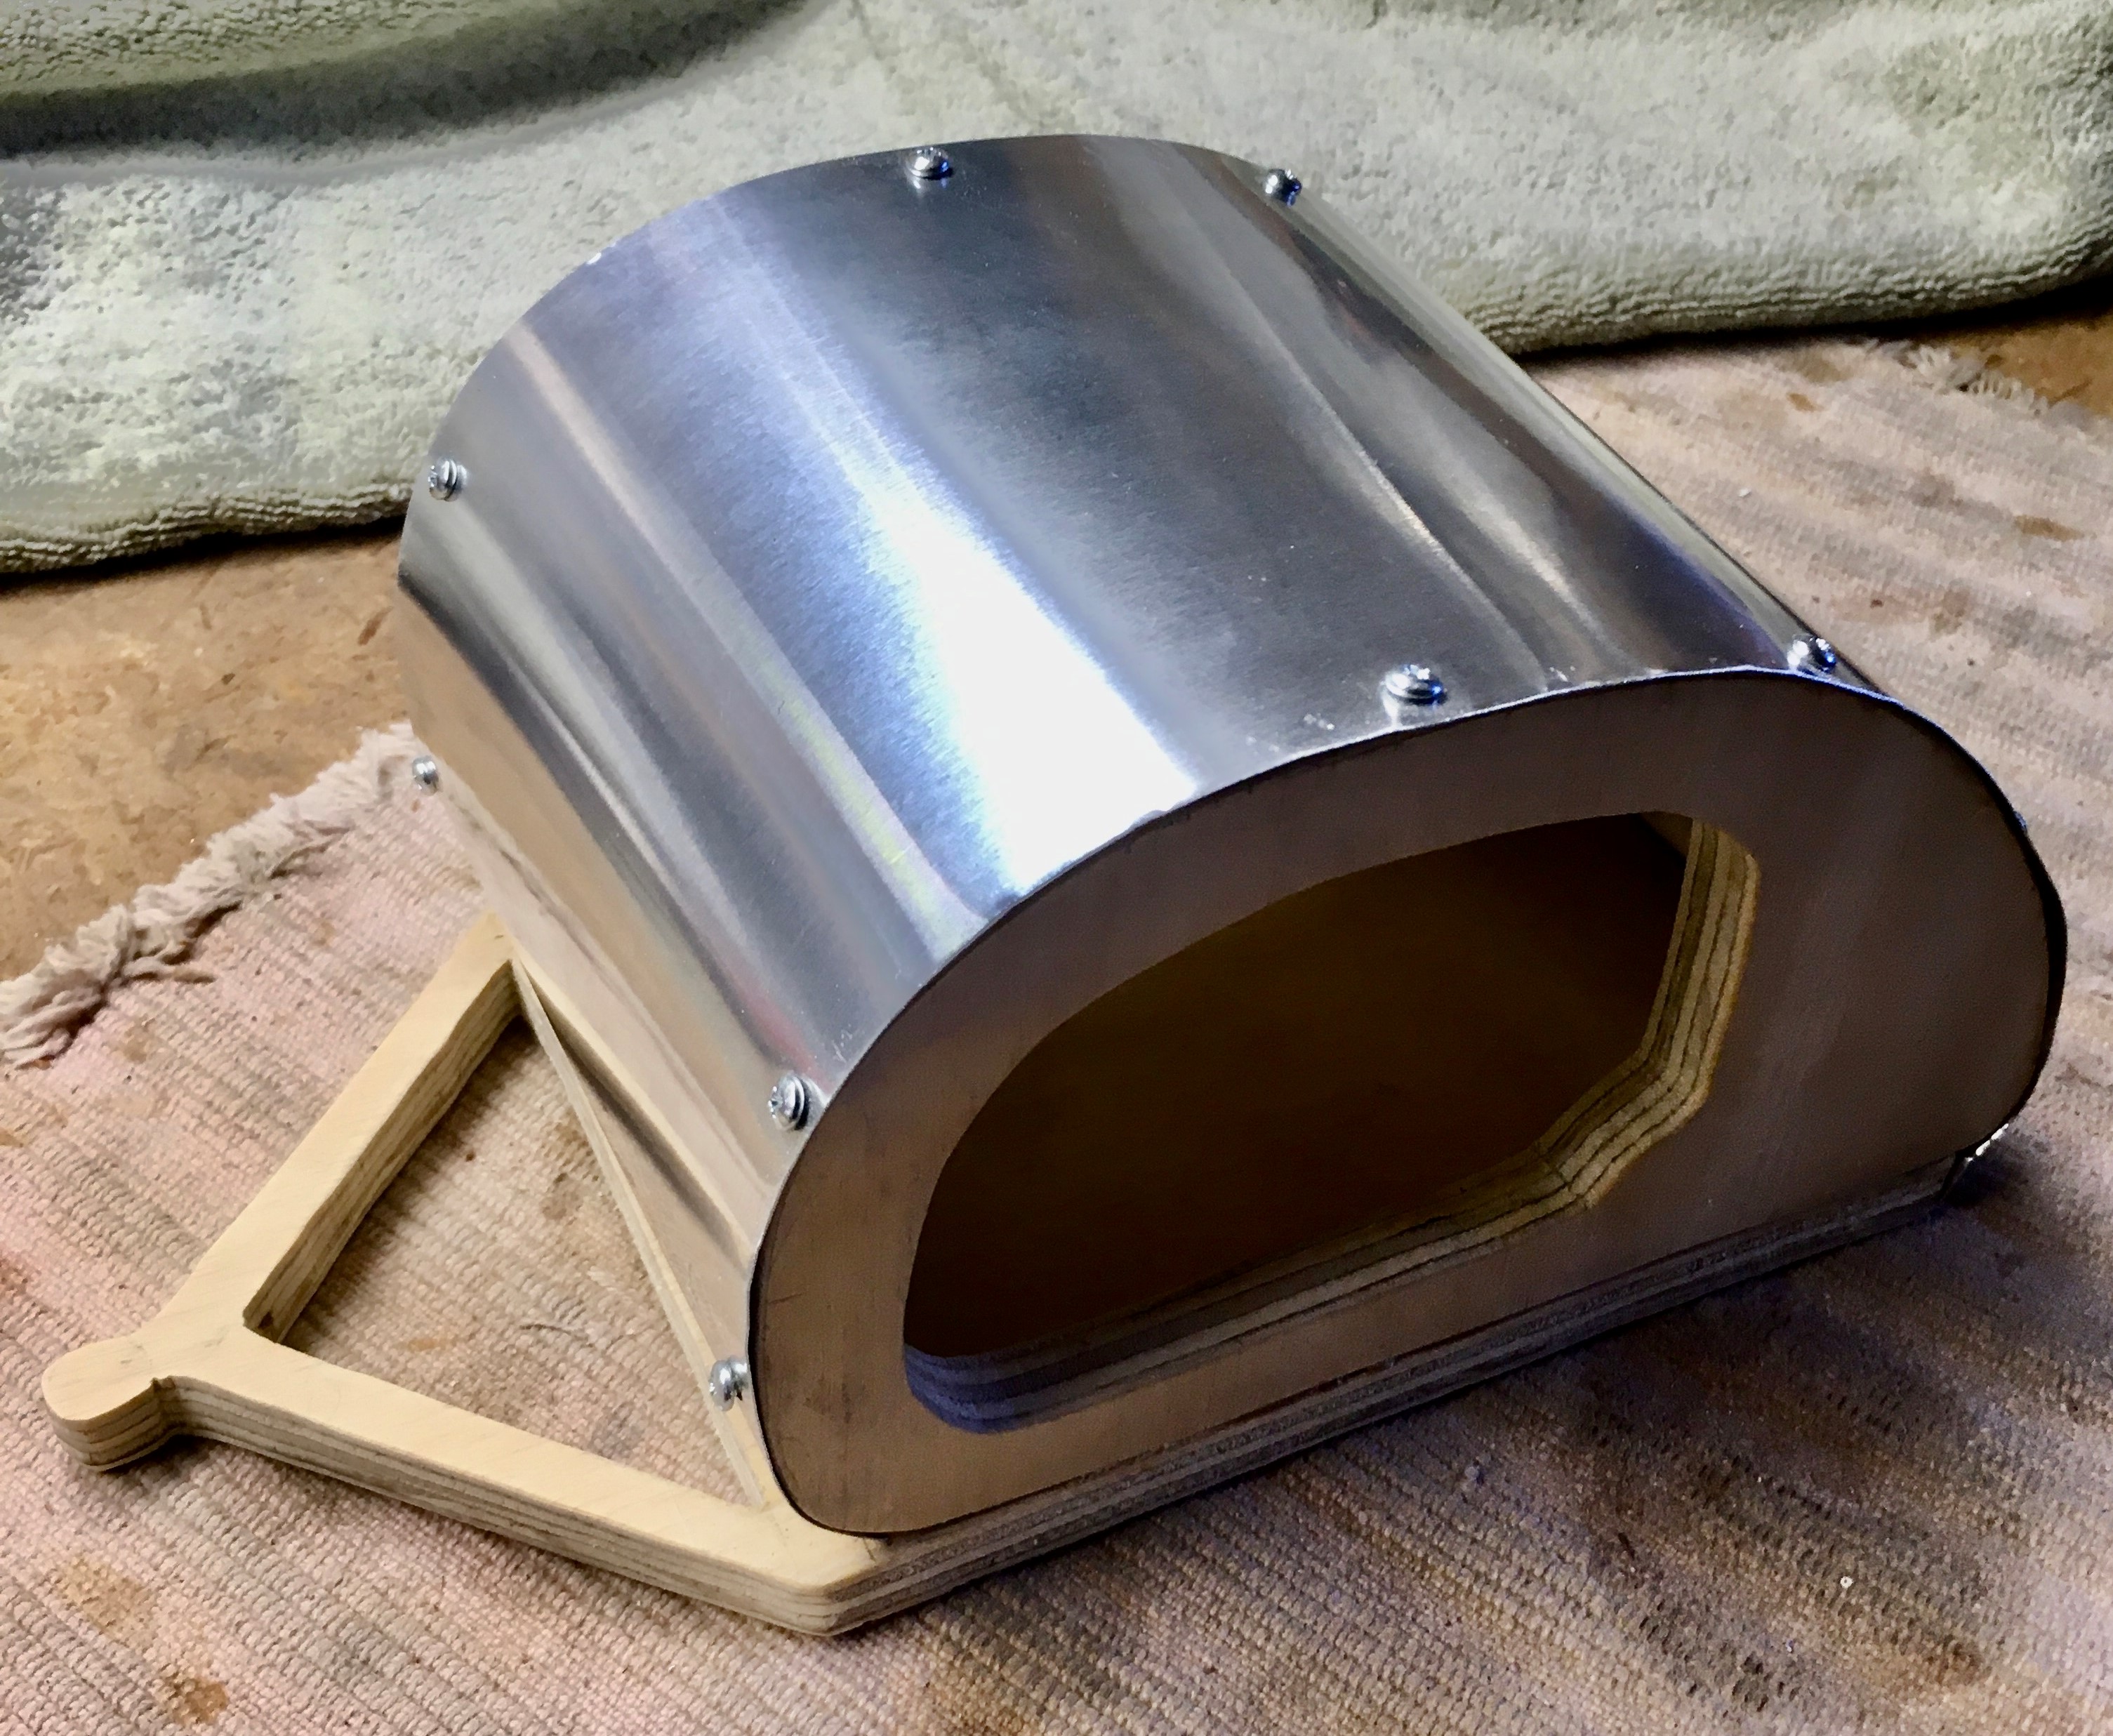
I thought that I would completely open the two sides to hold the seed. I began with the side layout on scrap plywood. The finished feeder will be about 7″ x 5″ x 5″ in size.

I used a hand coping saw to make the curved cuts.

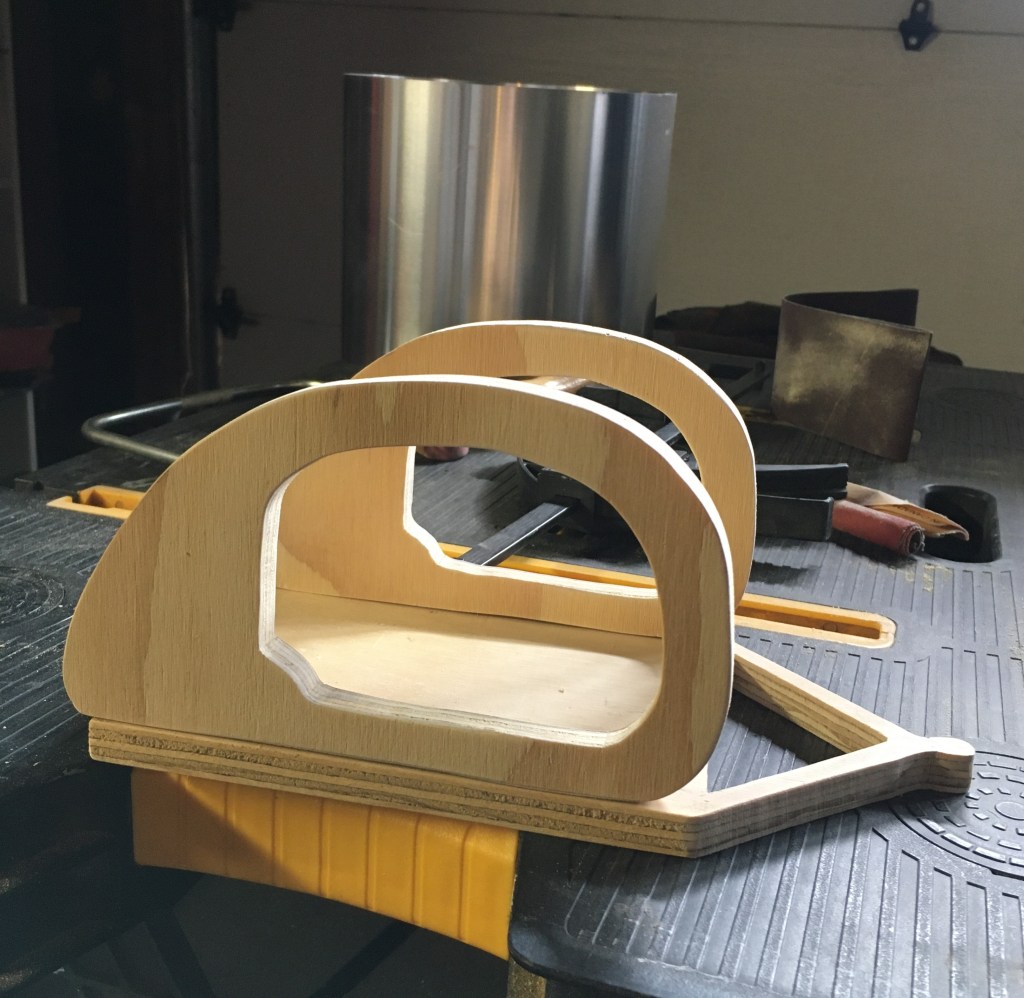
Here is the layout for the base, with trailer hitch included.

Once everything was cutout, I glued and screwed the two sides to the base.

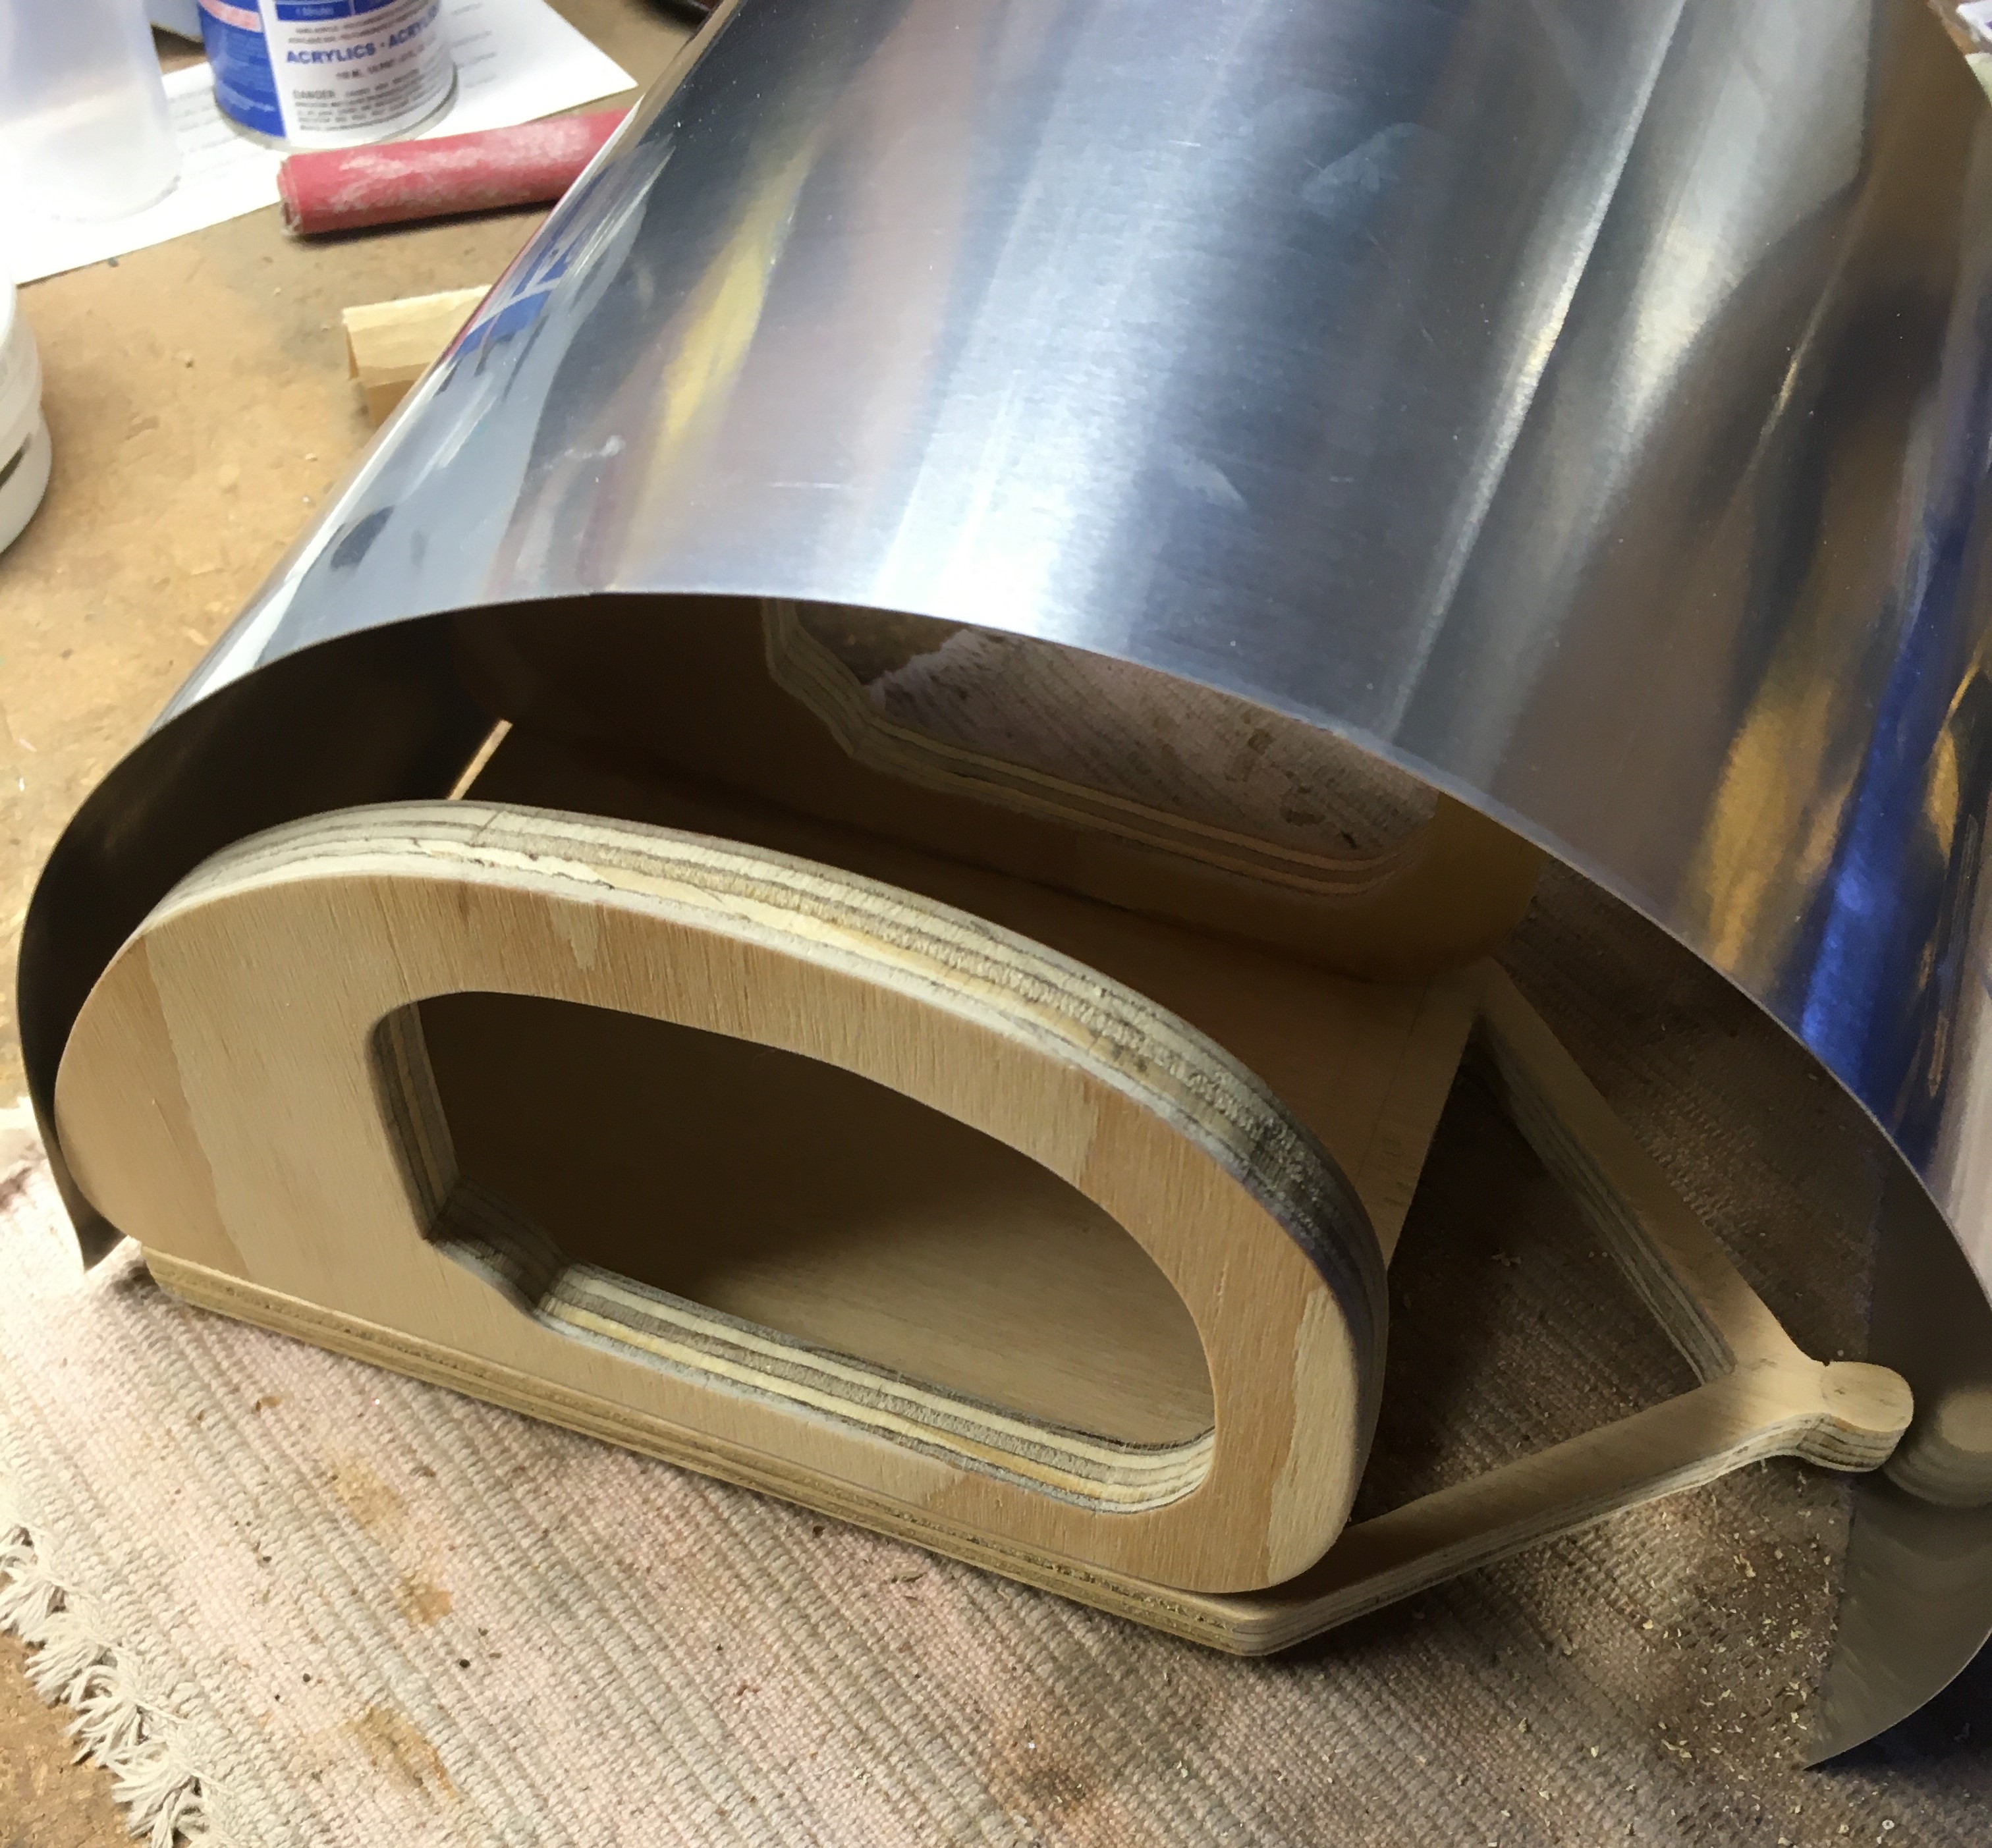
I used heavy gauge paper to make a template prior to cutting the rolled aluminum, which I fitted to the cured side pieces. Once positioned, I began screwing it in place.

I lightly stained the plywood and added side details and silver paint on the frame.

I bought a toy truck for $3.00 and removed the wheels. I simply cut the truck axle in half, drilled a small hole in the wooden frame and pushed each wheel into position.

Here is the trailer with seed inside. I put a piece of aluminum foil inside the trailer and tossed in a handful of seed. I also put some on the ground to entice my first avian visitors.

It won’t be long and all that seed will be gone. Those snowbirds will be Happy Campers!

Hammerhead Balance Board

I have been working here and there on my Hammerhead Balance Board for several months now. The goal is to use the balance board to teach my muscles on land, the skills needed to turn this board into a Hammerhead Fly Board on water, as described in my post Flying on a Hammerhead Shark.

The board was built from a recycled office desktop. I began by making a paper template based on images of hammerhead sharks that I found on the web.

Once the template was made. I traced it onto the board. I did have to make a few adjustments for length and width prior to cutting out the shark shape with a saber saw.

Once the board was cut out, I sanded off the dark stain and gave it a couple coats of clear Varathane.

The hangup in completing this project was obtaining the square tubing – the track for the roller. The roller is the fulcrum that the board sits on, as the user attempts to maintain balance while moving back and forth and a little side to side. The roller rides on the track. I bought the roller online from Vew-Do.

I was able to locate some PVC 3/4″ x 3/4″ square tubing from US Plastics Corporation. I had to purchase 10′ even though I only needed about 4′ for the track.

I secured the track to the underside of the board with capped screws, basically a screw with attached washer. I also used a large number of screws anticipating that there would be a significant amount of force against the tubing from the roller.

Here are a couple of ‘glamour’ shots of the top and bottom of the completed board.

Since I have not finished my Balance Paddle Balance Paddle – Part 1as yet (my trainer support so I will not break my hip), I will not show you the board in “real time” action. I have tried it several times while hanging on to the van parked in the garage. Not easy, but cool. It is a workout!

I am only two builds away (Balance Paddle and Hydrofoil Wing) from Flying On The Back of a Hammerhead Shark!