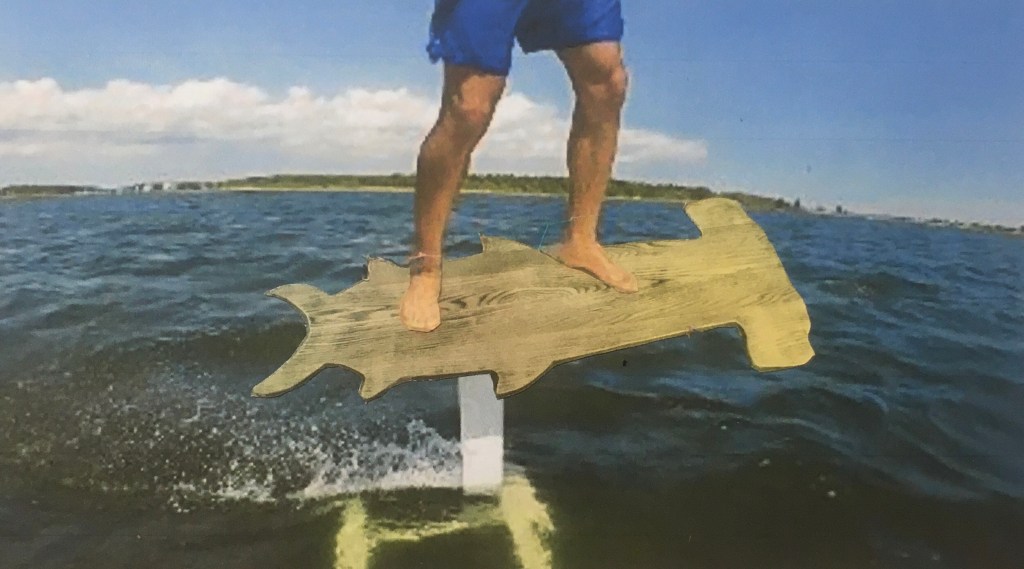
I have been working here and there on my Hammerhead Balance Board for several months now. The goal is to use the balance board to teach my muscles on land, the skills needed to turn this board into a Hammerhead Fly Board on water, as described in my post Flying on a Hammerhead Shark.
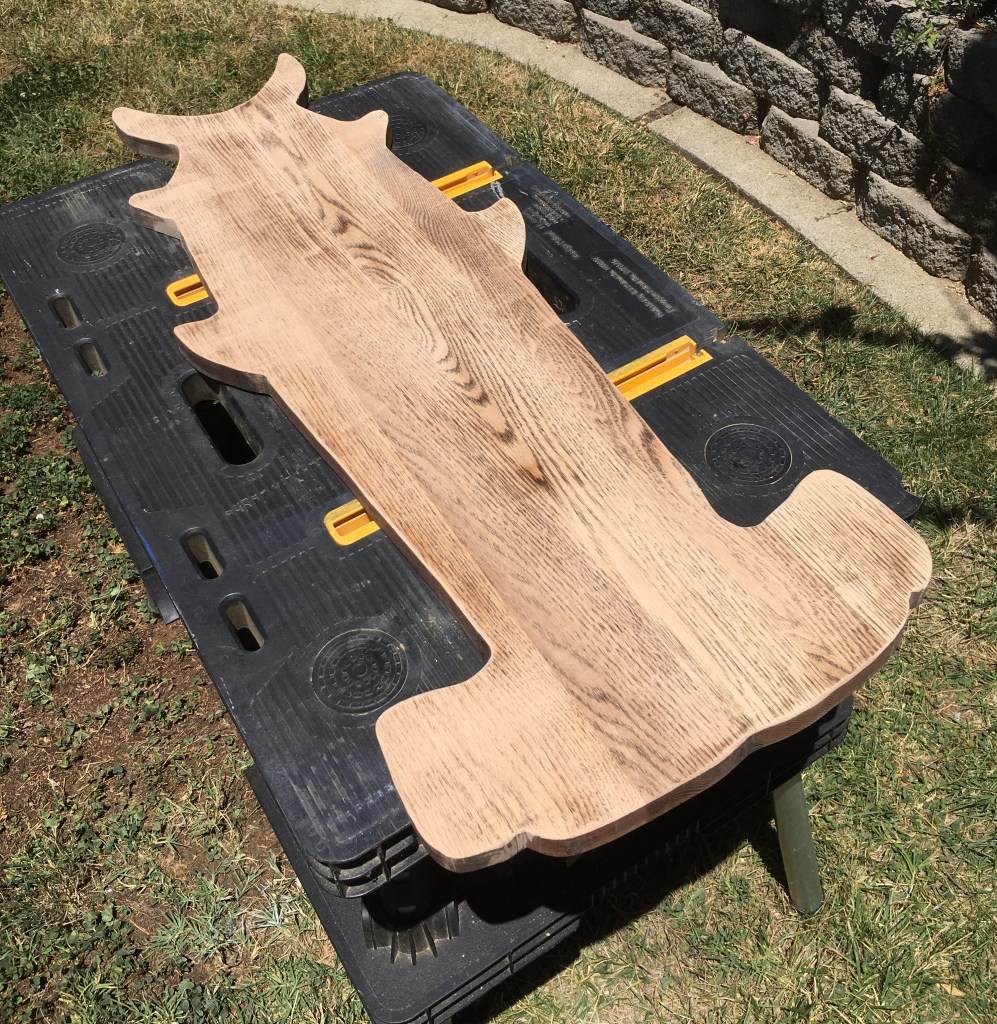
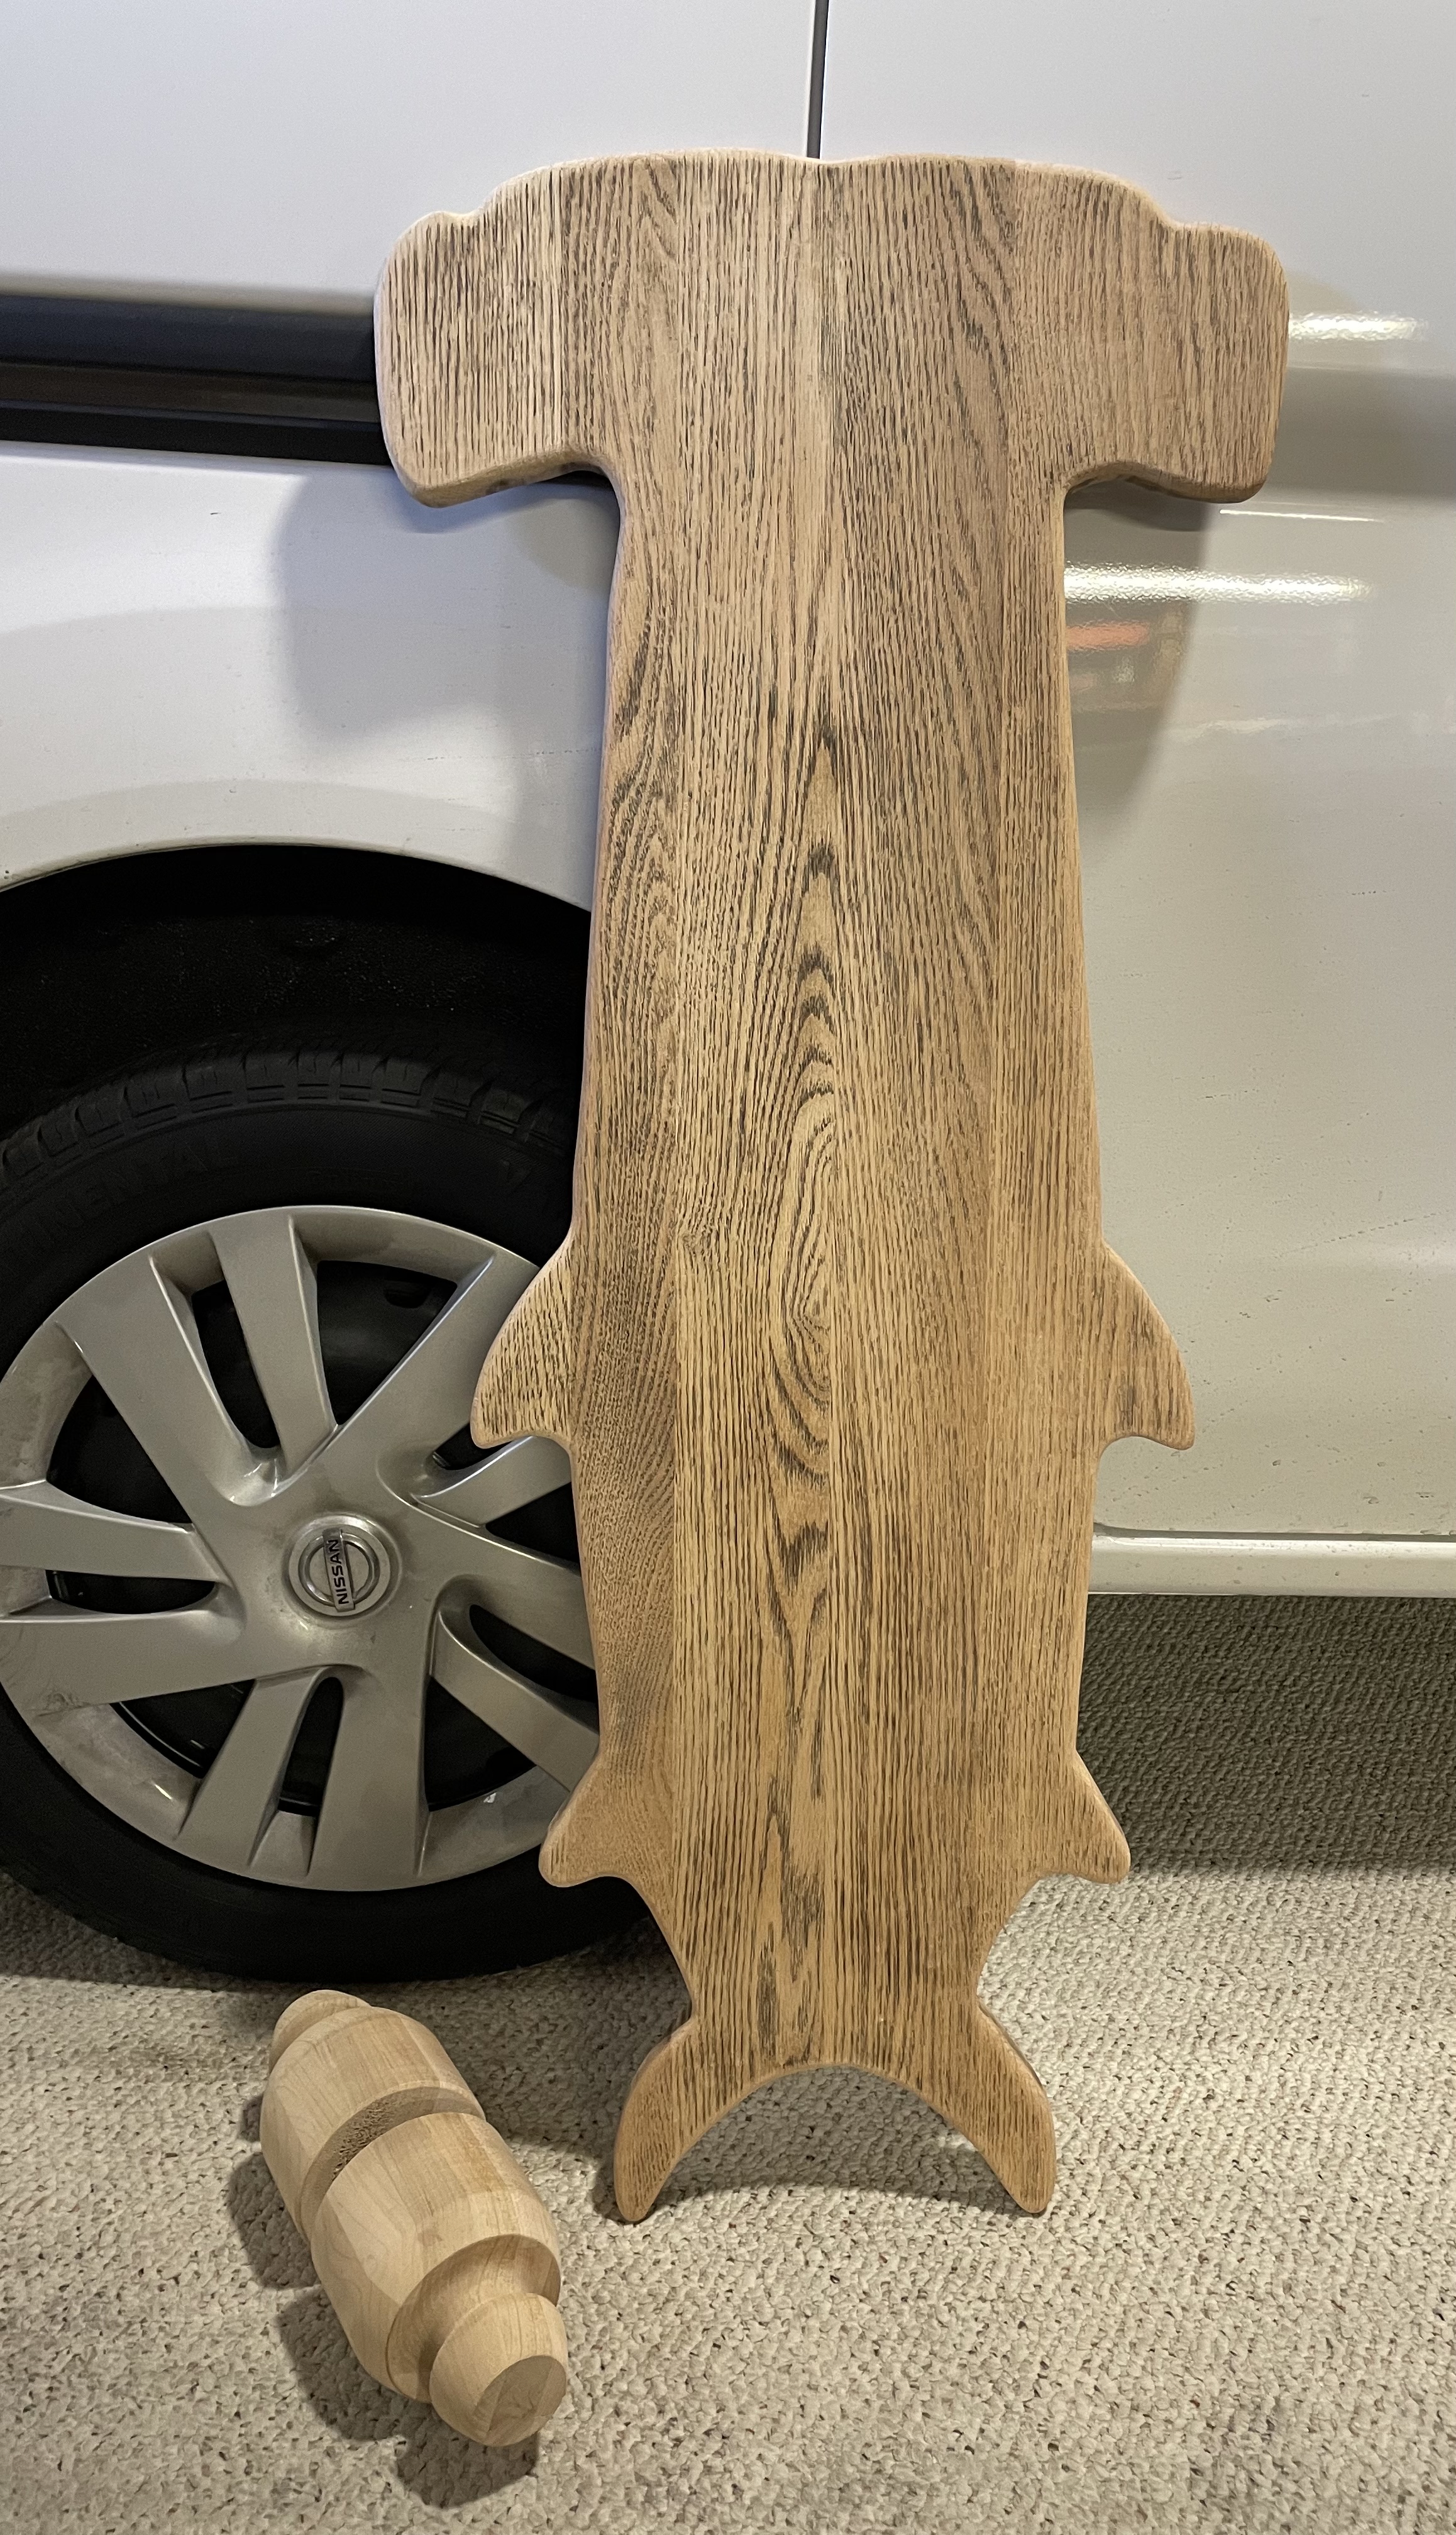
The board was built from a recycled office desktop. I began by making a paper template based on images of hammerhead sharks that I found on the web.
Once the template was made. I traced it onto the board. I did have to make a few adjustments for length and width prior to cutting out the shark shape with a saber saw.


Once the board was cut out, I sanded off the dark stain and gave it a couple coats of clear Varathane.
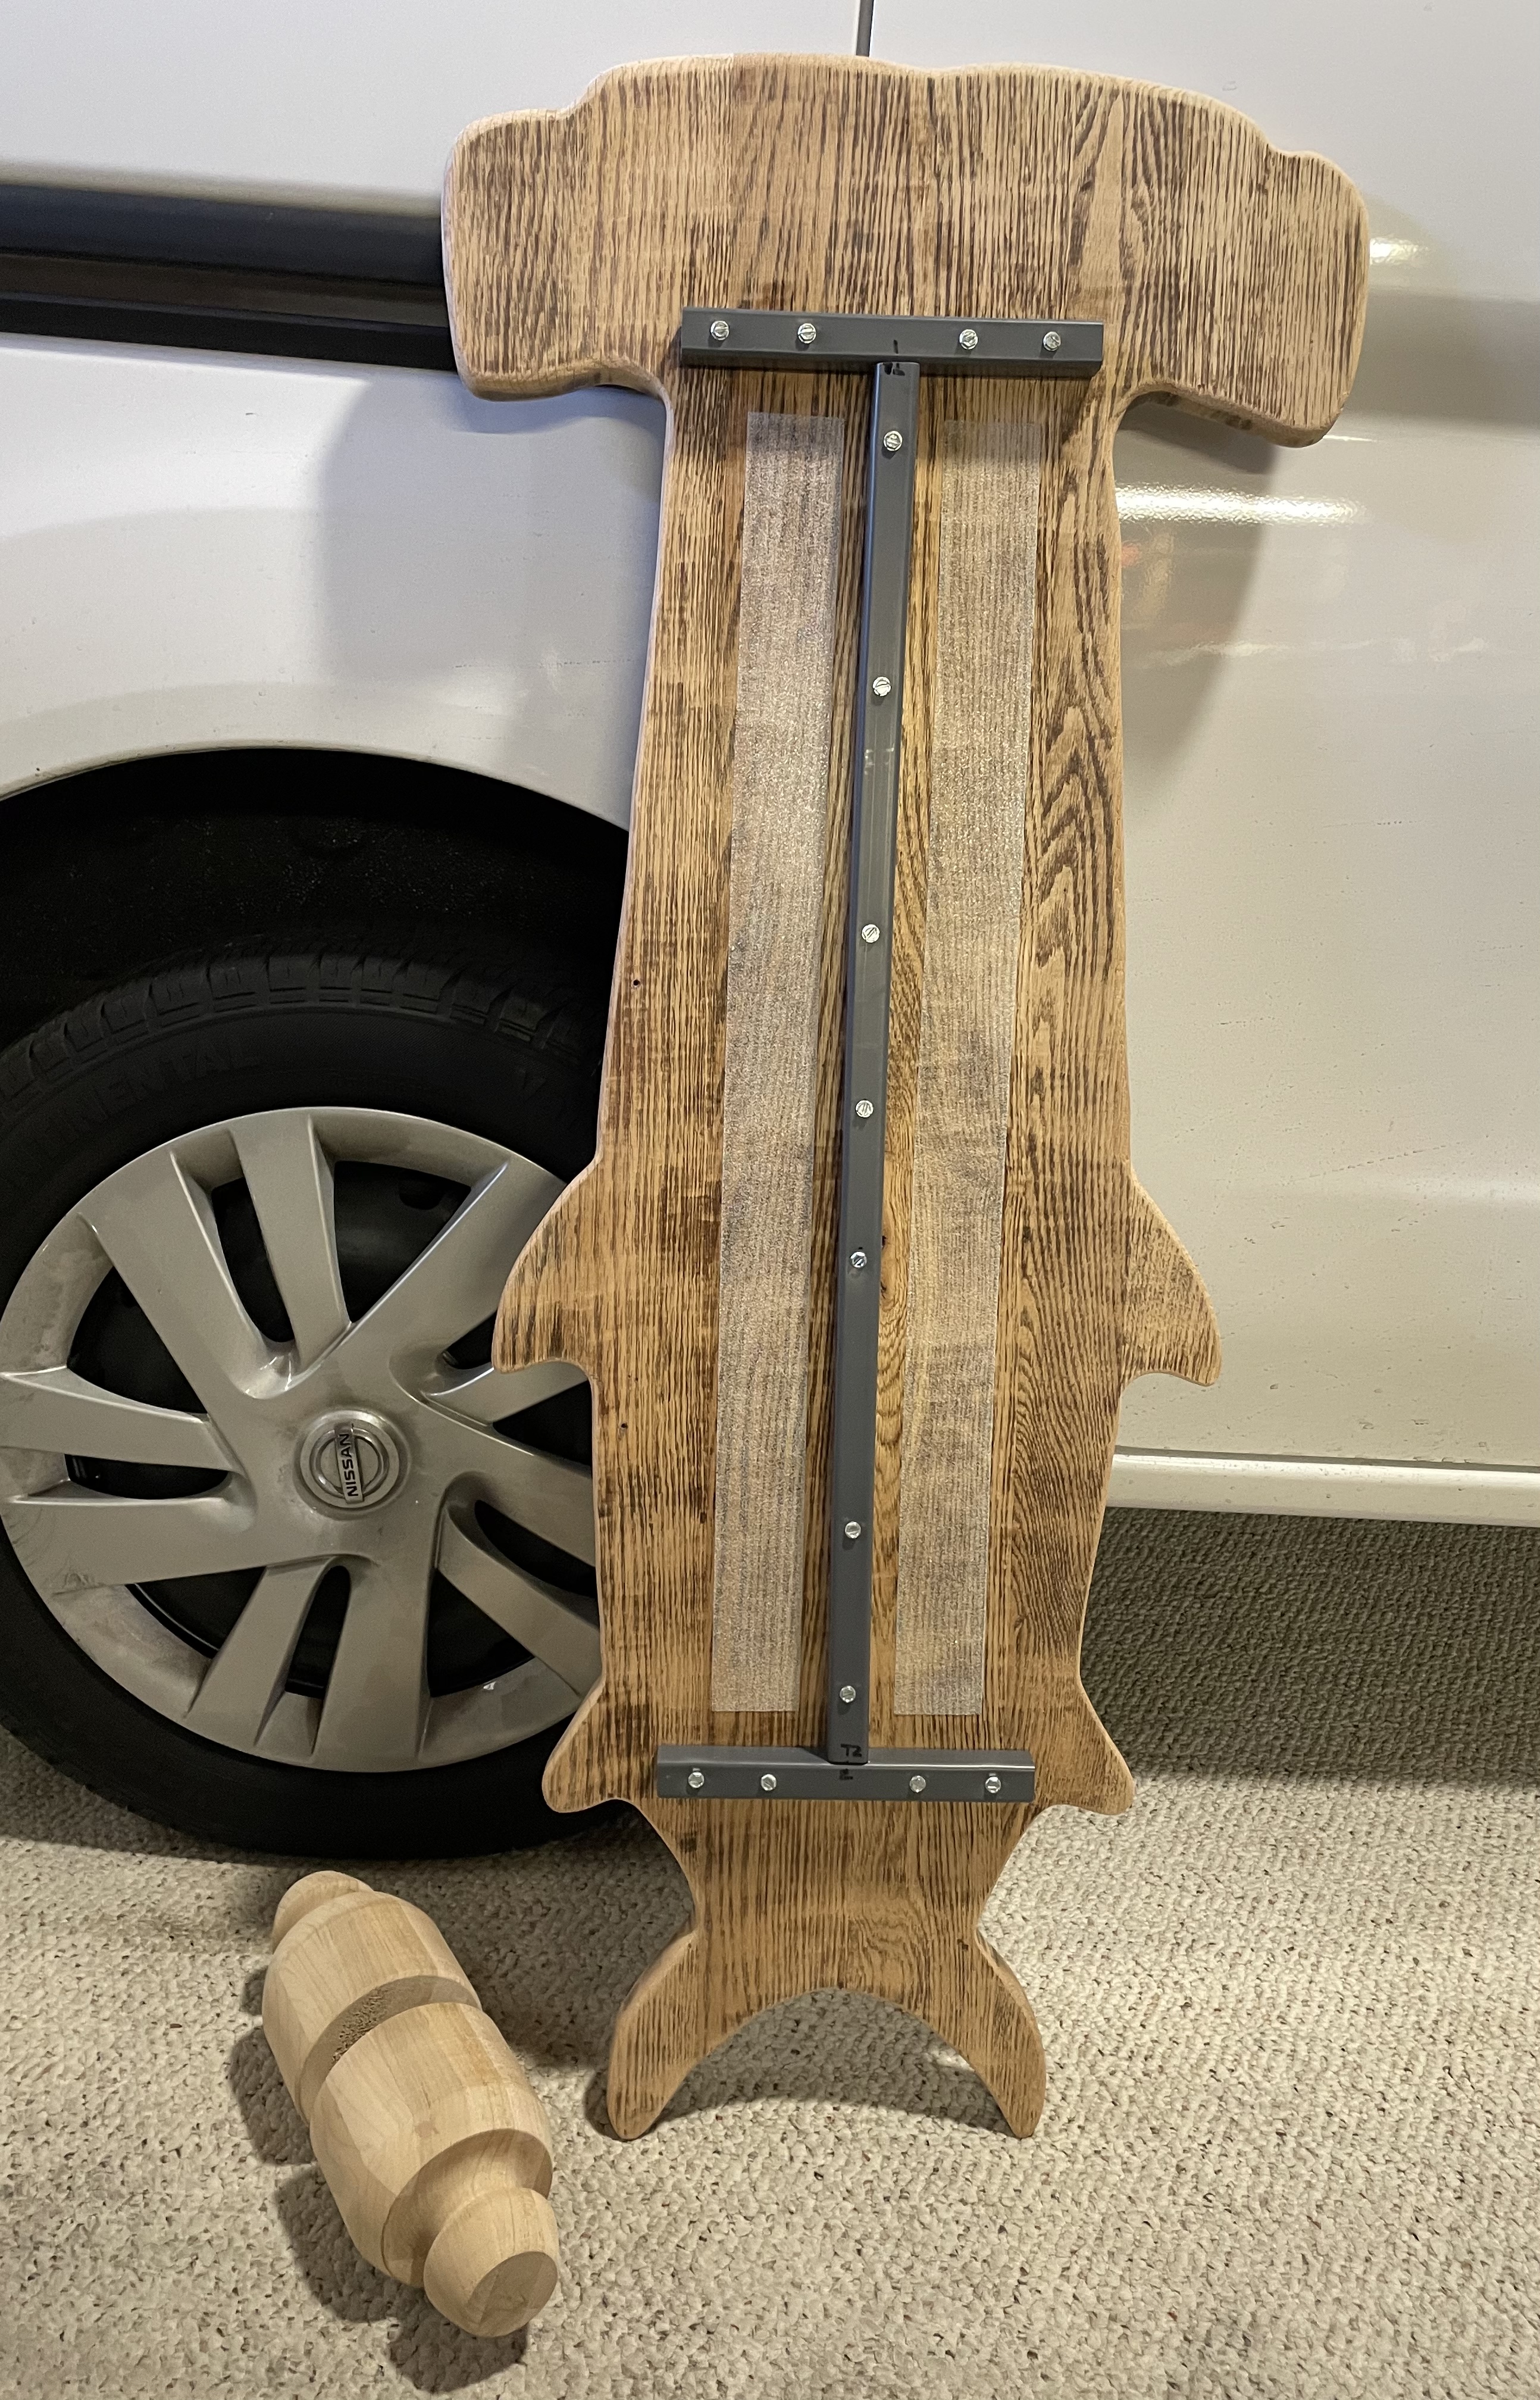
The hangup in completing this project was obtaining the square tubing – the track for the roller. The roller is the fulcrum that the board sits on, as the user attempts to maintain balance while moving back and forth and a little side to side. The roller rides on the track. I bought the roller online from Vew-Do.
I was able to locate some PVC 3/4″ x 3/4″ square tubing from US Plastics Corporation. I had to purchase 10′ even though I only needed about 4′ for the track.
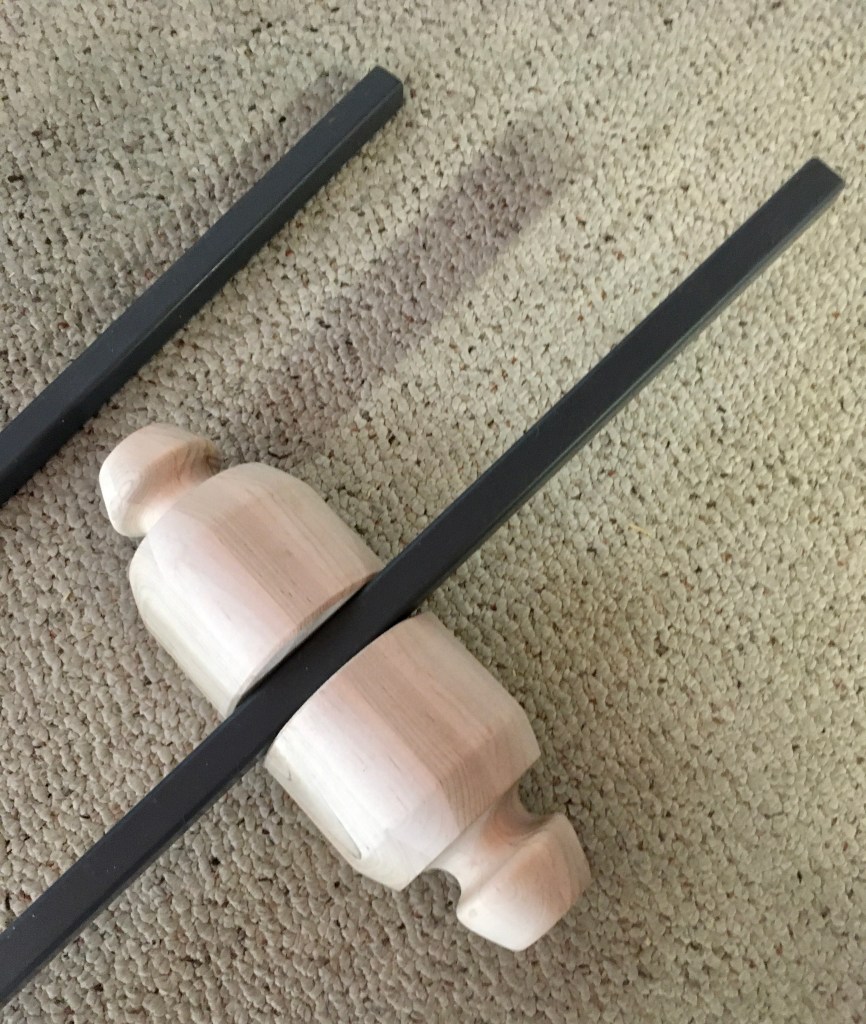
I secured the track to the underside of the board with capped screws, basically a screw with attached washer. I also used a large number of screws anticipating that there would be a significant amount of force against the tubing from the roller.
Here are a couple of ‘glamour’ shots of the top and bottom of the completed board.
Since I have not finished my Balance Paddle Balance Paddle – Part 1as yet (my trainer support so I will not break my hip), I will not show you the board in “real time” action. I have tried it several times while hanging on to the van parked in the garage. Not easy, but cool. It is a workout!

I am only two builds away (Balance Paddle and Hydrofoil Wing) from Flying On The Back of a Hammerhead Shark!